How to Create an Internal Form for Appointment Notes on eAgenda
What Is an Internal Form on eAgenda?
An internal form on eAgenda is a tool used to record notes during scheduled appointments. It is configured as an Internal Form for Appointment Registration, linked to a specific schedule, and filled in by authorized users during or after an appointment. These forms help document important information in a structured manner.
Benefits of Creating Internal Forms
- Organization of appointment notes in a standardized format.
- Direct link to schedules, facilitating access during appointments.
- Access restricted to users with login and password, ensuring security.
- Improved information management for teams and reports.
Prerequisites
Before starting, you need:
- An administrator or authorized user account on eAgenda with access to the forms section.
- At least one schedule configured on the platform.
- Internet access and an updated browser (Chrome, Firefox, etc.).
- Your subscription plan must support forms, in case it includes file uploads.
Step by Step: Creating and Filling In an Internal Form
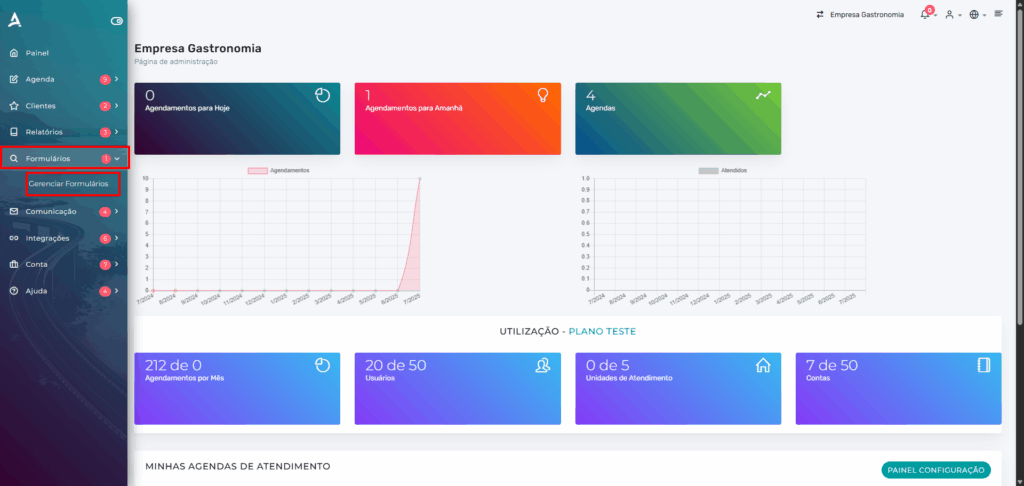
1. Access the Manage Forms Section
- Log in to your eAgenda account (e.g., www.eagenda.com).
- In the side menu, click on “Forms” > “Manage Forms”.
2. Create a New Form
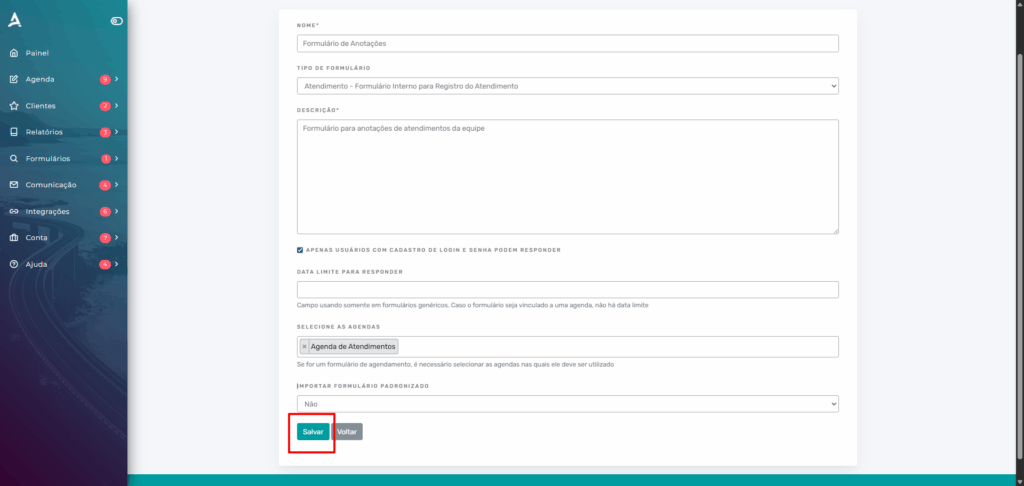
- On the Manage Forms screen, click the “Create a New Form” button.

- Fill in the fields:
- Form Name: Enter a descriptive name (e.g., “Appointment Notes Form”).
- Form Type: Select “Appointment – Internal Form for Appointment Registration”.
- Description: Add a description to identify the form (e.g., “Form for team appointment notes”).
- Only users with login and password credentials can respond: Check this option to restrict access.
- Response Deadline: Leave blank, as appointment forms do not have a deadline.
- Select Schedules: Choose the schedule where the form will be used (e.g., “Appointments Schedule”).
- Click “Save” to create the form.
3. Add Questions to the Form
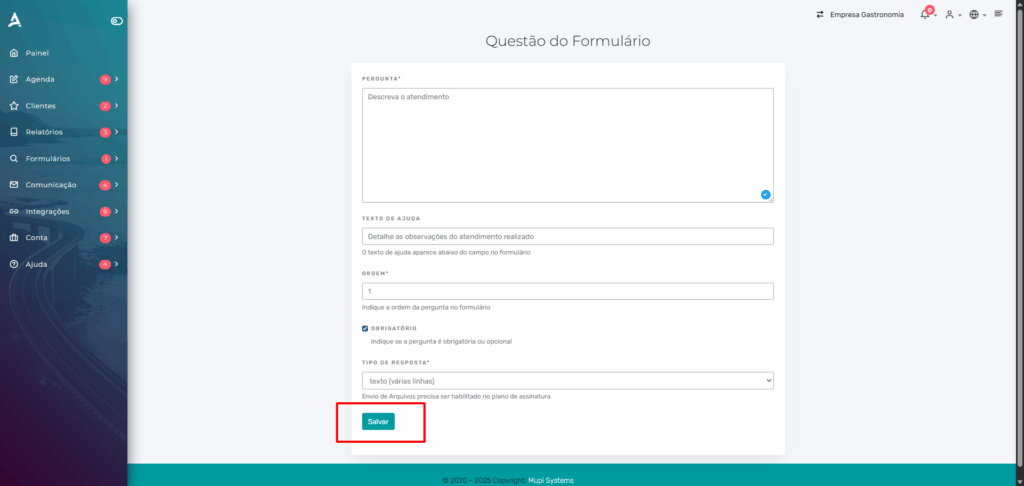
- On the newly created form screen, click “New Question”.

- Fill in the fields for the question:
- Question: Enter the question (e.g., “Describe the appointment”).
- Help Text: Add an explanation if necessary (e.g., “Detail the observations from the appointment”).
- Order: Define the question order (e.g., 1).
- Required: Check if the question is mandatory.
- Response Type: Select “Text (multiple lines)”. Note: File uploads require a specific subscription plan.
- Click “Save” to add the question. Repeat for other questions if necessary.
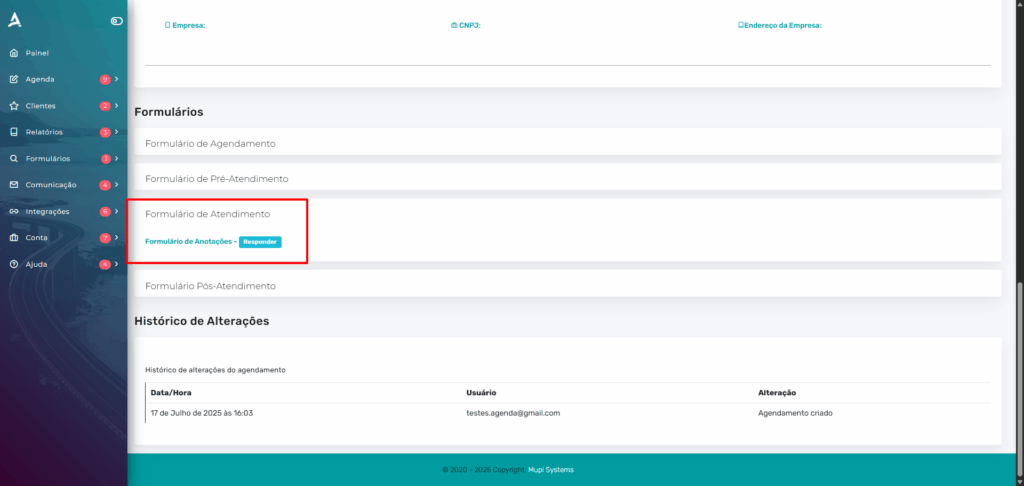
4. Fill In the Form During an Appointment
- Access the “List Appointments” tab in the side menu.
- Locate the appointment and click the identifier to view the appointment details.

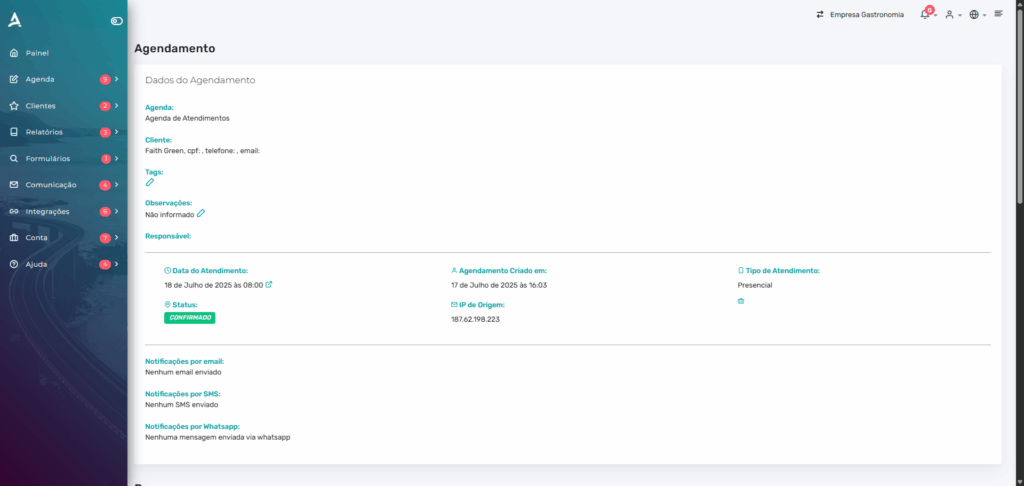
- Scroll down the page and in the “Appointment Form” section, click “Respond”.
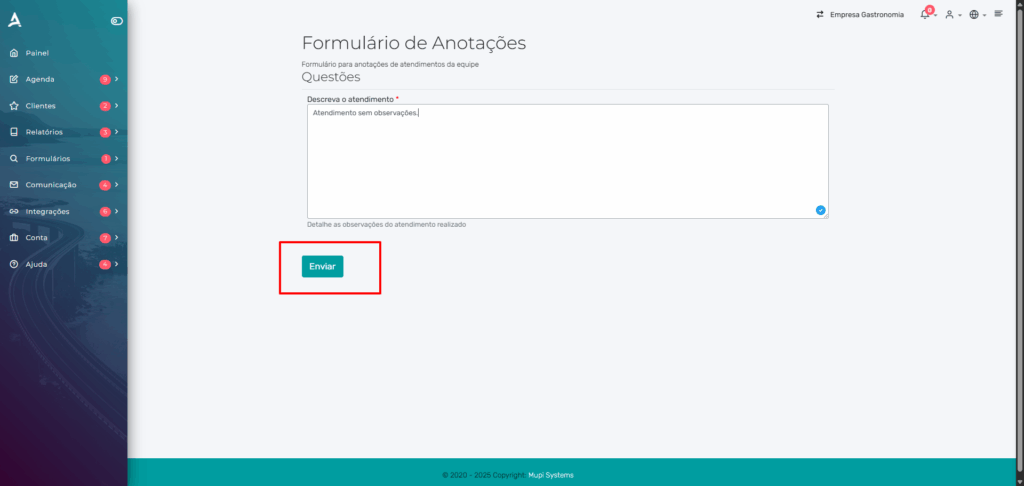
- Fill in the form questions.
- Click “Submit” to save the responses.
Tips for Efficient Forms
- Use clear and specific names for forms (e.g., “Appointment Notes – Team X”).
- Include only essential questions to avoid lengthy forms.
- Verify that the selected schedule corresponds to the appointments where the form will be used.
- Ensure your subscription plan supports file uploads if needed.
Conclusion
Creating an internal form for appointment notes on eAgenda is simple and efficient. This guide helps you configure forms, link them to schedules, and fill them in during appointments. Start organizing your notes in a practical and structured way now!
📞 WhatsApp: [Click here to send us a message] 🌐 eAgenda Platform: [Discover the tool] 🏢 Our Company: [Mupi Systems – Innovative Solutions] 📧 Email: [contato@mupisystems.com.br] 📚 Tutorials and Documentation: [Access our guides and tutorials]