How the Client Books an Appointment via Platform Login
In this tutorial, we will explain how the client can book an appointment using the Login on the Minha Agenda Virtual or eAgenda platform.
It is important to note that the client must have been previously registered. If you have any questions about how to add a client, access the Client Access Control Tutorial by clicking here.
Step-by-step guide for the client to book an appointment
1**.** After the schedule administrator registers the client to make their own bookings, a “Make Your Appointment” email will arrive at the email address registered for the client.
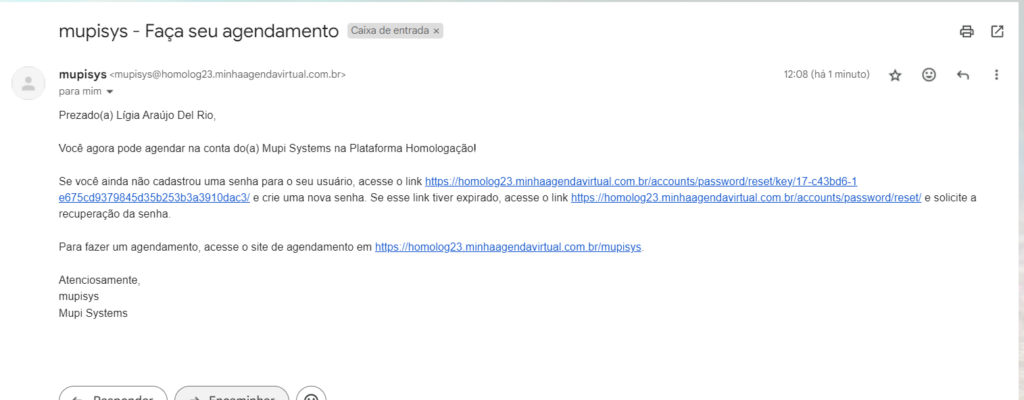
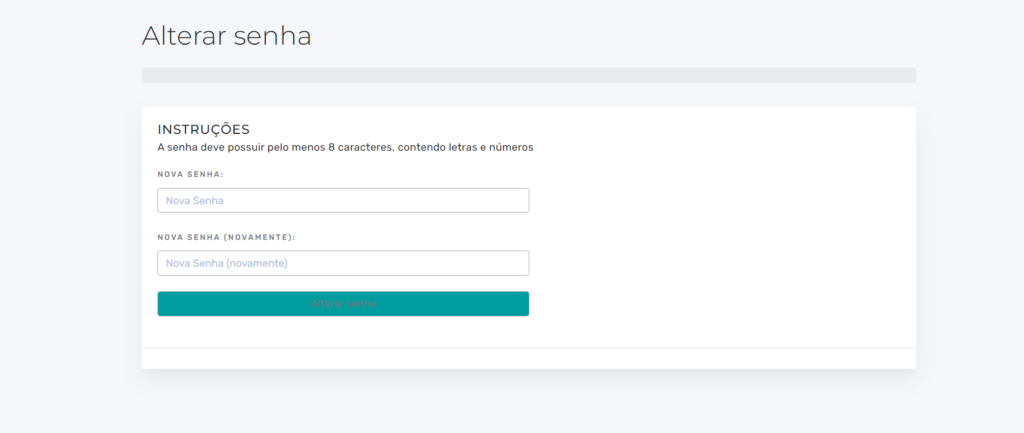
2. Register your password using the link provided in the email.
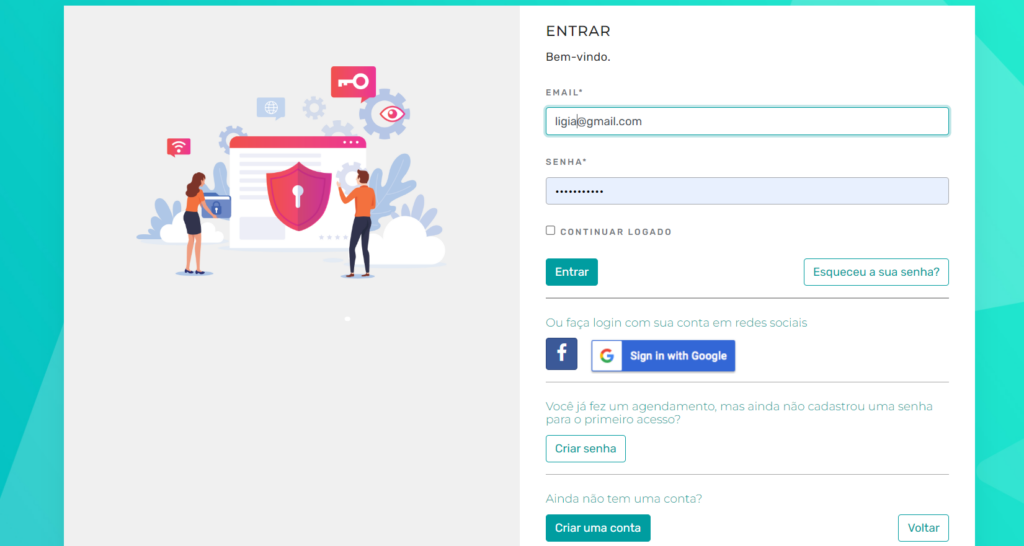
3. After registering your password, access the eAgenda login page. Enter your email and password and click Sign In.
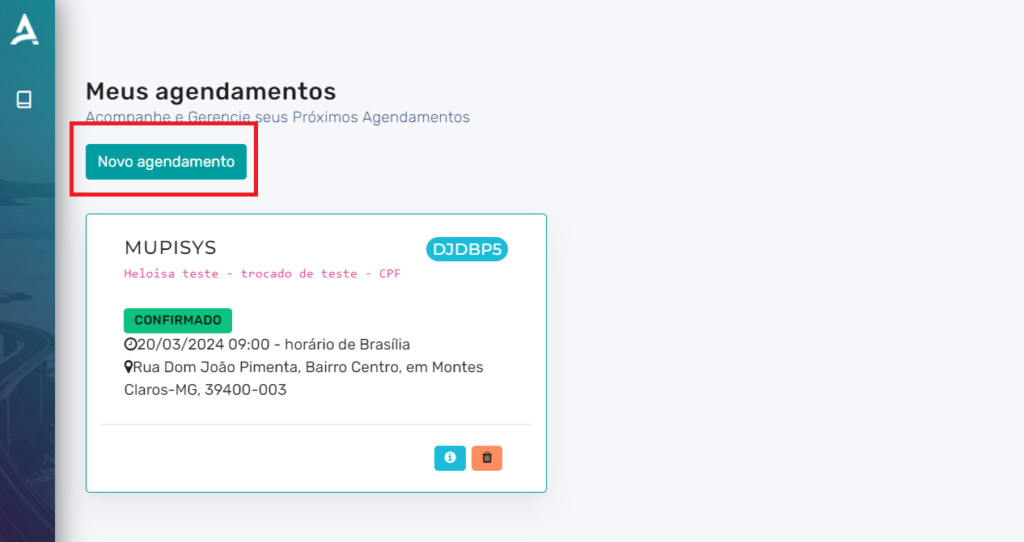
4. The page will be redirected to My Appointments. Click on New Appointment.
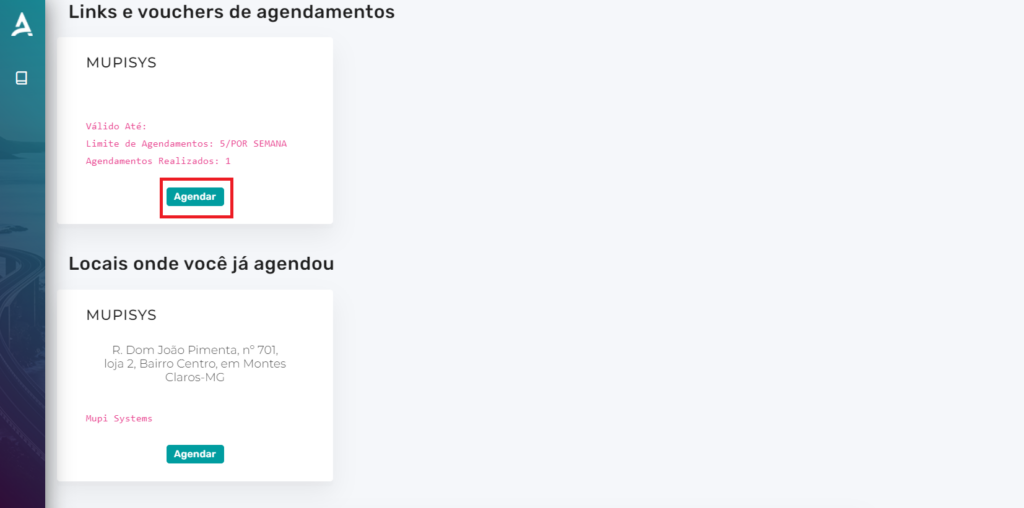
5. The page will be redirected to Scheduling links and vouchers → Book.
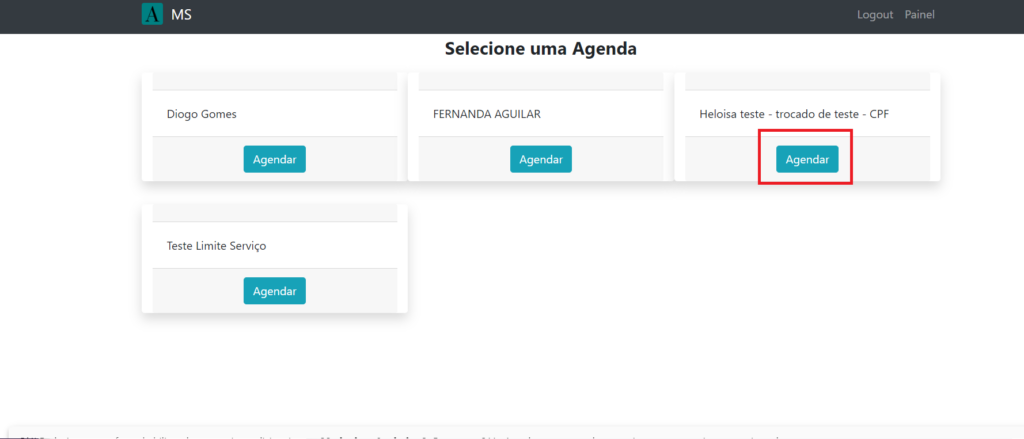
6. The page will be redirected to Schedules. Select the Schedule for which you want to make the appointment.
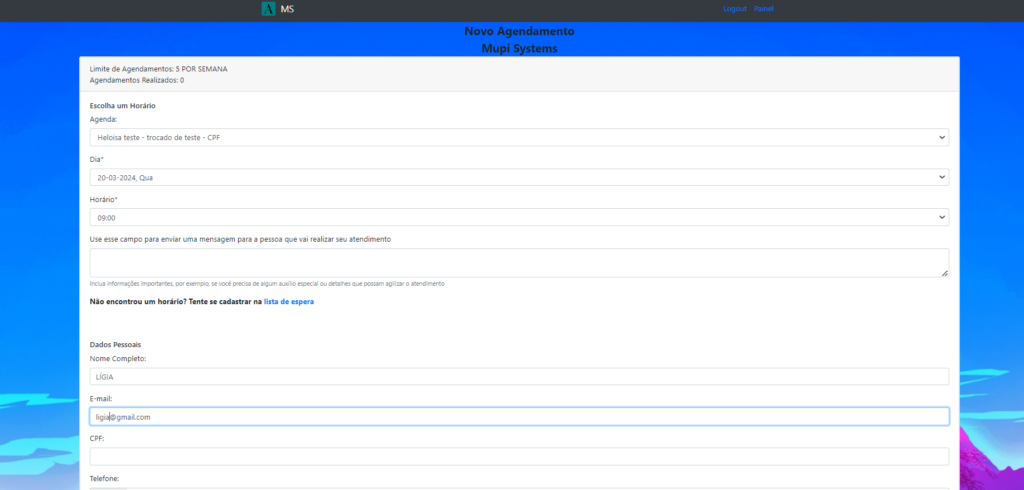
7. The page will be redirected to the Schedule with available times and days.
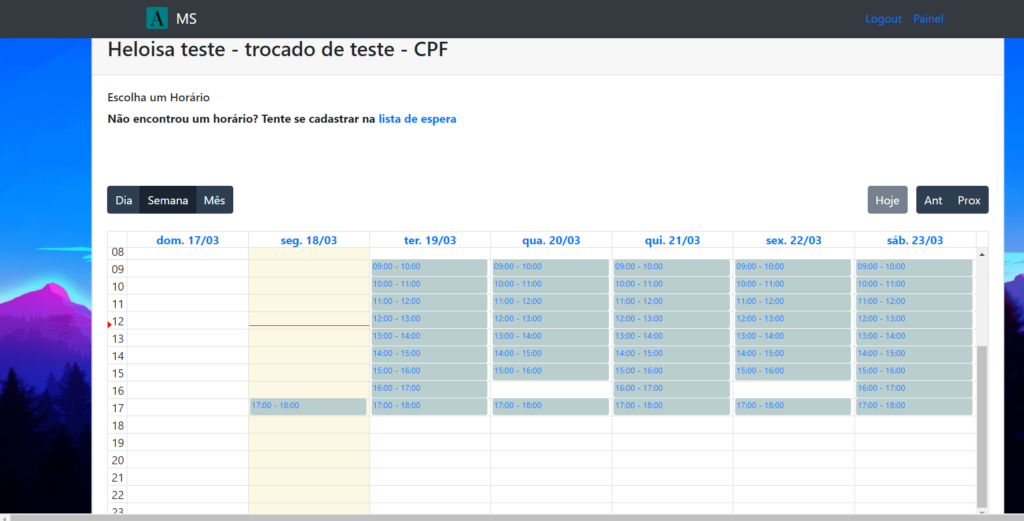
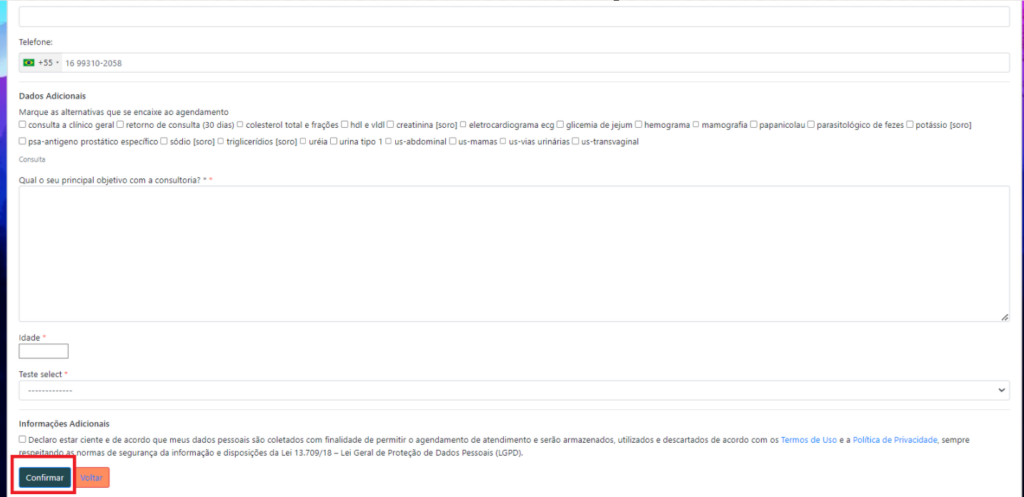
8. Click on the time slot on your preferred day. The page will be redirected to New Appointment. Review the details and click Confirm.
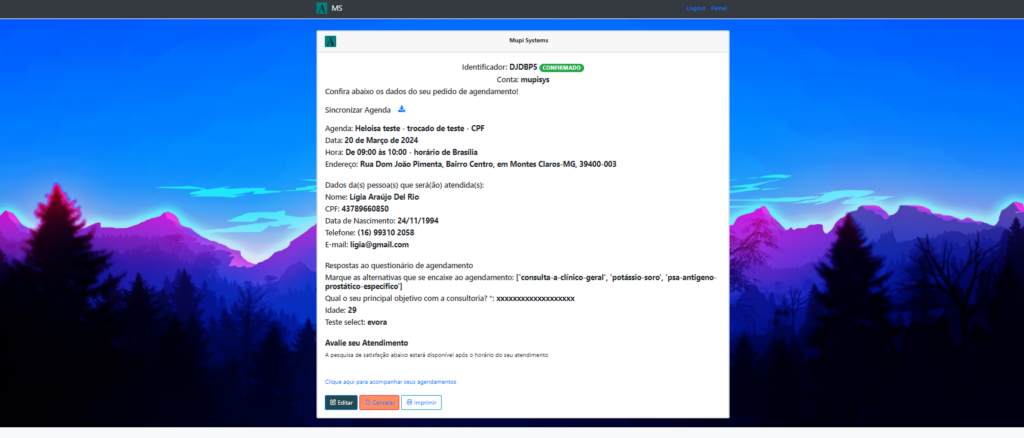
9.The Appointment Confirmation will be displayed.
Take advantage and visit our Blog to answer your questions.
Mupi Systems offers various technological solutions for all types of businesses. Discover our platforms that bring innovation to the market.