How to Create Calendar Groups in eAgenda
The Groups feature enables the creation of calendars aimed at specific groups, ideal for situations with numerous calendars that can be organized based on common characteristics. This allows you to create a sequential flow on the scheduling screen, making it easier for users to find the desired calendar. The flow can be configured with 1 to 3 steps, and calendars are usually linked in the last step, although they can be linked in earlier steps if needed.
Step by Step: How to Create Calendar Groups
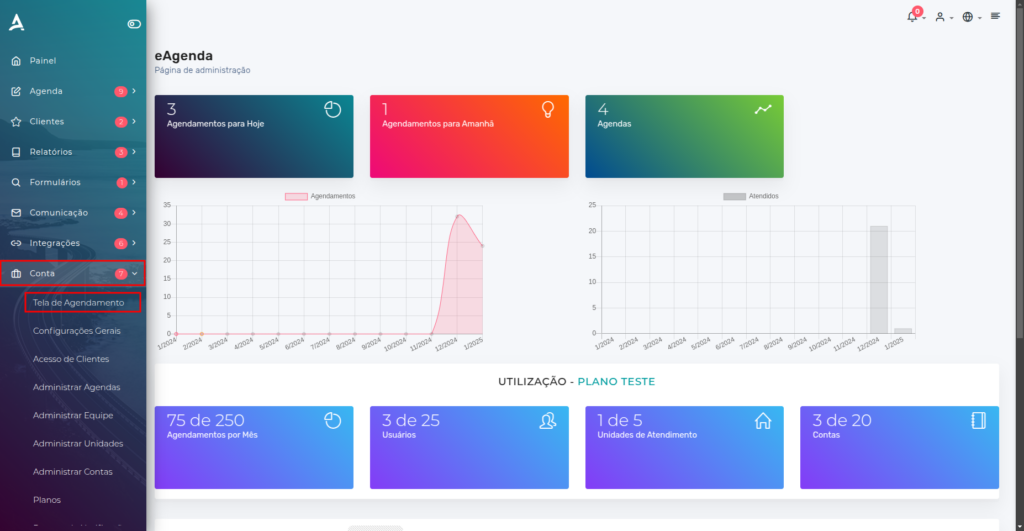
1**.** Open the Side Menu and click on Account → Scheduling Screens;
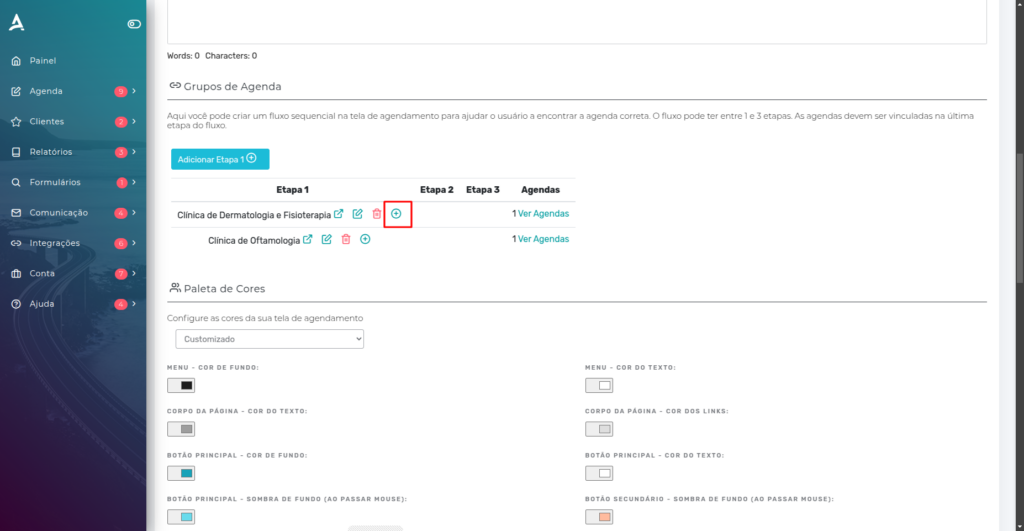
2. After clicking the Scheduling Screens option, the Scheduling Screen Configuration interface will be displayed. On this new screen, scroll down until you find the section titled Calendar Groups. This is where you can view, edit, or configure the available calendar groups as needed for your scheduling.
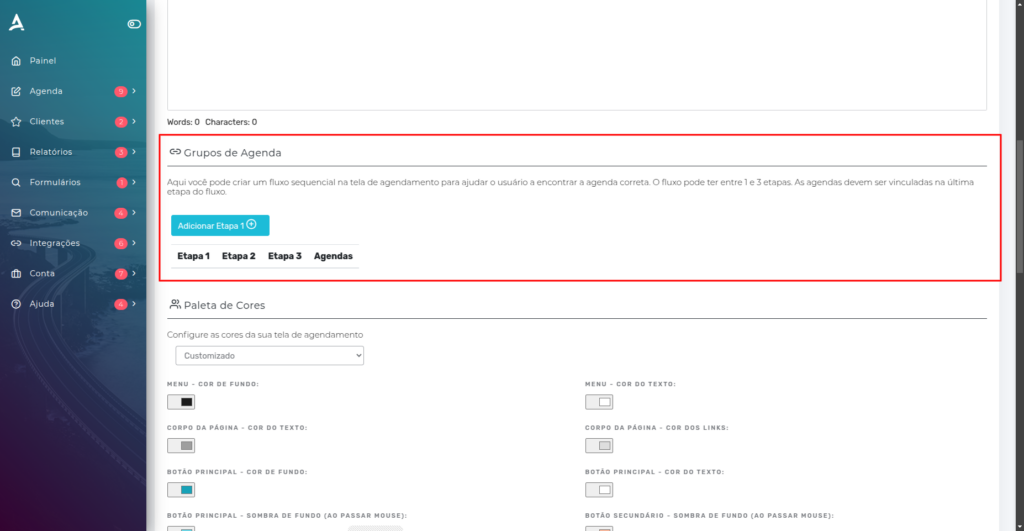
3. In this step, we will begin configuring the Calendar Groups. To do this, click the Add Step 1 button. Clicking it will automatically redirect you to the New Calendar Group screen, where you can enter the necessary information to create a new group in a personalized and organized way.
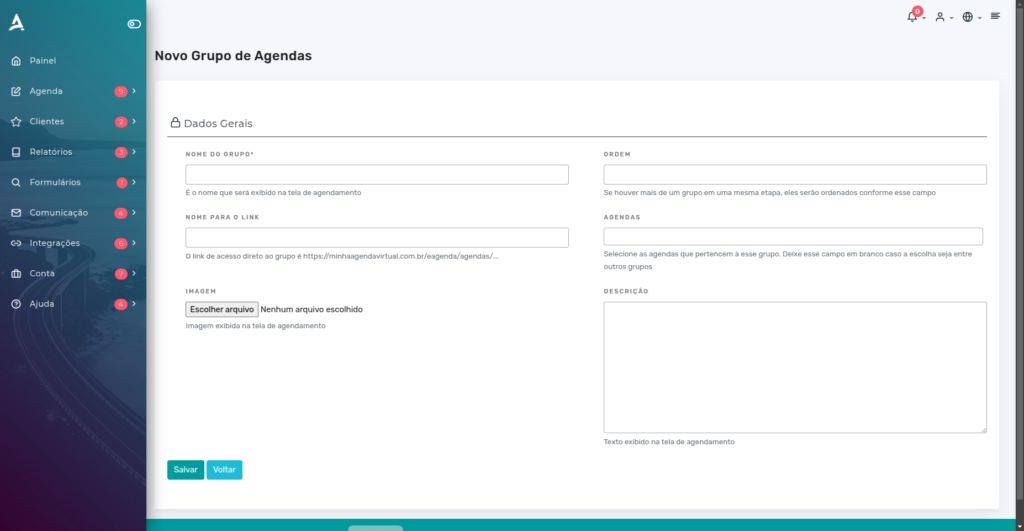
4. On the New Calendar Group screen, fill in the fields with the desired information, such as name, description, and other specific settings. After completing the form, click the SAVE button to register the group. If you want to add more groups to Step 1, simply repeat this procedure as many times as needed.
Configuring Subgroups
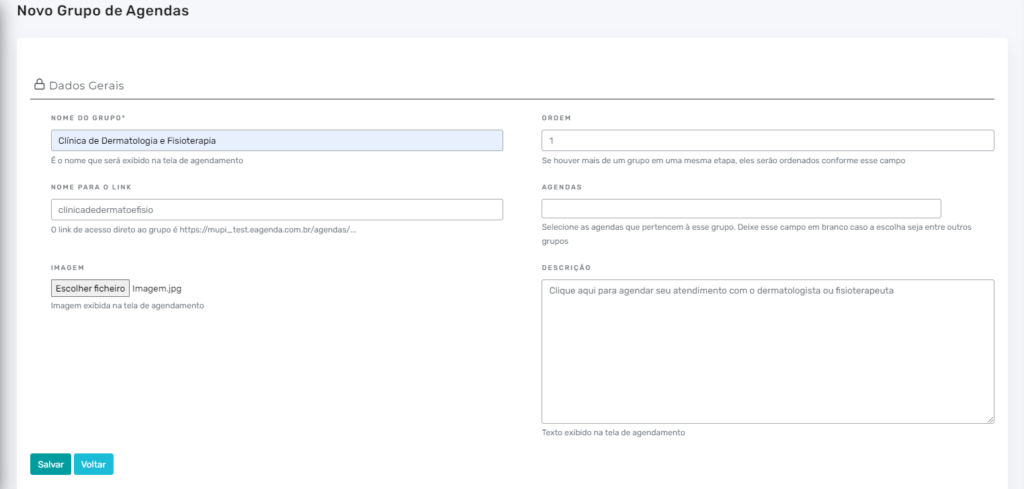
- Example: in Step 1, the group Dermatology and Physical Therapy Clinic was created, containing the specific settings for that service.
Continuing with the example, still in Step 1, another group was added, named Ophthalmology Clinic, following the same process described earlier.
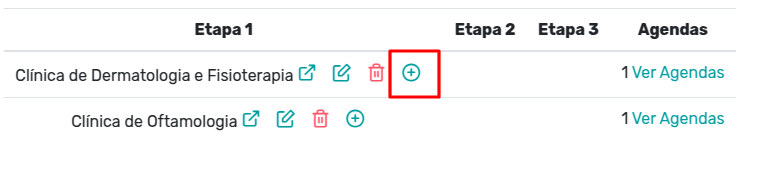
2. To add a new step linked to one of the already created steps, locate the group you want to add the next step to and click the ”+” button positioned next to the group name. This action will create a subsequent step, maintaining the hierarchical structure between groups and facilitating the scheduling flow.
3. When you click the ”+” button, the New Calendar Group window will appear again. Fill in the fields with the information for the new group that will be linked to the previous step. After entering the necessary data, click SAVE to complete the creation and maintain the link between steps.
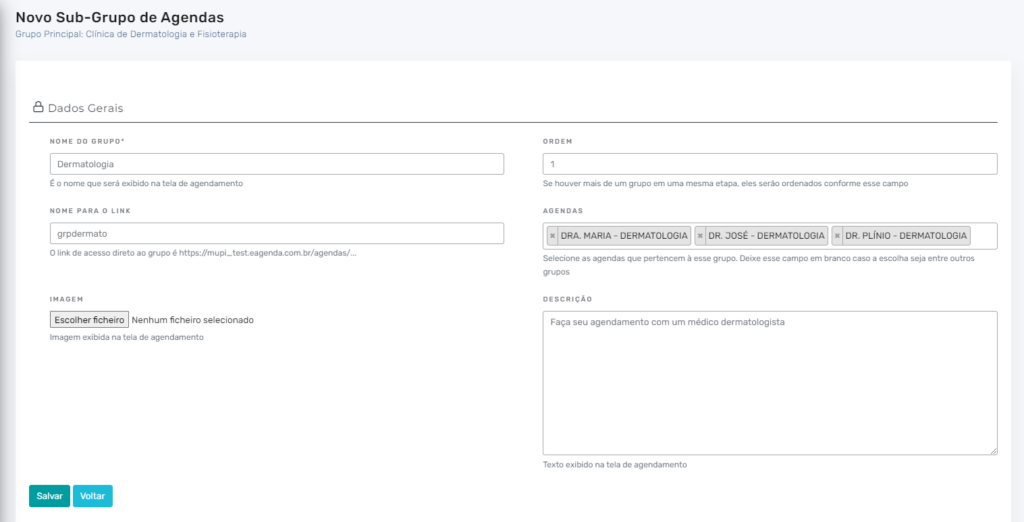 Note in the example that here the dermatologists’ calendars were linked, which will appear after the customer selects “Dermatology” in the group selection screens.
4. You can create as many Calendar Groups as necessary to match your business structure.
In the example shown, two subgroups were created linked to the main group “Dermatology and Physical Therapy Clinic”, allowing for more detail within that specialty.
On the other hand, the group “Ophthalmology Clinic” has no subgroups. In this case, the calendar was linked directly to that group, without the need for additional steps.
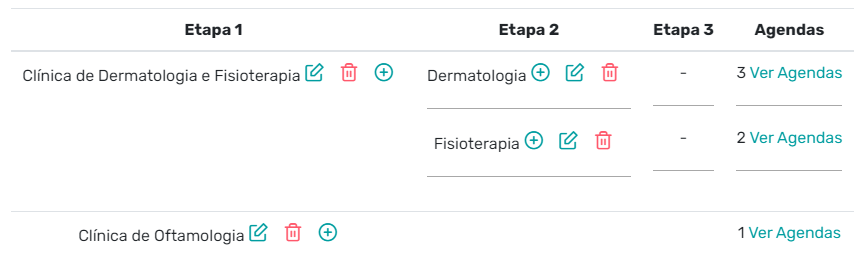 It is worth noting that, if needed, it would still be possible to create another group selection step, further branching the flow.
Conclusion
See below the result, which can be accessed through the company’s main scheduling link.
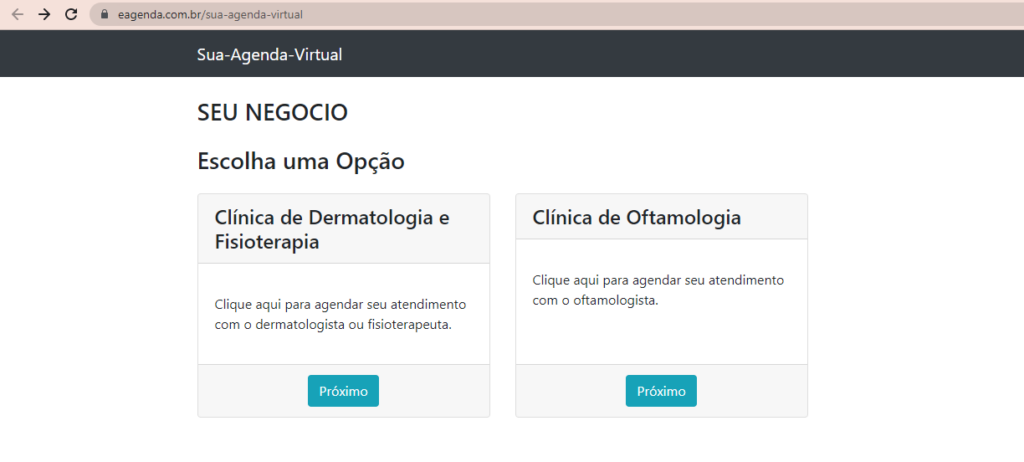
By clicking “Next” on the “Dermatology and Physical Therapy Clinic” option, you will be directed to the next step or to the calendar linked to this group, facilitating the scheduling process according to the previously defined configuration.
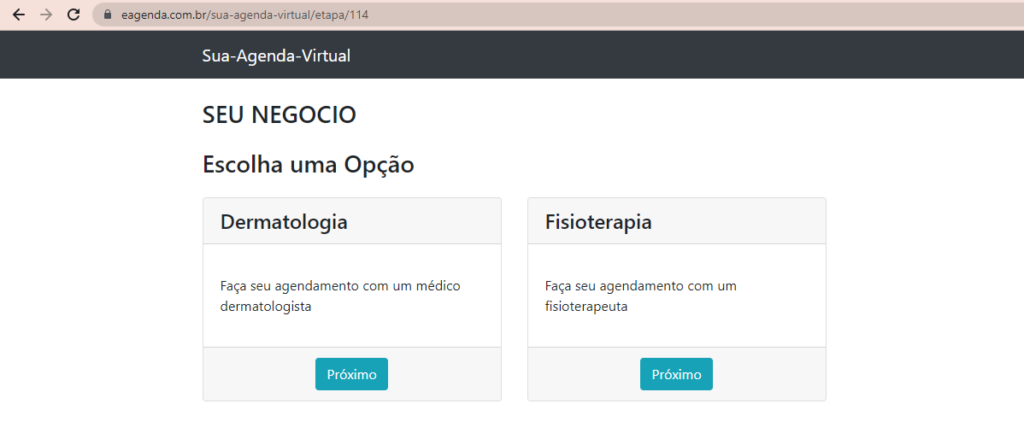
By clicking “Next” on the “Dermatology” option, you will be directed to the next scheduling step or to the specific calendar linked to this service, allowing the process to continue smoothly and according to the previously defined configuration.
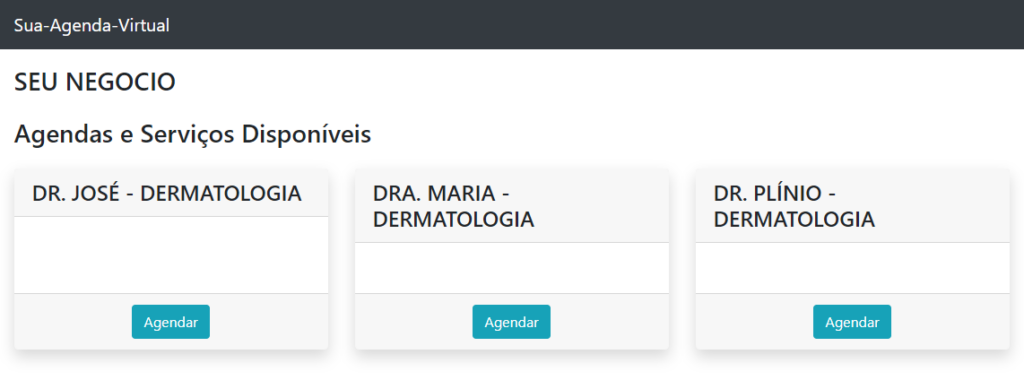 From here, the next step will redirect the customer to the scheduling screen with the desired doctor.
Note: when using Calendar Groups, all calendars must be properly linked to a group to appear to the customer through the company’s main scheduling link.
Calendars that are not linked to any group will not be displayed in this flow and, therefore, can only be accessed directly through the specific link of the corresponding calendar.
Important: this configuration is restricted exclusively to the Owner and Administrators of the account. In other words, Collaborators and Viewers do not have permission to create, edit, or change the Calendar Groups layout. This limitation ensures greater control and security in structuring the company’s scheduling flow.
We also have a video tutorial on How to Create Calendar Groups available. Take the opportunity to explore our Blog and get your questions answered.
Video Tutorial
Mupi Systems offers various technology solutions for all types of businesses. Explore our platforms that bring innovation to the market.