How to Allow File Uploads in eAgenda
In eAgenda, you can configure various types of additional forms, offering more flexibility and customization in the relationship with your customers. Among these features, one of the most useful is the File Upload option.
With this feature enabled, your customers can attach and send files directly through the platform, in a practical and secure way. This allows you to request, for example, personal documents, medical exams, signed contracts, images, or any other type of material needed for your service.
Uploading files directly through the form eliminates the need for exchanging emails or external messages, centralizing all information in a single environment. This way, the process becomes more agile, organized, and efficient for both you and the customer. Additionally, this feature helps maintain a complete service history, which can be essential for tracking case progress and ensuring higher quality service.
Whether for clinics, offices, service providers, or businesses in any sector, the file upload feature in eAgenda is a powerful ally in automating and professionalizing customer service.
Step by Step: Allowing File Uploads
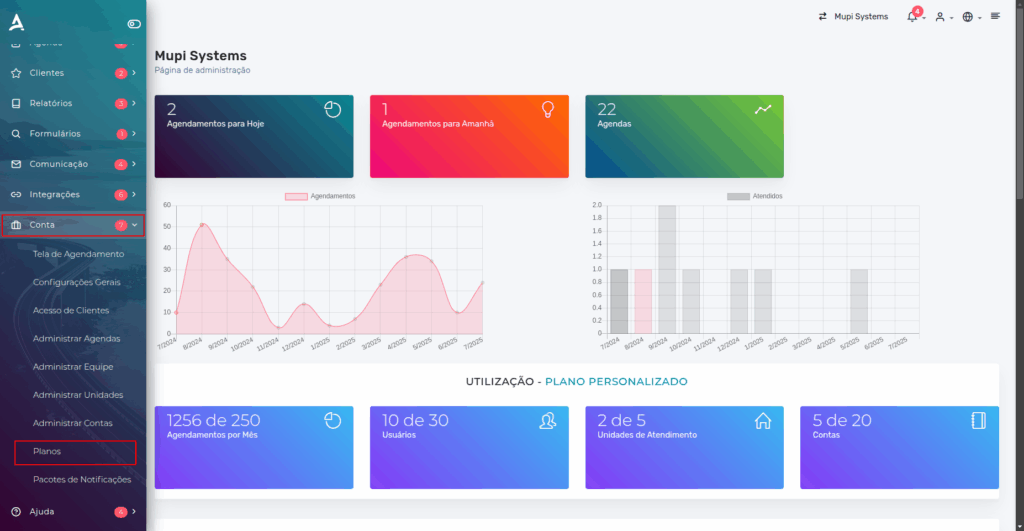
To begin, access the platform’s side menu and click on Account > Plans. This is the essential first step to enable File uploads.
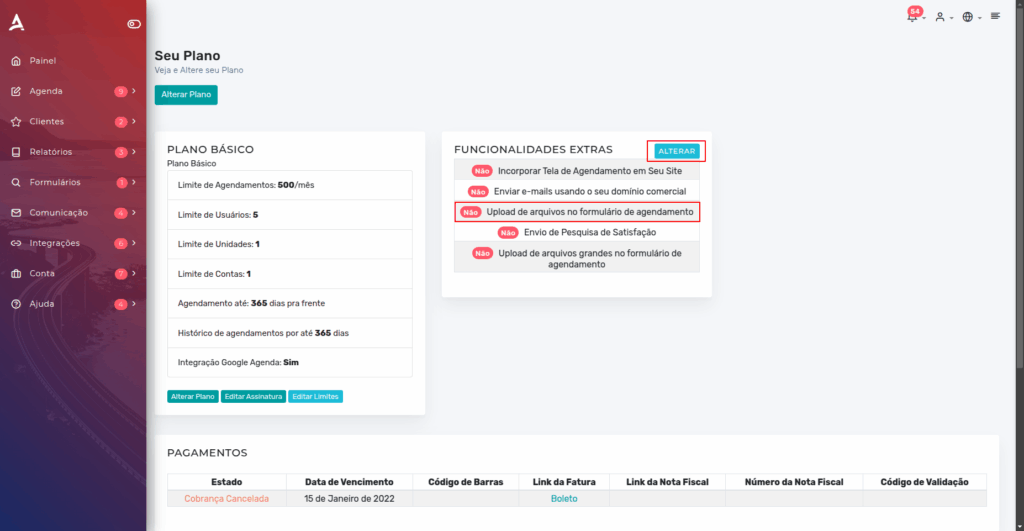
On the Plans page, you need to enable the File Upload Extra Feature in your subscription. In this section, click Change.
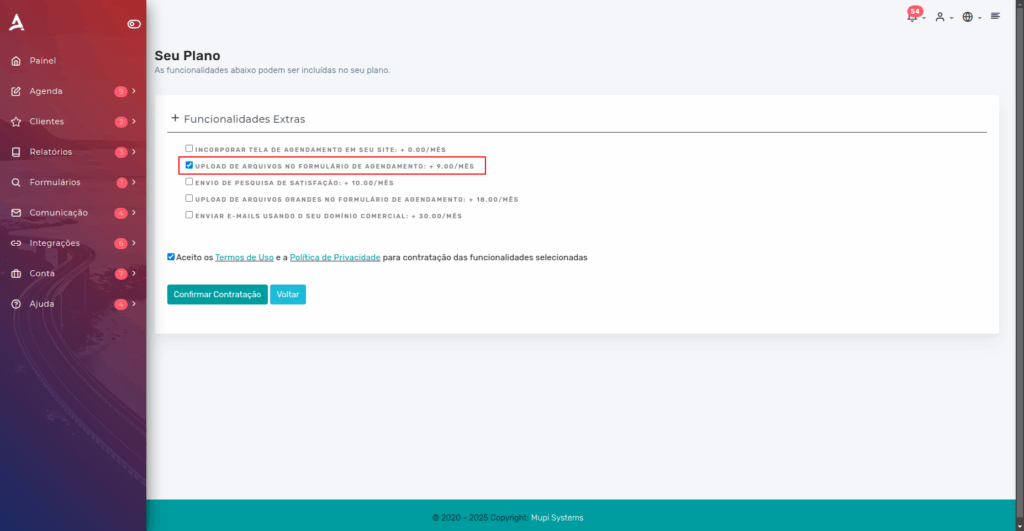
Then, you will be redirected to the Extra Features screen. On it, select the File Upload option. Remember that enabling this feature will add R$9 to your subscription.
Accept the Terms of Use and click Confirm Subscription.
Done! Now you just need to configure the File Upload form.
Configuring the File Upload Form
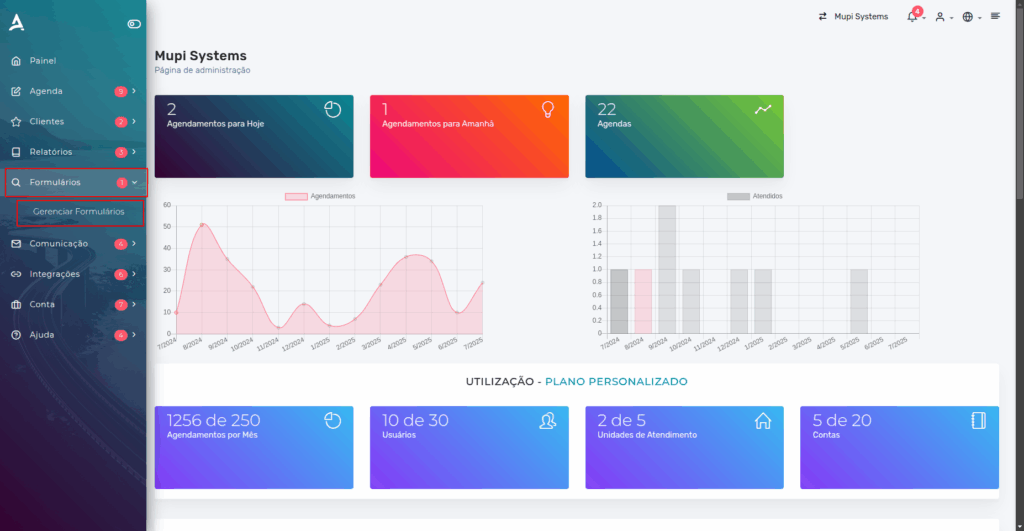
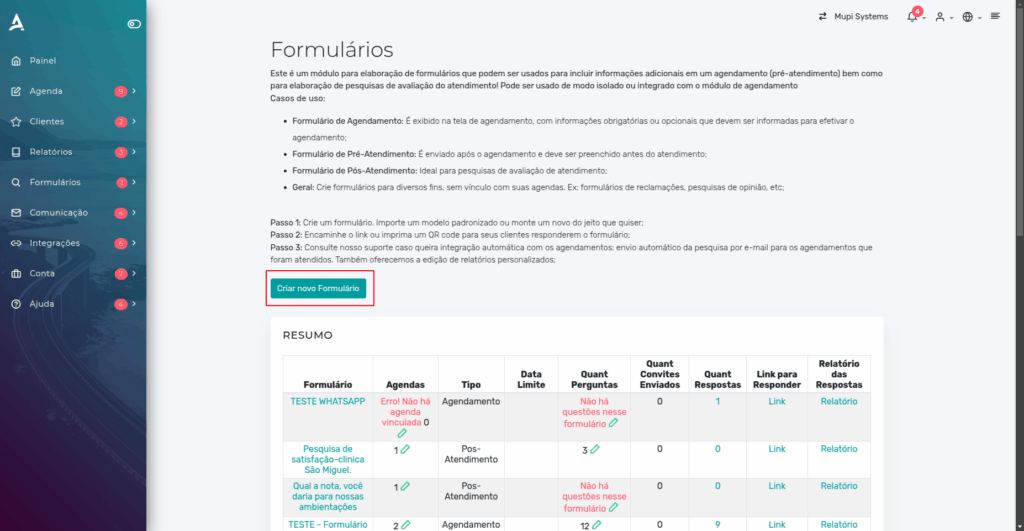
In the platform’s side menu, click on Forms > Manage Forms.
On the Forms page, click Create New Form.
After the previous step, you will need to configure the Form.
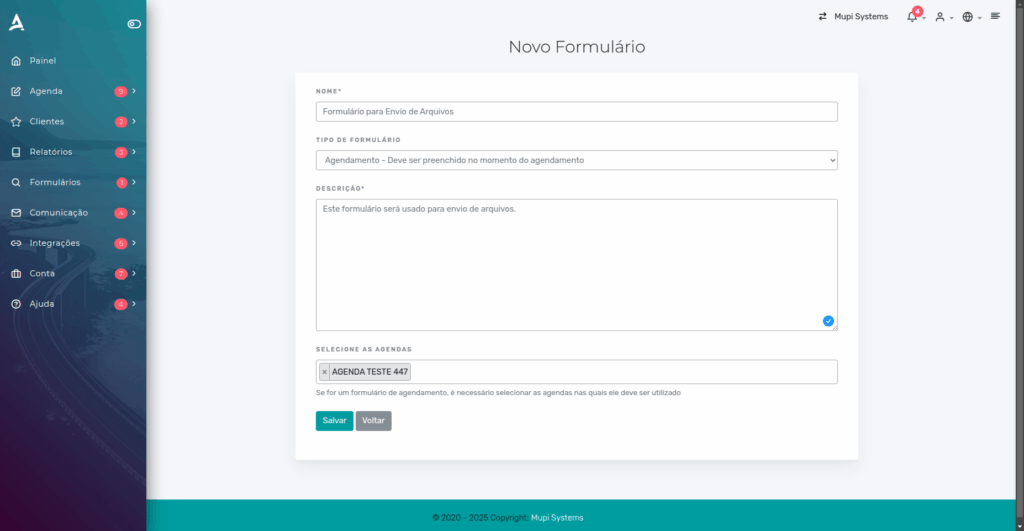
- Name: Set the form name according to your needs.
- Form Type: Select the option “Scheduling – Must be filled in at the time of scheduling”.
- Description: Enter a text that helps identify the form.
- Select Calendars: Choose the calendar where the file upload field will be available.
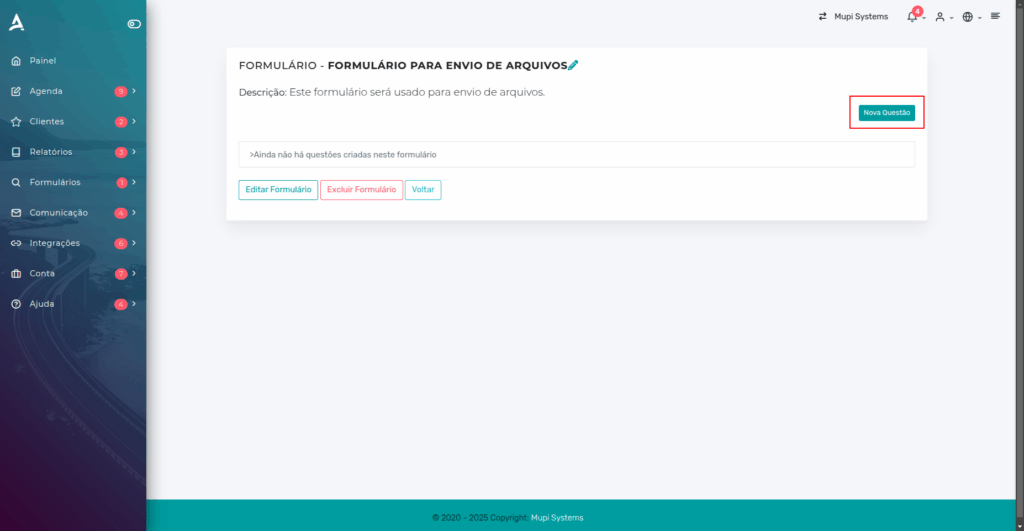
Done! After clicking Save, you will need to configure the form questions. To do this, click “New Question”.
Then, fill in the necessary data to configure the questions.
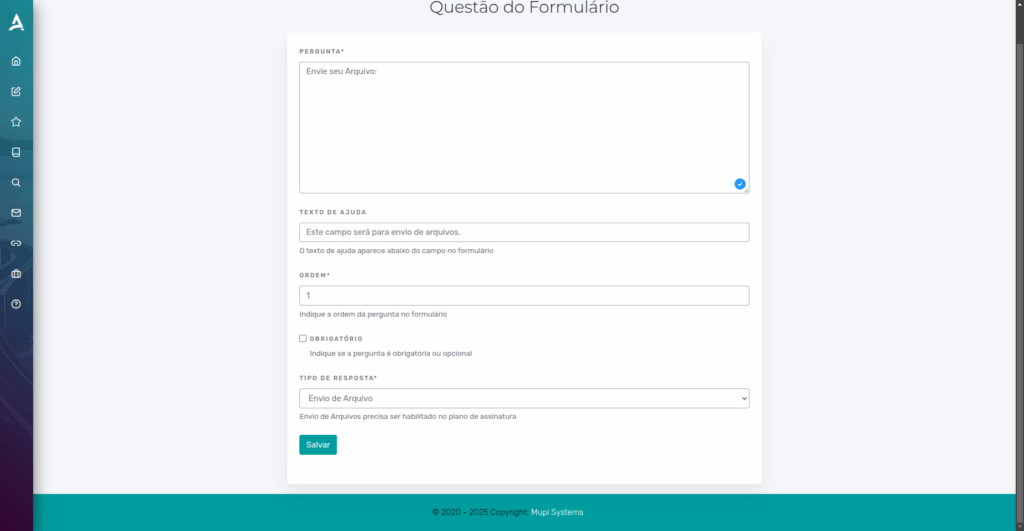
Question: Enter here the question text or the information you want the customer to see when filling out the form.
Help Text: Add an explanatory or guiding text to help the customer better understand what should be answered in this field.
Order: Set the order in which this question will be displayed relative to others in the form.
Response Type: Select the “File Upload” option to allow the customer to attach a document or image at the time of scheduling.
Done! Now just click Save.
Conclusion
In summary, in this tutorial you learned how to activate and configure the File Upload feature in eAgenda, a tool that allows your customers to attach documents directly on the platform, making the service process more practical, secure, and centralized.
You saw how to enable this feature by accessing the platform’s Plans section and subscribing to the resource as an extra feature. Then, you learned how to create and configure a custom form, setting the name, type, description, and linked calendar. Finally, the steps for adding form questions were presented, using the “File Upload” response type to receive documents directly during scheduling.
This feature is ideal for clinics, offices, and businesses that want to professionalize and automate their services, reducing email exchanges and improving information organization.
Mupi Systems offers various technology solutions for all types of businesses. Explore our platforms that bring innovation to the market.
Contact Us or Learn More
WhatsApp: [Click here to send us a message] eAgenda Platform: [Explore the tool] Our Company: [Mupi Systems – Innovative Solutions] Email: [contato@mupisystems.com.br] Tutorials and Documentation: [Access our guides and tutorials]