How to Set Up Your First Calendar in eAgenda
Welcome to the eAgenda platform! In this tutorial, you will learn how to set up your first calendar in a simple and practical way.
Here, you will have access to a complete set of features designed to make your daily routine more efficient, organized, and productive. With eAgenda, you can manage appointments, optimize communication with your clients, personalize services, and track all activities in a centralized and intuitive way.
Our platform was carefully designed to simplify your day-to-day operations, offering more autonomy, control, and agility at every step of the service process.
Step by Step: Setting Up Your First Calendar
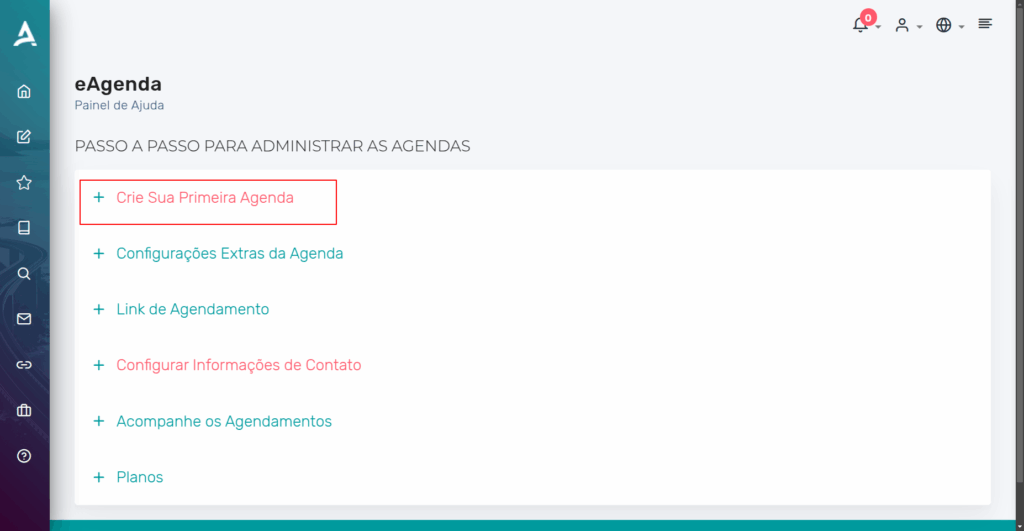
After completing your registration, you will see the Step-by-Step Guide to Managing Calendars page. On this screen, click Create Your First Calendar.
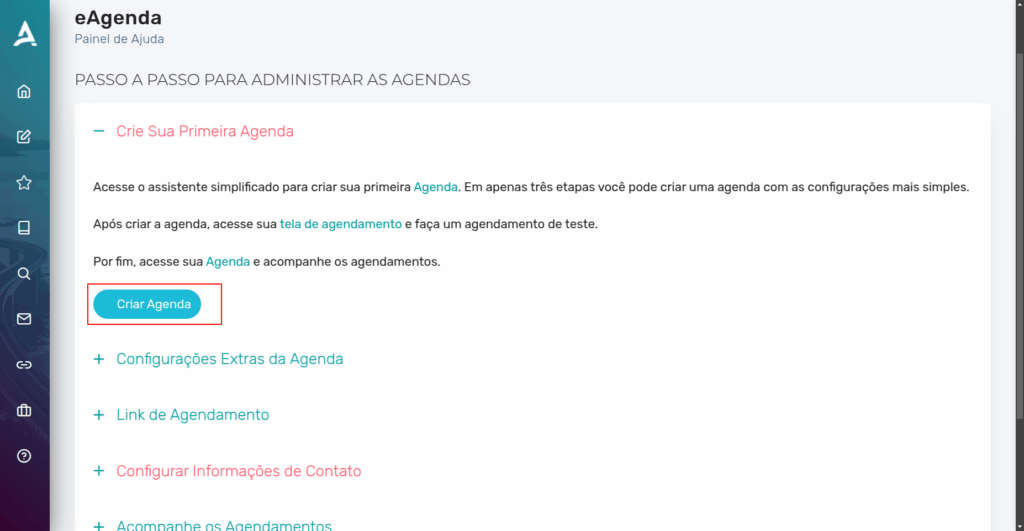
Then, click Create Calendar.
After the previous step, you will be redirected to the Configure Calendar screen, where you will create your calendar in 3 steps:
- General Settings
- Personal Details Configuration
- Service Hours
General Settings
In the General Settings step, you will need to configure the following:
- Calendar Name: In this field, you must define the name of your calendar.
- In-Person or Video Conference: In this field, select between In-Person or Video Conference.
- If the service is provided in person, you must select whether the service takes place at your address or if you will provide home service at the client’s address.
- Number of people in the same time slot: In this field, you must select whether you will serve one or more people in a single time slot.
- If set to Yes, you must define a person limit for a single time slot.
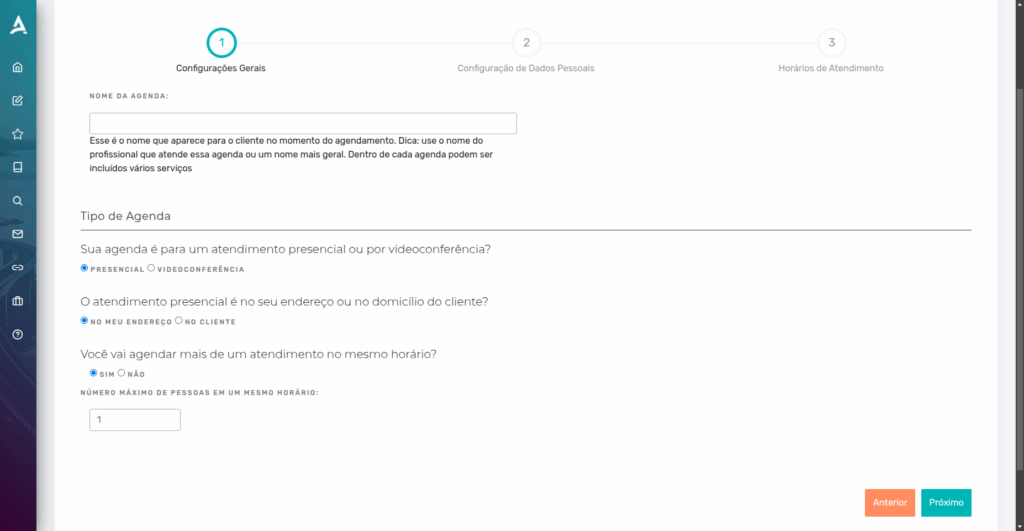
Then, simply click Next.
Personal Details Configuration
In the Personal Details Configuration step, you must enable the desired form fields that will be required for the client to fill in when making an appointment.
After selecting the desired forms, click Next.
Schedule Configuration
In the Service Hours step, you must define the service schedule settings.
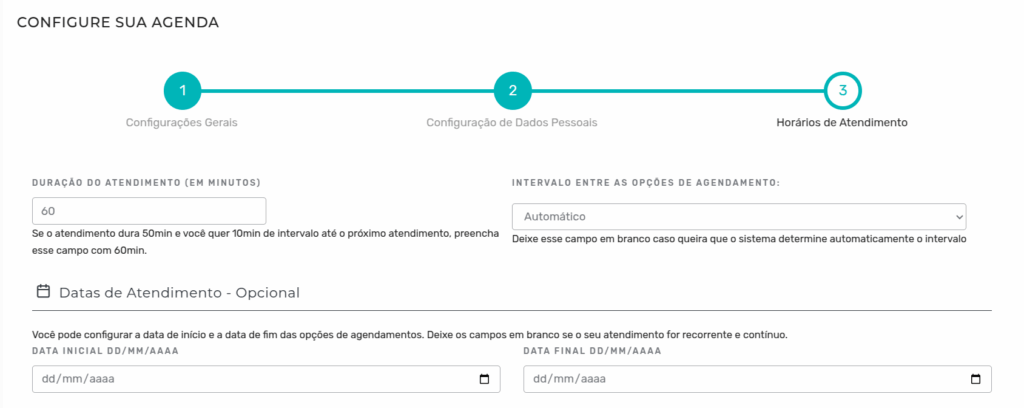
Session Duration: Set the duration of each session according to your needs.
Interval Between Scheduling Options: Set the time slot granularity — for example, if set to 5, time slots will be available to clients in 5-minute increments.
Start and End Date: These fields are optional. You can set the opening and closing dates for the calendar to accept appointments.
Service Hours
In the Service Hours section, you must configure the available time periods according to your workflow, defining the days and times when you want to receive appointments.
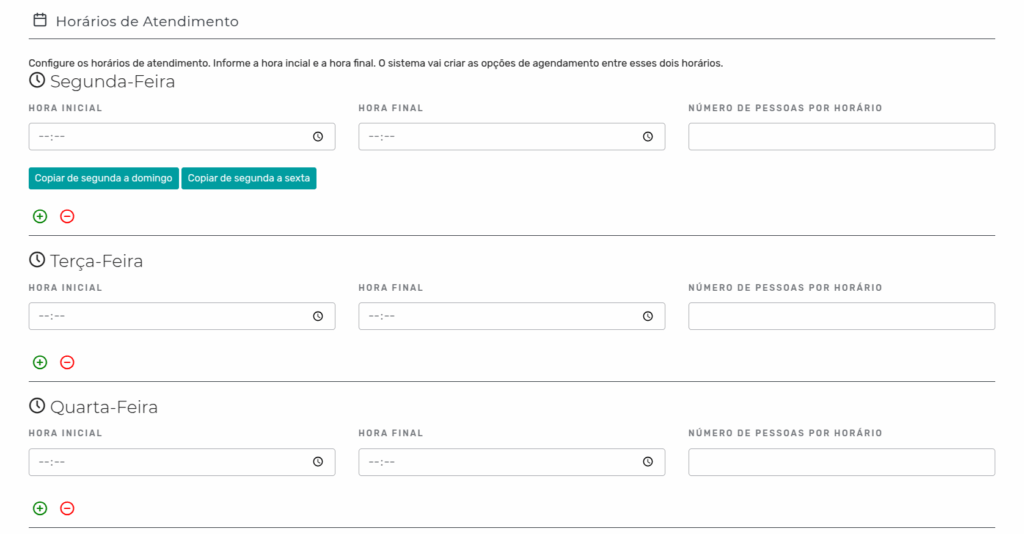
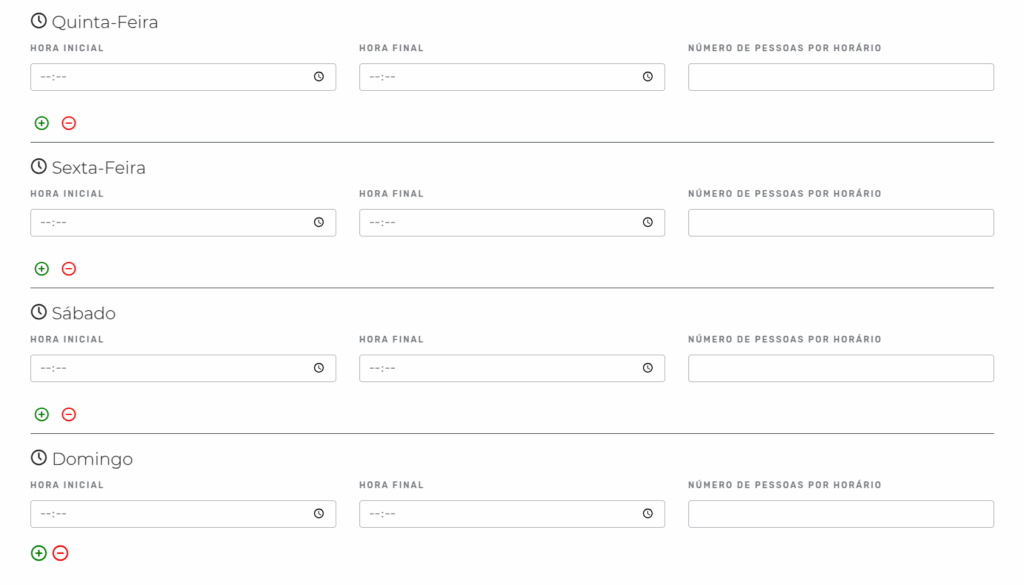
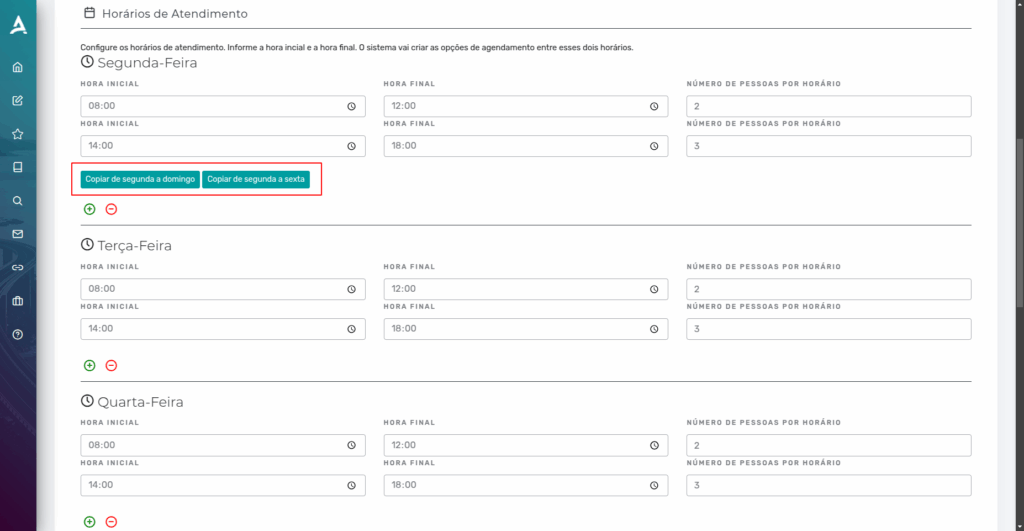
By clicking the ”+” icon, you can add a new time slot to configure service for the same day of the week. This feature is ideal for cases where sessions occur in two or more shifts.
For example, you can configure the schedule as follows:
- From 08:00 AM to 12:00 PM
- From 02:00 PM to 06:00 PM
This way, the gap between shifts — such as the lunch break — will remain free, with no appointments.

By clicking the “Copy Monday to Sunday” or “Copy Monday to Friday” buttons, the schedule settings defined for Monday will be automatically replicated to the other days of the week, depending on the option chosen.
This feature makes schedule configuration easier, eliminating the need to adjust each day individually.
Done! Now, simply click Submit at the bottom of the page to complete the initial setup. From this point on, your calendar will be active and ready to use.
Conclusion
In summary, in this tutorial you learned how to set up your first calendar in eAgenda in a simple and practical way, using an intuitive step-by-step guide that walks you through from the moment after registration to activating your calendar.
It was demonstrated how to create a new calendar in three main steps: general settings (defining the name, service type, and number of people per time slot), personal details (selecting the form fields to be filled in by clients), and service hours (including session duration, intervals, start and end dates, and the available shifts for appointments). Additionally, you saw how to optimize the configuration using features such as replicating schedules across days of the week. At the end, your calendar will be ready to use, allowing efficient and centralized management of your appointments.
Mupi Systems offers a range of technology solutions for all types of businesses. Discover our platforms that bring innovation to the market.
Get in Touch or Learn More
WhatsApp: [Click here to send us a message] eAgenda Platform: [Discover the tool] Our Company: [Mupi Systems – Innovative Solutions] Email: [contato@mupisystems.com.br] Tutorials and Documentation: [Access our guides and tutorials]