How to Enable Two-Factor Authentication
At Mupi Systems, our commitment is to offer the best experience for our clients, combining practicality, innovation, and above all, security. That is why we are excited to introduce Two-Factor Authentication (2FA), a new feature that reinforces account protection on our online scheduling platform.
With 2FA, we add an extra layer of security to ensure that only you have access to your account. Even if your password is compromised, an intruder would still need the unique authentication code, sent to a trusted device or application, to gain access. This drastically reduces the risk of unauthorized access, protecting your sensitive information, such as appointments, client data, and personalized settings.
Step by Step: Enabling Two-Factor Authentication
Important: You can only enable the second authentication factor after verifying your email.
Email Verification
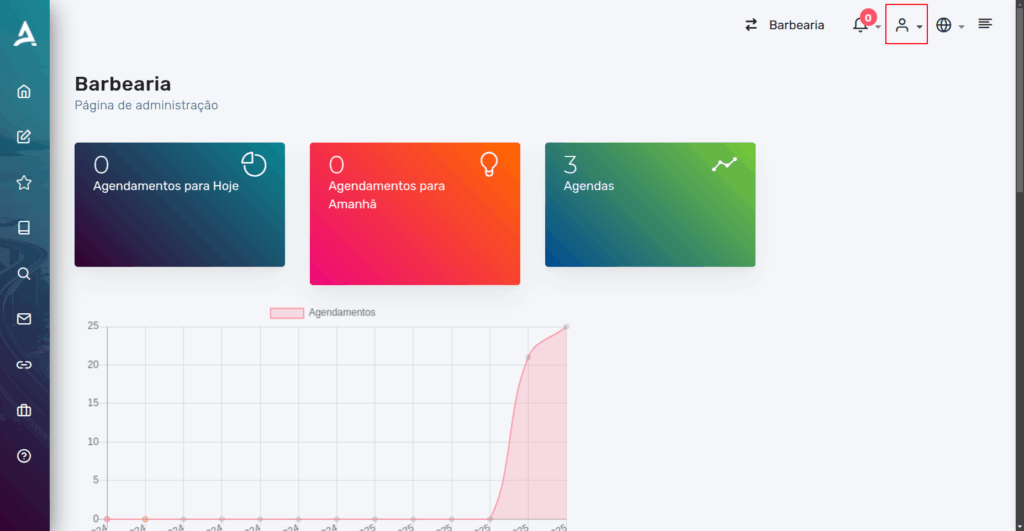
On the platform’s main dashboard, locate the profile icon (represented by a character figure) in the upper right corner of the screen.
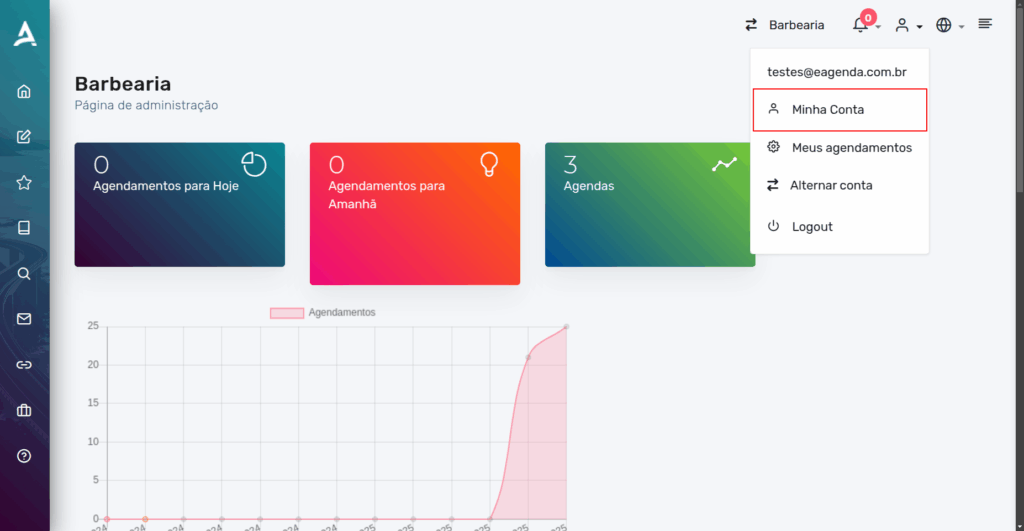
After completing the previous step, a small window will open. In it, click on “My Account”.
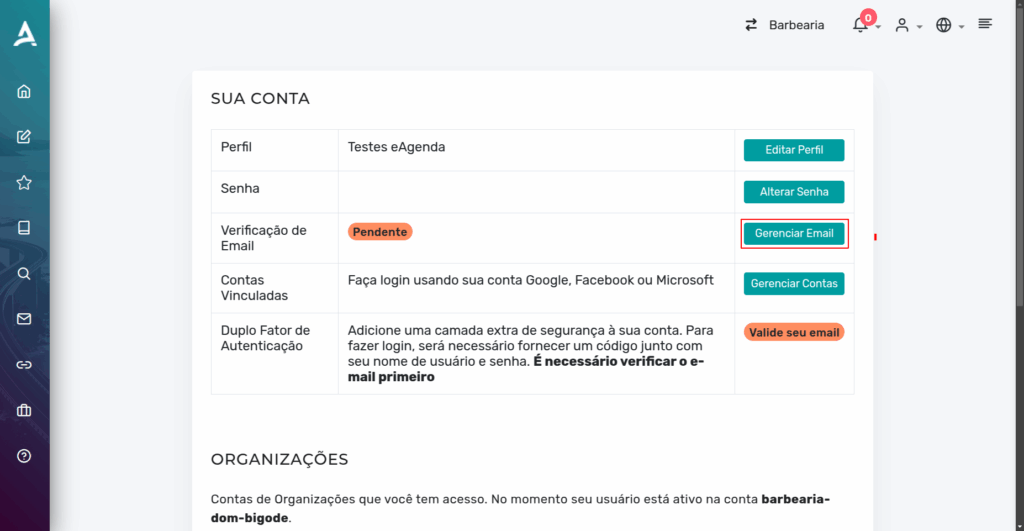
You will then be redirected to the “Your Account” page, where you can verify your email.
To verify your email, click on “Email Verification”.
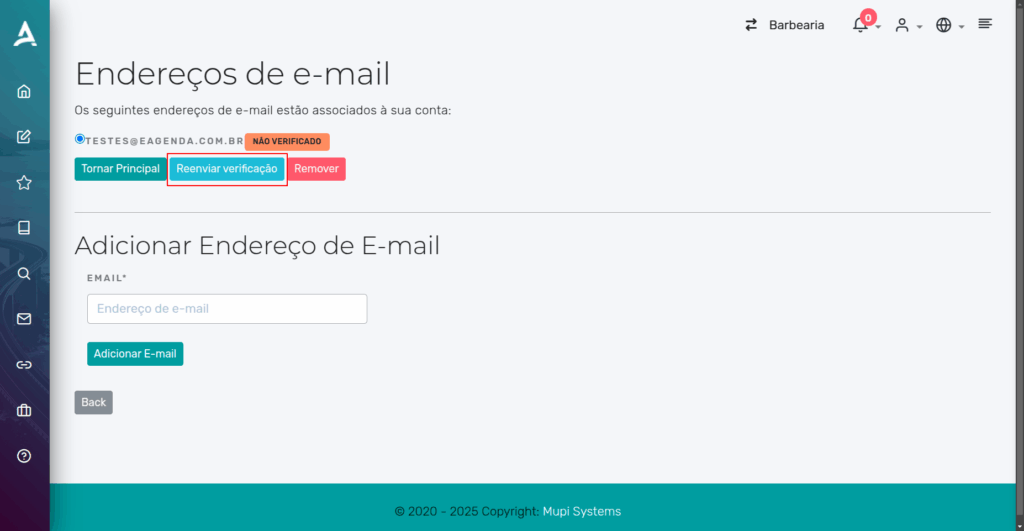
Then, click on “Resend Verification”.
After clicking the confirmation link received by email, you will be redirected to the email address confirmation page. Click “Confirm”.
Enabling Two-Factor Authentication
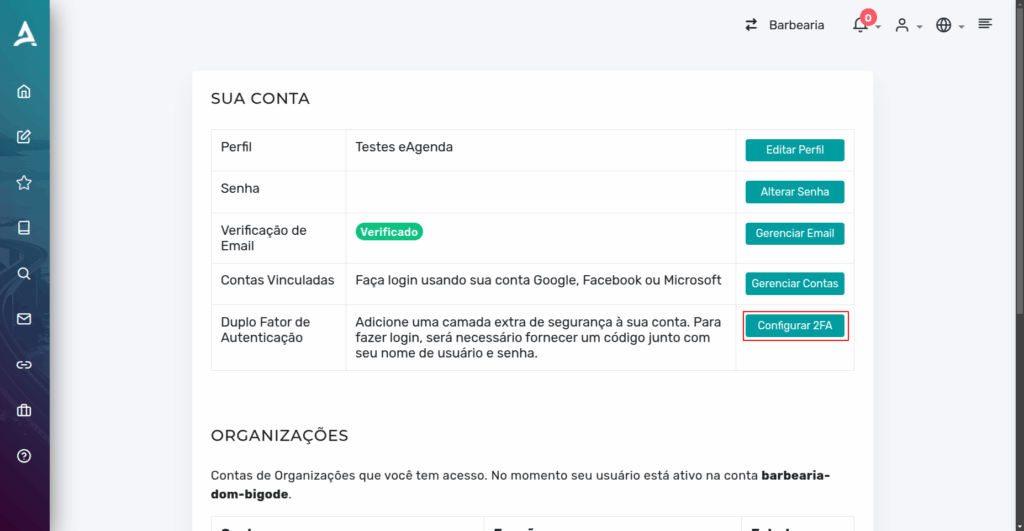
Back on the “Your Account” page and with your email verified, click on “Configure 2FA”.
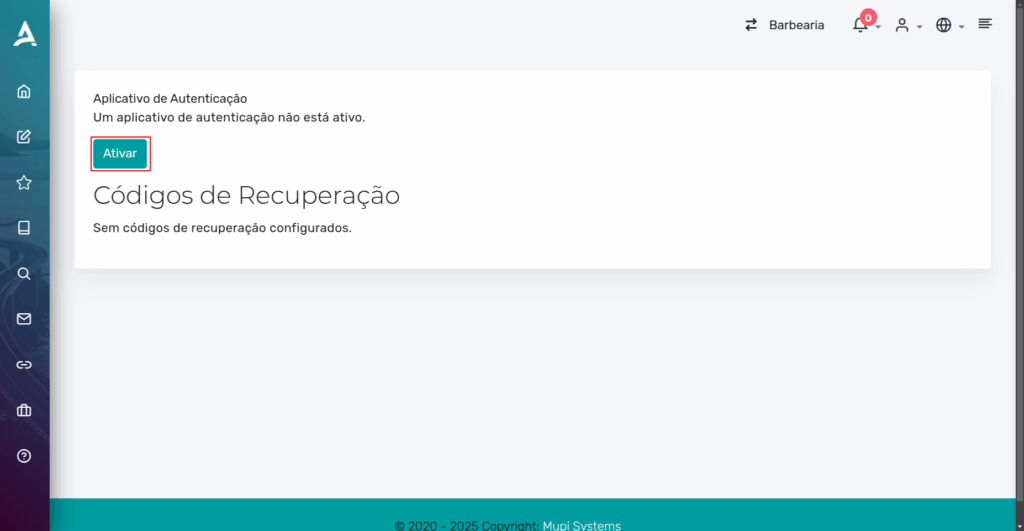
After clicking “Configure 2FA”, you will be redirected to the authentication page. There, click “Activate”.
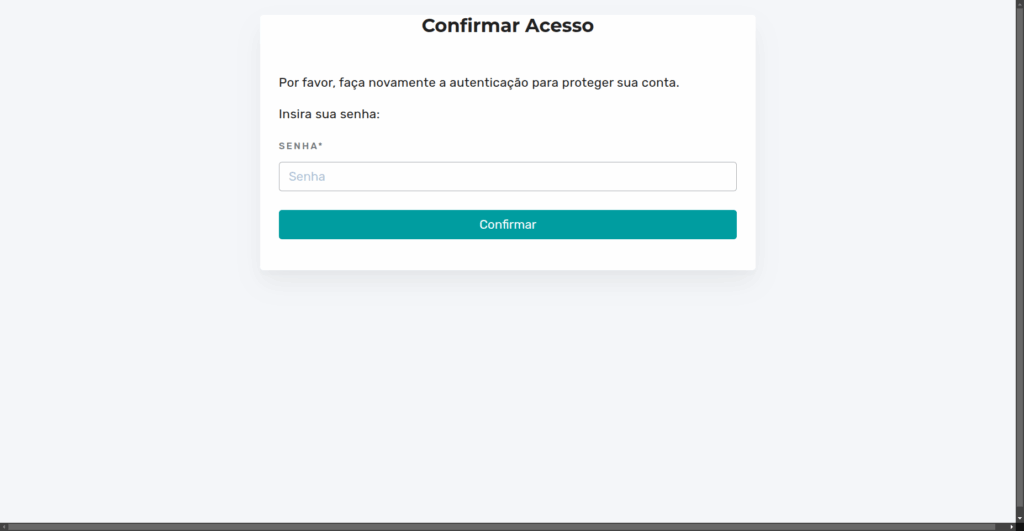
Next, your account access password will be requested. Enter your password and click “Confirm”.
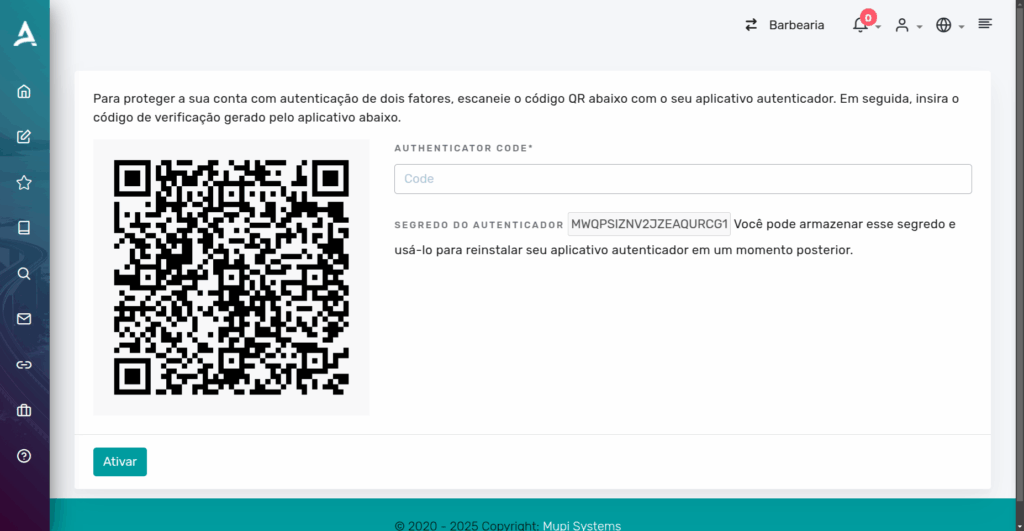
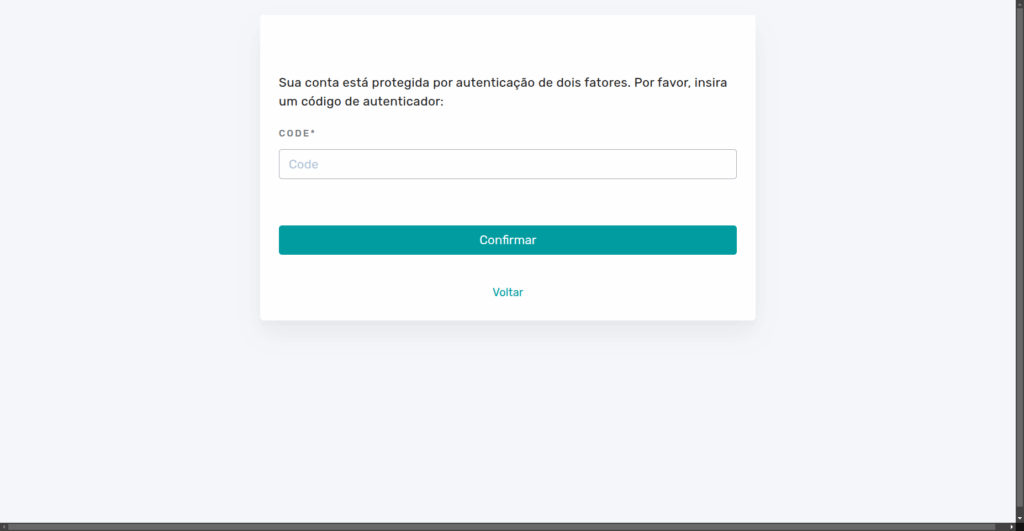
After confirming your password, scan the QR Code with an authenticator app (such as Google Authenticator or Microsoft Authenticator) and enter the authentication code generated by the app in the “Authenticator Code” field.
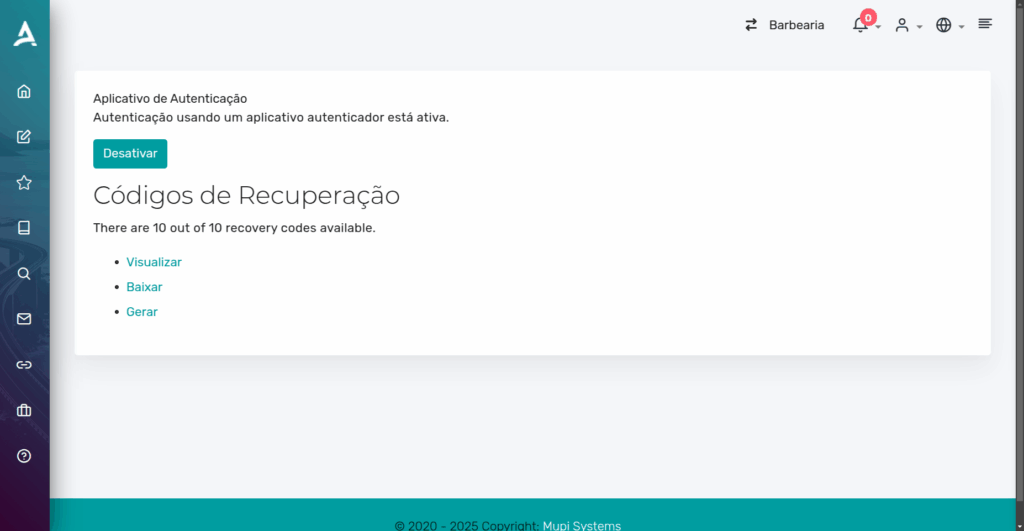
After entering the code generated by the app, the system will generate 10 recovery codes. Done! Two-factor authentication (2FA) is now enabled.
IMPORTANT: You need to access your account’s general settings and enable the 2FA requirement.
Enabling the 2FA Requirement
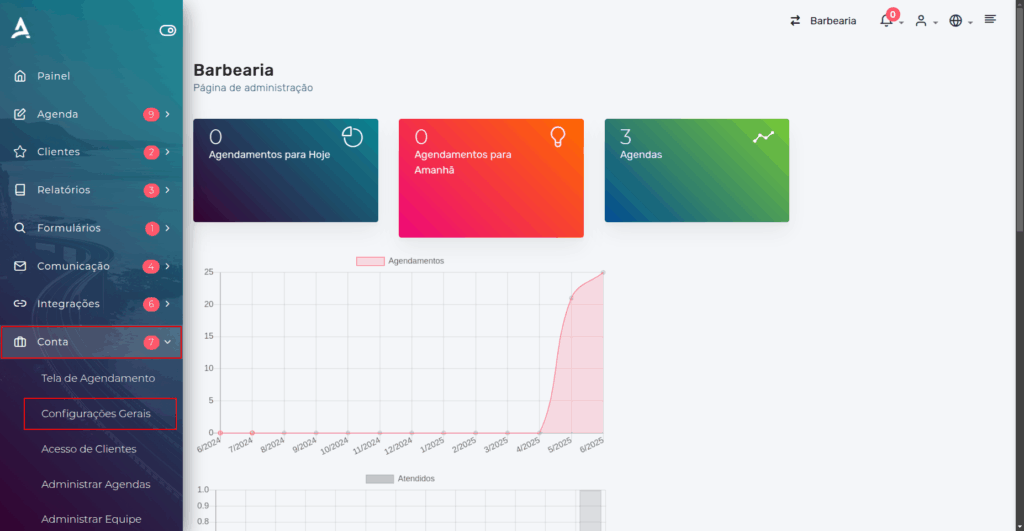
In the side menu, click on Account → General Settings.
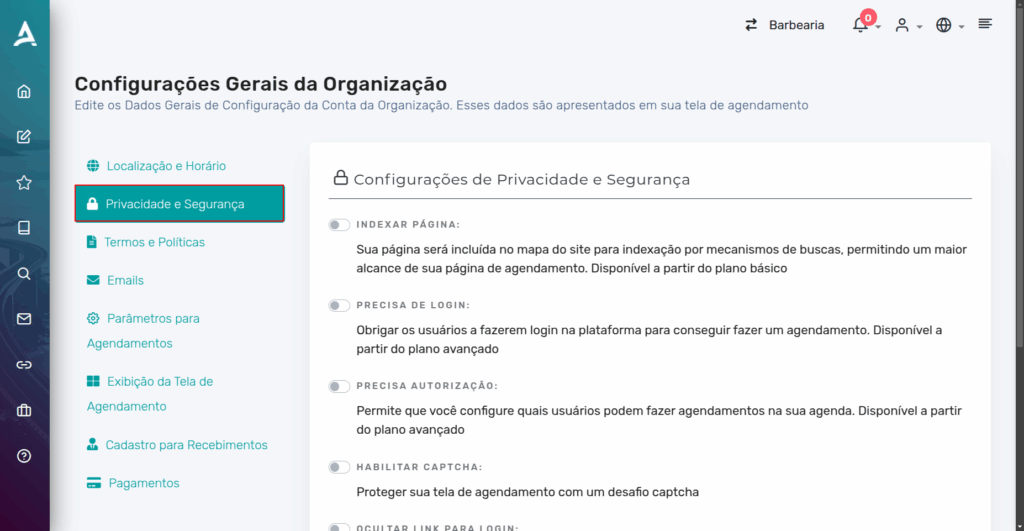
You will then be redirected to the Organization General Settings page. On this page, access the “Privacy and Security” tab.
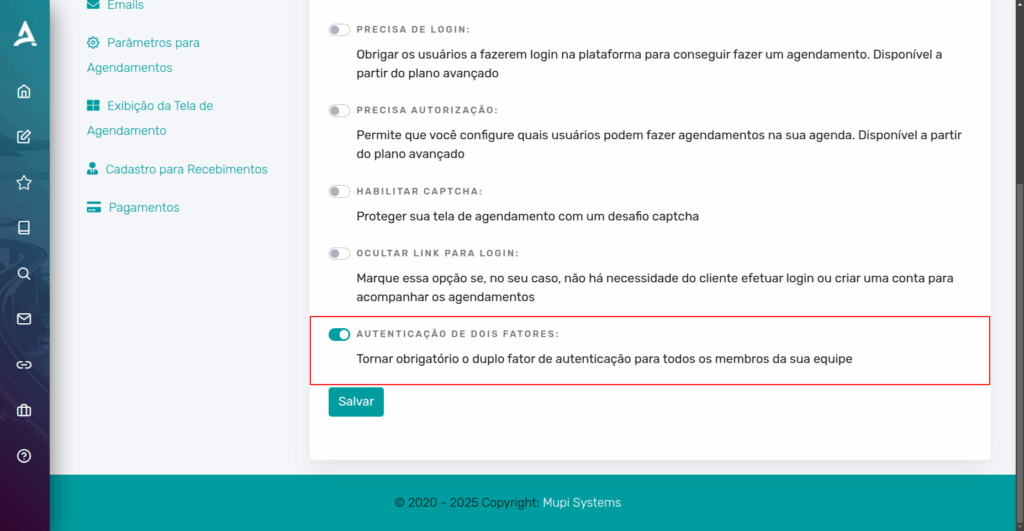
After accessing the Privacy and Security tab, scroll to the bottom of the page and enable the Two-Factor Authentication option, then click Save.
Done! Now every time your account is accessed, the authentication code will be requested.
Conclusion
In summary, in this tutorial you learned how to configure Two-Factor Authentication (2FA) on the Mupi Systems platform to increase your account security. Initially, you need to verify your email by accessing the profile panel, clicking “My Account,” and confirming the link sent by email. With your email verified, you can enable 2FA on the “Your Account” page, using an authenticator app such as Google or Microsoft Authenticator to scan the QR Code, enter the generated code, and save the provided recovery codes.
Finally, to make 2FA mandatory, you must access “General Settings” in the “Account” menu, go to the “Privacy and Security” tab, activate the Two-Factor Authentication option, and save the changes, ensuring that all account access requires the authentication code, protecting it against unauthorized access.
Mupi Systems offers various technological solutions for all types of businesses. Discover our platforms that bring innovation to the market.
Get in Touch or Learn More
We are here to help! Access our official channels:
📞 WhatsApp : [Click here to send us a message] 🌐 eAgenda Platform : [Discover eAgenda] 🏢 Our Company : [Mupi Systems – Innovative Solutions] 📧 Email : [contato@mupisystems.com.br] 📚 Tutorials and Documentation : [Access our guides and tutorials]