How to Manually Add an Appointment in eAgenda
In this tutorial, we will show you how to manually add an appointment. You will learn how to select the client, choose the service, and set the date and time for the session. This method is ideal when you need to add appointments quickly without relying on links. By following the steps below, you will be able to register appointments easily and efficiently.
Step by Step: How to Add an Appointment
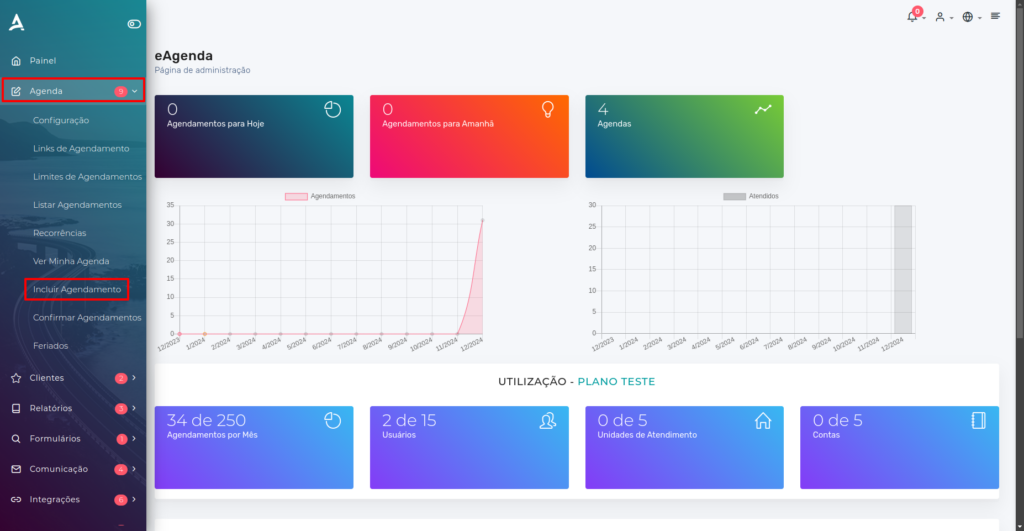
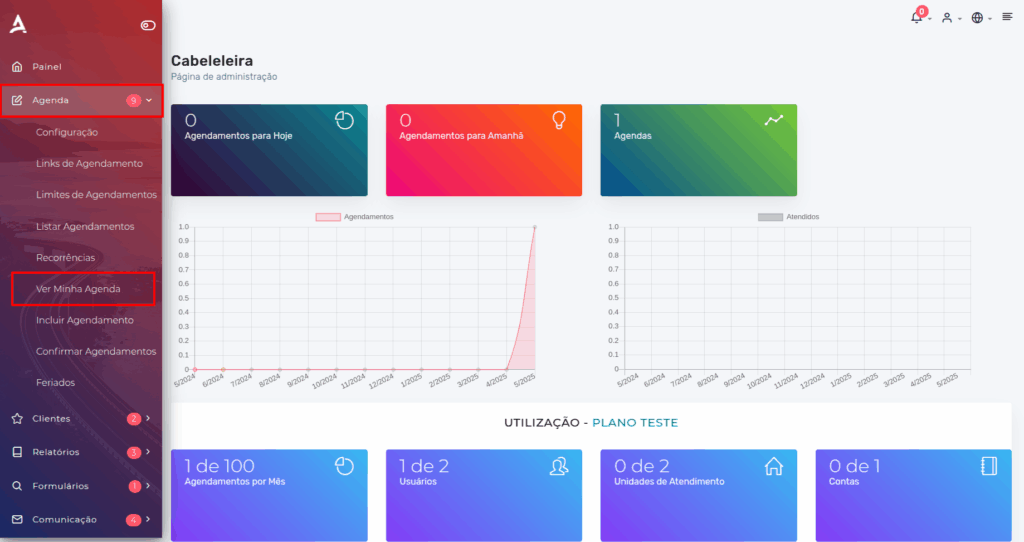
- Open the Side Menu, click on Calendar → Add Appointment;
You will be redirected to the New Appointment screen. On this screen, you will need to fill in the fields to create a manual appointment.
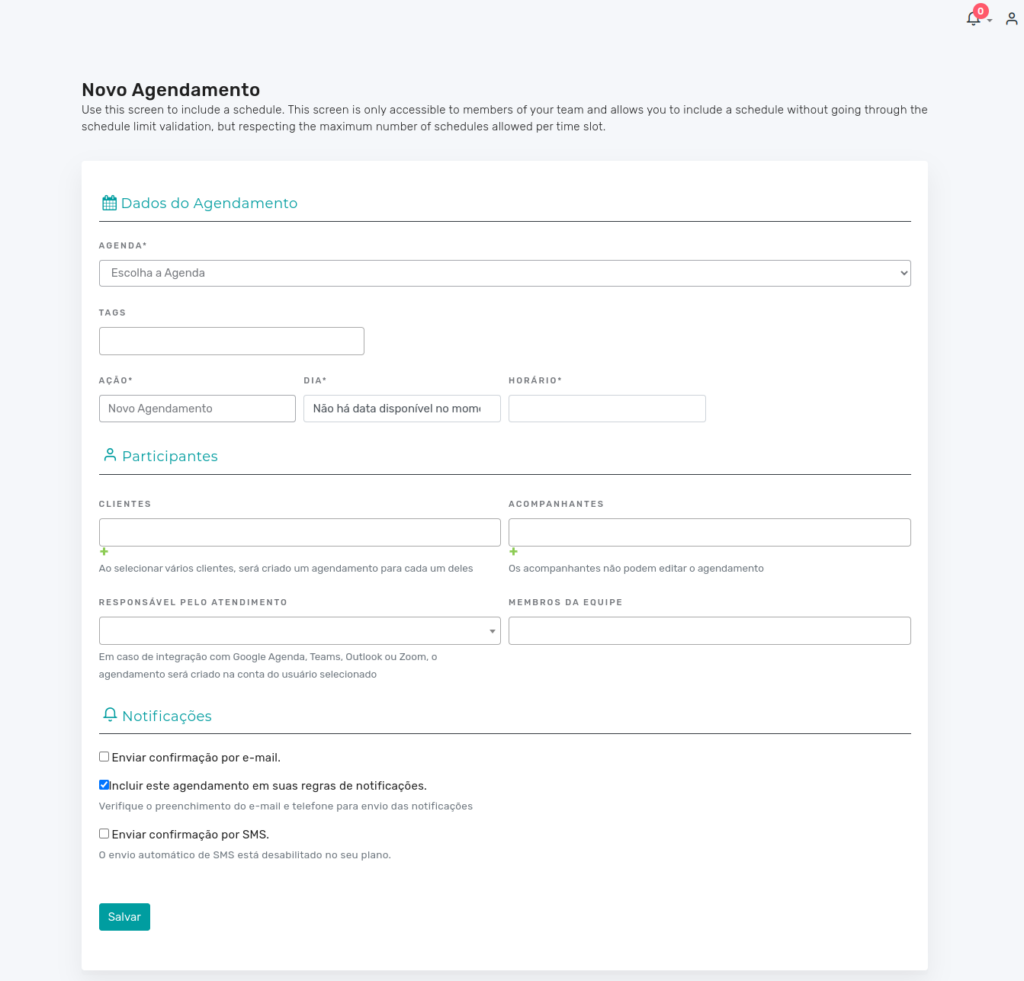
Filling in the Fields
It is worth noting that the only required fields on this screen are: Calendar, Action, Date, and Time.
- Calendar:
- In this field, you will choose the desired calendar. E.g.: Calendar 1.
- Service:
- In this field, you will select the desired service. E.g.: Manicure.
- The Service field will only appear if there are one or more services linked to the calendar.
- Action:
- In this field, you will select the desired action: New Appointment or Fit into Time Slot.
- Date:
- In this field, you must select the date for the appointment.
- Time:
- In this field, you will set the time for the appointment.
- Clients:
- In this field, you will select one or more clients to be served at the desired date/time.
- To add a new Client, simply click the ”+” icon.
- Companions:
- In this field, you will select one or more companions who will attend along with the client at the scheduled date/time.
- To add a new Companion, simply click the ”+” icon.
- Person Responsible for the Session:
- In this field, you must select who will conduct the session.
- Another responsible person will only appear if there is another user. Configuring users.
- Team Members:
- In this field, you can select one or more members who may attend the session/meeting.
Notification Rule
When creating an appointment, you can choose to send a confirmation via email if you have selected a client with a linked email address, or include this action in your notification rules to customize the process according to your preferences.
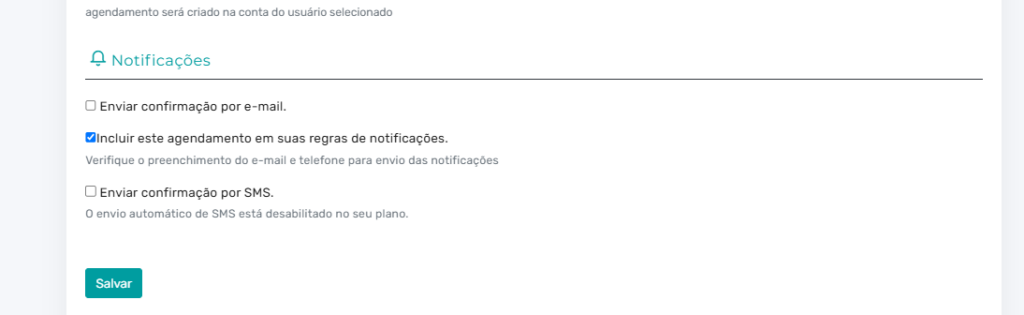
After configuring the settings as desired, simply click Save.
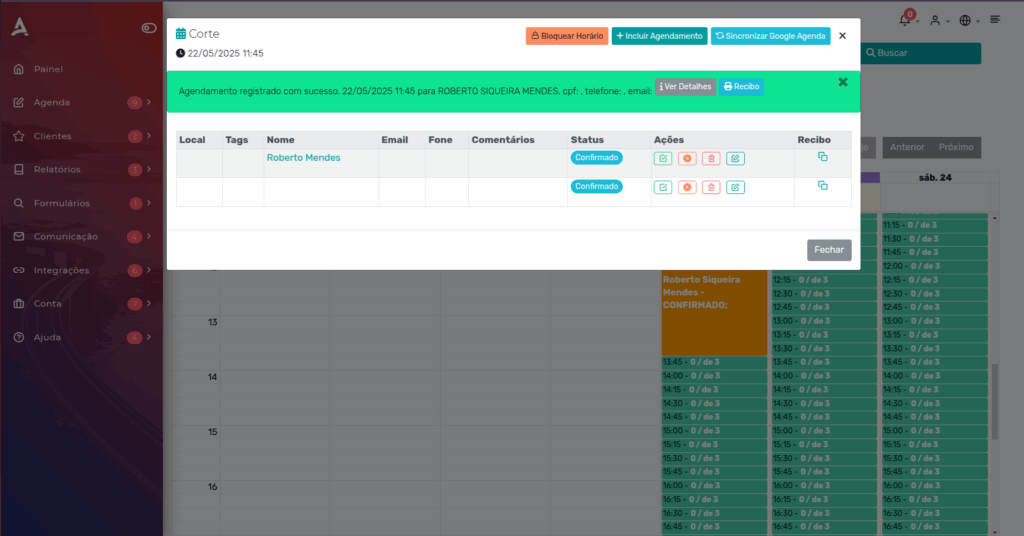
Receipt
After clicking “Save”, a green alert will appear on the screen confirming that the appointment was successfully created. Additionally, the client will automatically receive the receipt by email if configured.
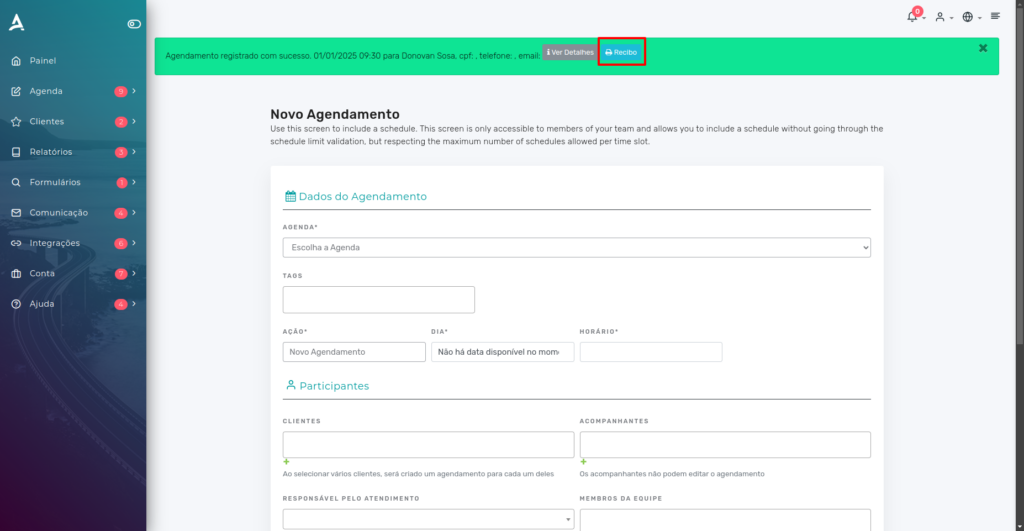
If you prefer to share the receipt another way, click the Receipt option and send the link directly to the client.
Adding an Appointment via the Calendar
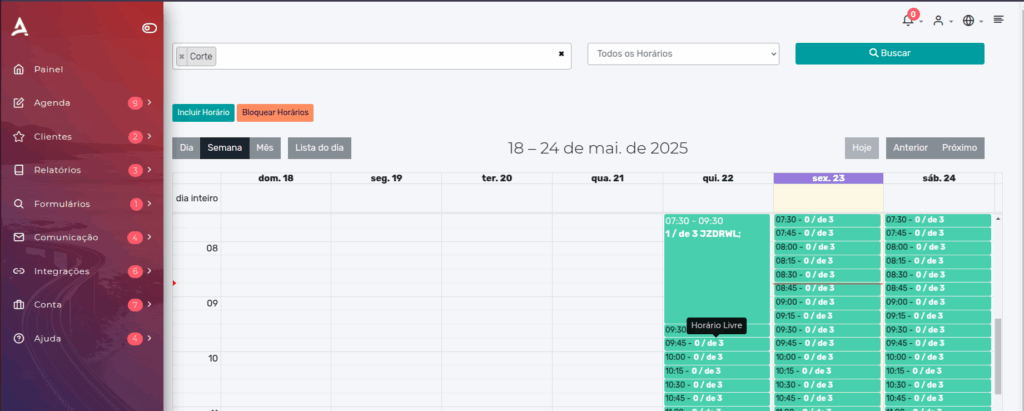
Open the Side Menu, click on Calendar → View My Calendar;
Click on the time slot and select the desired time to add the appointment.
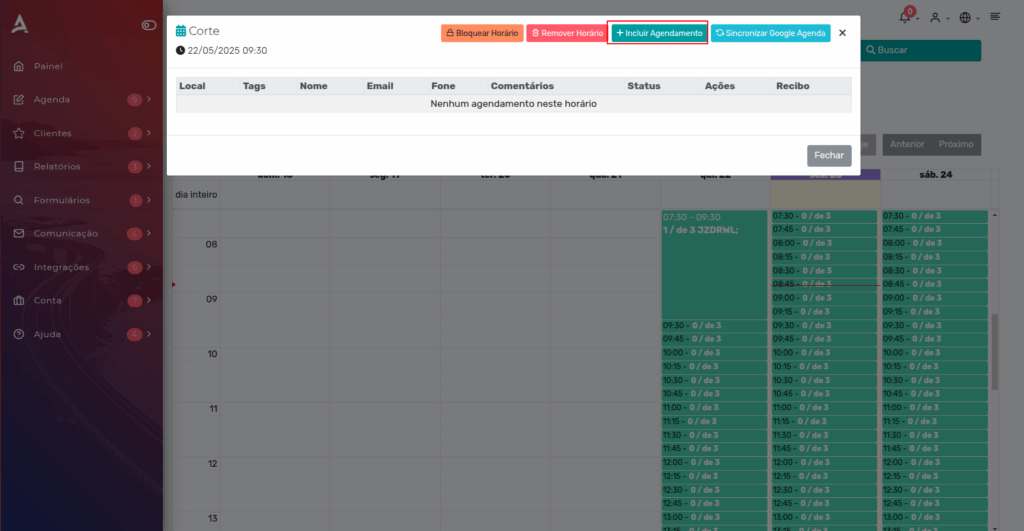
After that, a window will appear with some information and options for that time slot. Select ‘Add Appointment’.
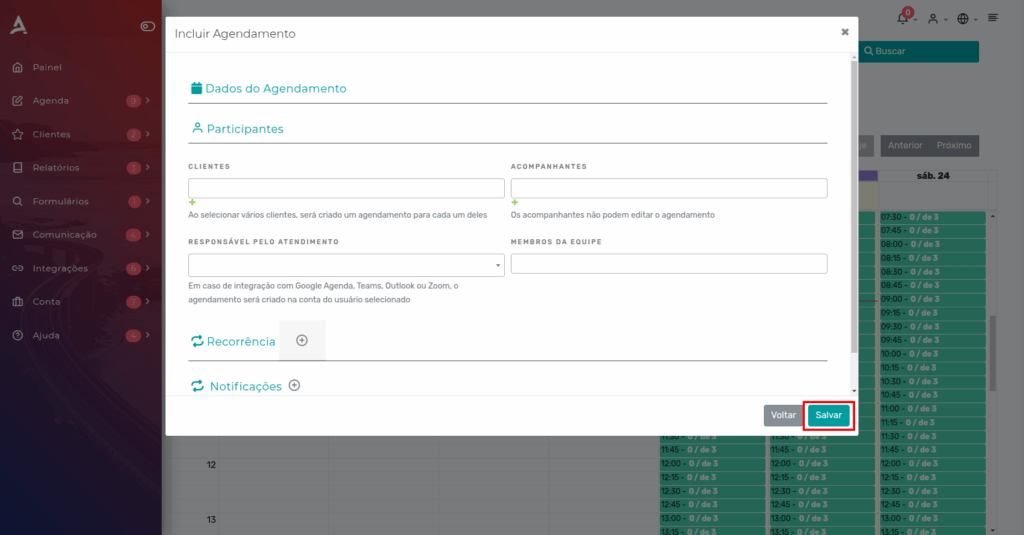
Fill in the appointment details and then select ‘Save’.
The appointment was successfully created! You can also issue the appointment receipt if needed.
With this method, you can view the available time slots and choose the best option for your team and the client.
In summary, in this tutorial you learned how to manually add appointments — a useful option when the client does not book through a link or is not familiar with the platform. Take the opportunity to visit our Blog to answer other questions, or check out our YouTube channel.
Mupi Systems offers a range of technology solutions for all types of businesses. Discover our platforms that bring innovation to the market.