Client Guide: How to Schedule an Appointment on eAgenda
In this tutorial, we present the eAgenda Scheduling Screen, a tool designed to simplify the organization and completion of appointments in an agile and efficient manner. Developed with a focus on user experience, this feature allows anyone to schedule an appointment intuitively by simply accessing the link provided by the administrator.
Making a New Appointment
When you access the scheduling link provided, you will be directed to a screen with required fields. Fill them in correctly to confirm your appointment and ensure access to the service.
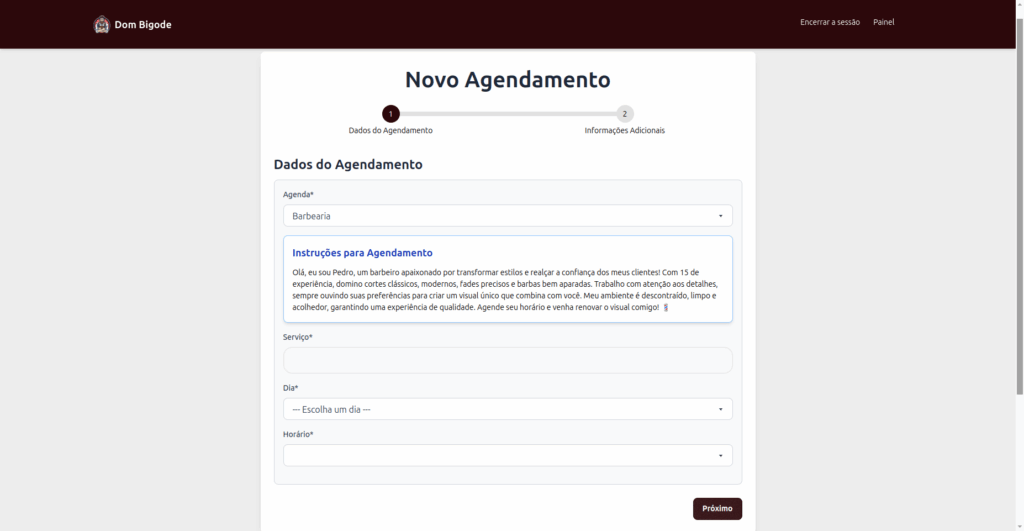
- “Schedule” Field:
- Generally, a schedule is already automatically selected based on the link sent by the administrator.
- In some cases, you may change the schedule and choose another one available for booking.
- “Service” Field:
- This field will only appear if the schedule configured by the administrator has registered services.
- A schedule may offer multiple services or none, depending on the configuration.
- Read the scheduling instructions:
- Before proceeding, check whether the administrator has provided instructions or important information about the scheduling process.
- These instructions may include details about the service or specific guidelines.
- Date and time selection:
- Choose an available day and time on the schedule to complete the booking.
- Available times will be displayed according to the schedule configuration.
After filling in the information, click the “Next” button to proceed to the next step of the scheduling process.
Personal Information
In this step, you must fill in the required information to complete the appointment. The “Full Name” field is always mandatory. Other fields, such as phone number, email, or additional data, may vary according to the settings defined by the schedule administrator.
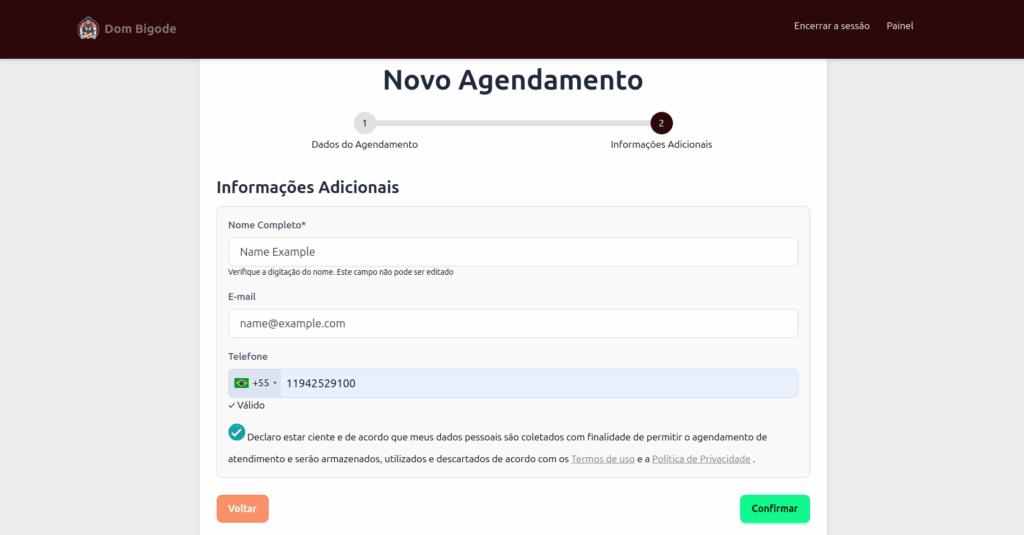
After filling in the information, confirm the Terms and Conditions of Use and click Submit. You will then be redirected to the Appointment Confirmation, where you can view all details of the appointment, including the address for in-person services or the video conference link if the appointment is online.
Appointment Confirmation
In this step, you will have access to the data you filled in on the previous forms. This data will be displayed so you can review it and, if necessary, correct any information before completing the appointment.
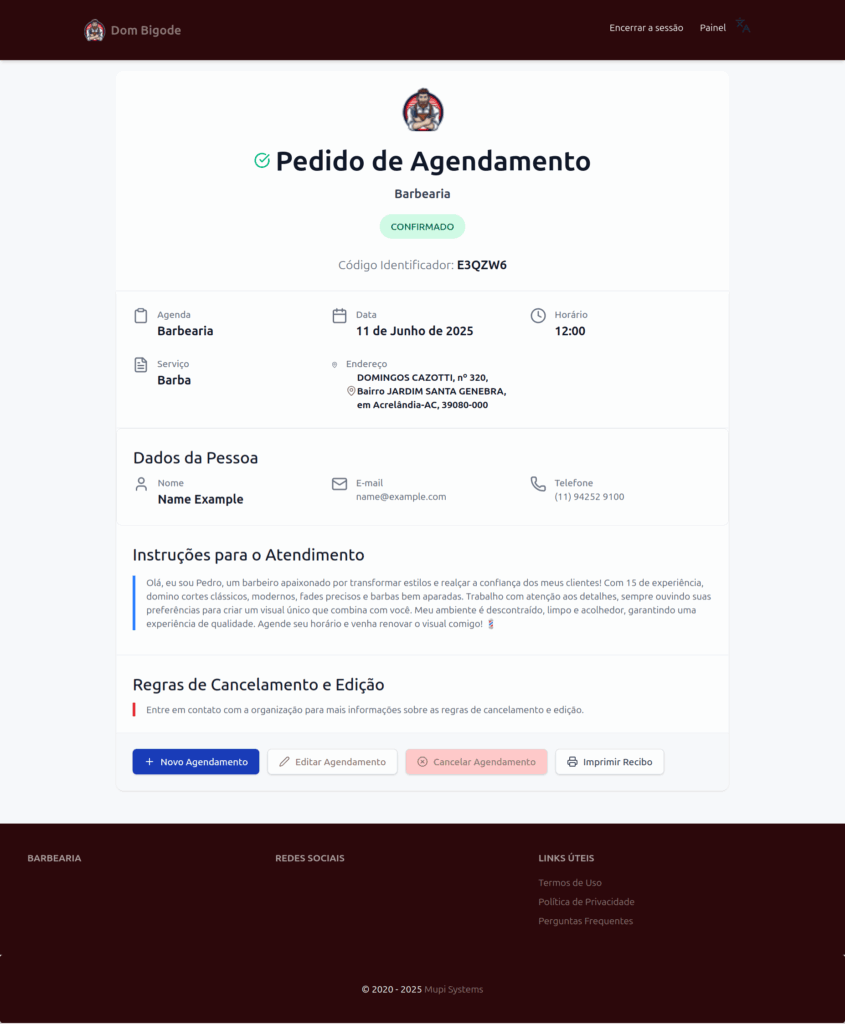
- Appointment Confirmation: When redirected to the confirmation page, you will see that the appointment was successfully made.
- In the default configuration, appointments are confirmed automatically.
- In some schedules, the administrator may configure manual confirmation, leaving the status as “Pending Confirmation”.
- Confirmation Sent by Email: If you provided an email during booking, a copy of the confirmation will be sent to your email.
- Confirmation Page Options: On the confirmation page, you can:
- Edit appointment details, such as date, time, and personal information.
- Cancel the appointment.
- Sync the appointment with other calendars.
- Print the confirmation, which may be necessary to present at the scheduled time.
Edit Appointment
By clicking Edit, you can view the previously filled information. If needed, you can adjust your personal data or change the appointment date and time.
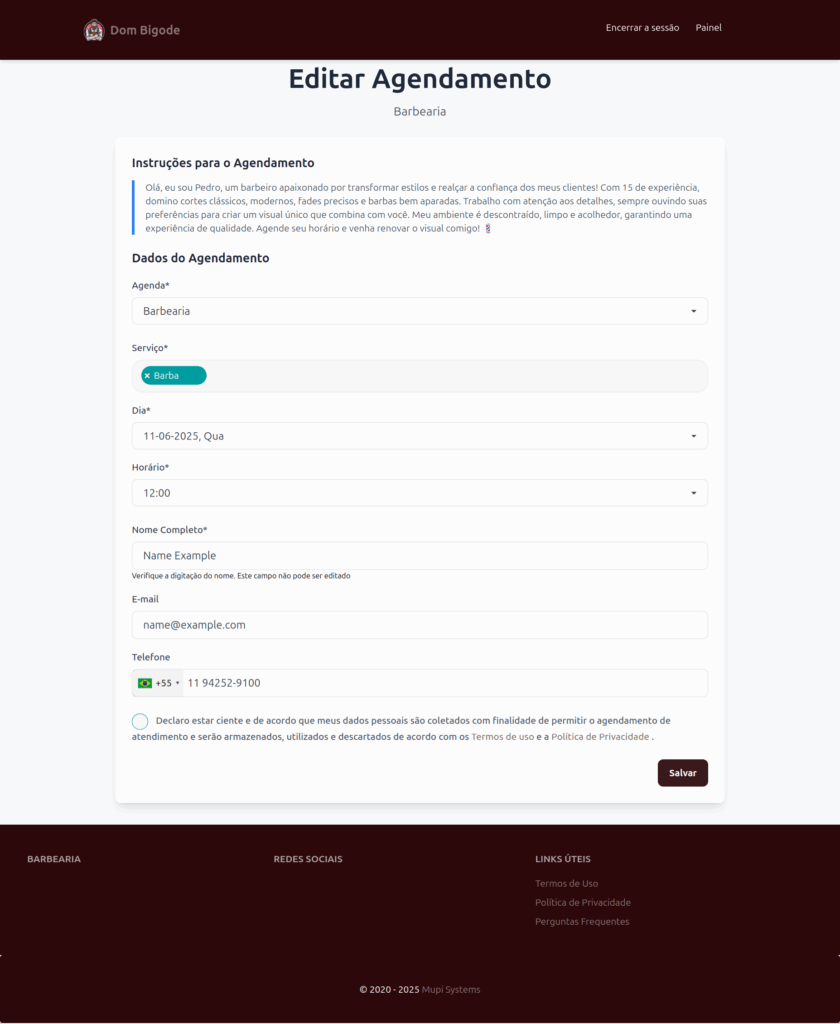
Please note that, in some cases, the appointment may not be editable. The administrator has the option to define in the schedule settings whether appointments can be modified after confirmation.
Cancel Appointment
To cancel an appointment, click “Cancel” and you will be redirected to a confirmation screen. There, you can confirm the action and complete the cancellation process quickly and easily.
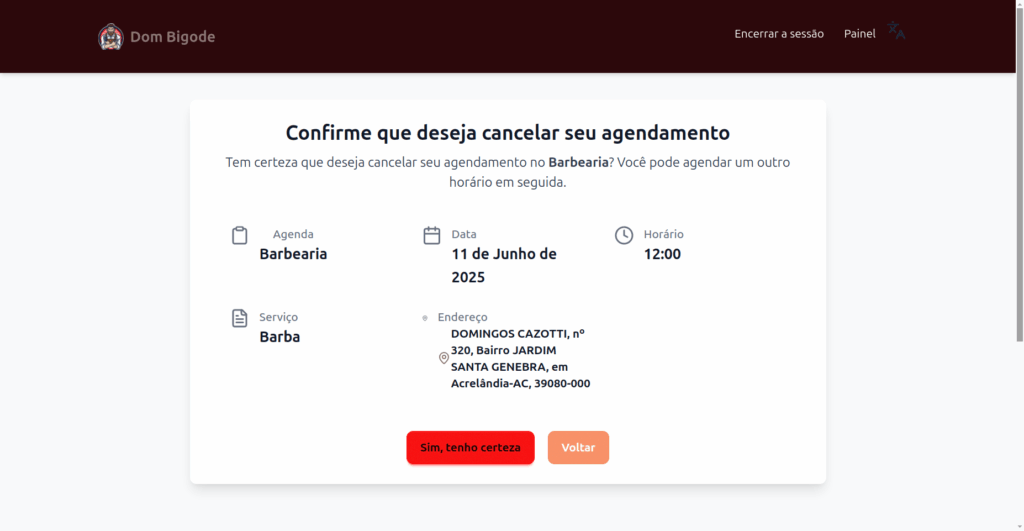
The administrator may also define specific rules for cancellation. For example, it may be configured that cancellation is only allowed up to 24 hours before the scheduled time; after that, cancellation will not be possible.
By clicking “Yes, I’m sure”, your appointment will be cancelled. If you prefer not to cancel, simply click “Back”.
Email Follow-up
As mentioned earlier, if you provide your email during booking, you will typically receive an email with the appointment information. Through this email, you can track the appointment status, access the confirmation, and, if necessary, edit information or even cancel the appointment. Below is an example of how the email will be sent:
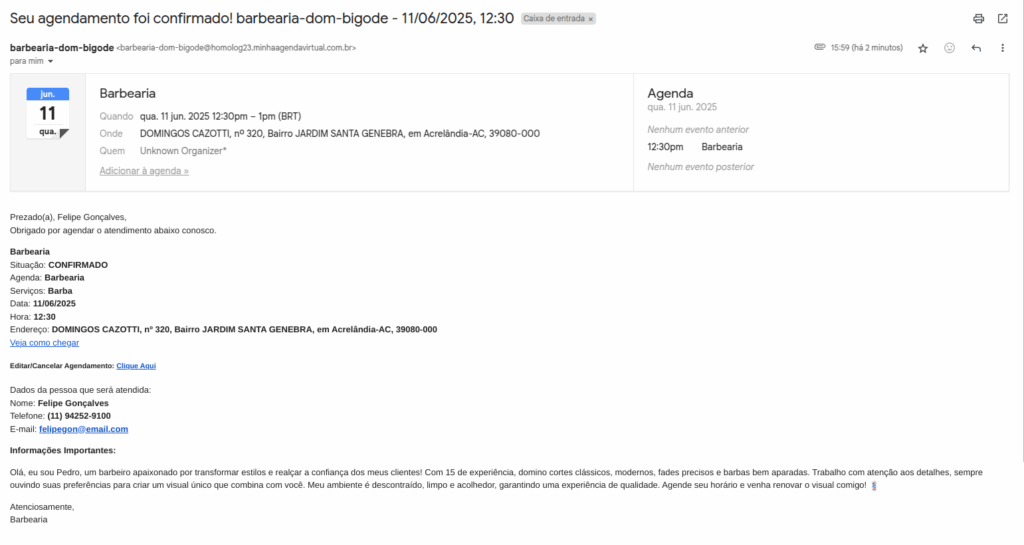
In cases of cancellation or changes to the appointment, you may also receive these updates by email, as well as satisfaction surveys. Additionally, some administrators may configure notification rules via WhatsApp. In that case, the same information will be sent to the number you provided, offering even more convenience and speed in communication.
Conclusion
In summary, in this tutorial you learned how to make a new appointment by filling in required fields such as “Schedule” and “Service”, selecting an available date and time, and providing personal information. We also covered how to review the appointment confirmation, edit or cancel the appointment, and track updates via email or WhatsApp, according to the administrator’s settings.
Mupi Systems offers various technological solutions for all types of businesses. Discover our platforms that bring innovation to the market.
Get in Touch or Learn More
We are here to help! Access our official channels:
📞 WhatsApp : [Click here to send us a message] 🌐 eAgenda Platform : [Discover eAgenda] 🏢 Our Company : [Mupi Systems – Innovative Solutions] 📧 Email : [contato@mupisystems.com.br] 📚 Tutorials and Documentation : [Access our guides and tutorials]