How Client Self-Scheduling Works
In an increasingly digital world, autonomy and convenience have become decisive factors in the relationship between clients and businesses. Today, no one wants to waste time on lengthy message exchanges or phone calls to book a simple appointment. The modern consumer values agility, clarity, and the ability to resolve everything with just a few clicks.
It is in this scenario that online scheduling, done by the client themselves, establishes itself as an indispensable solution. By allowing each person to choose their time slot directly and autonomously, the process eliminates communication errors, avoids scheduling overlaps, and brings more efficiency to professionals’ daily routines.
Available 24 hours a day, this feature ensures that the client can book an appointment at the most convenient time, without depending on the company’s business hours. In addition to saving team time, the system creates a smooth, modern experience that is more aligned with the expectations of today’s audience.
The result? Organized schedule management, fewer operational failures, and a much more positive perception of value for the client, who feels confidence and professionalism from the very first contact.
Step by Step: How to Make an Appointment
On eAgenda, the client has two practical ways to make an appointment:
- Through the link shared by the company – the client directly accesses the scheduling link and chooses the service, professional, and available time slot.
- Through their profile on the platform – when the company creates a profile for the client, they can access the platform with their credentials, view their appointment history, and book new time slots quickly and in an organized manner.
After accessing one of the options above, the client will see the following screen:
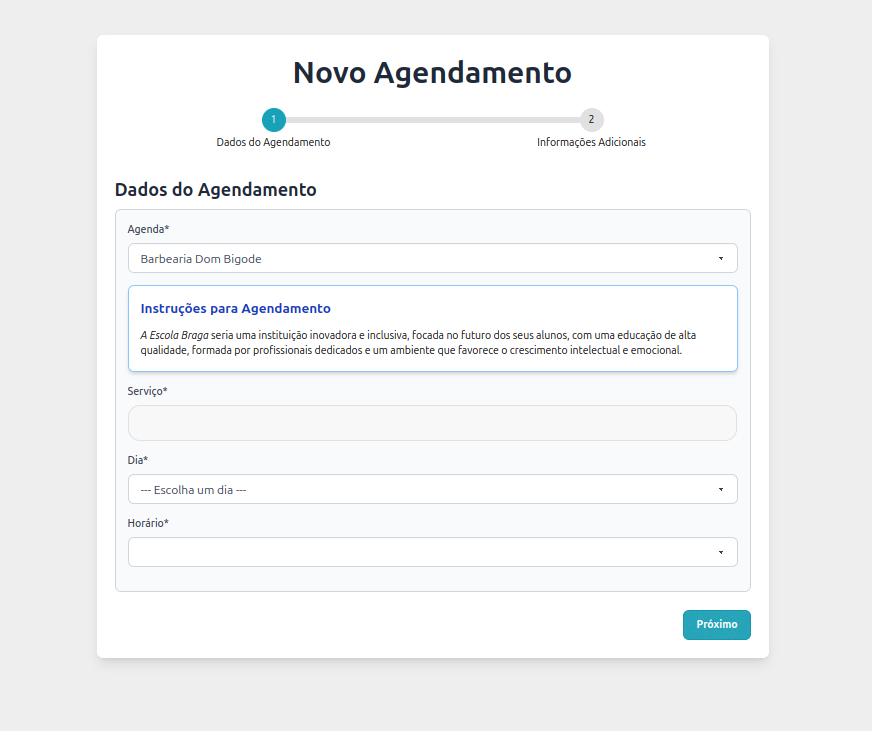
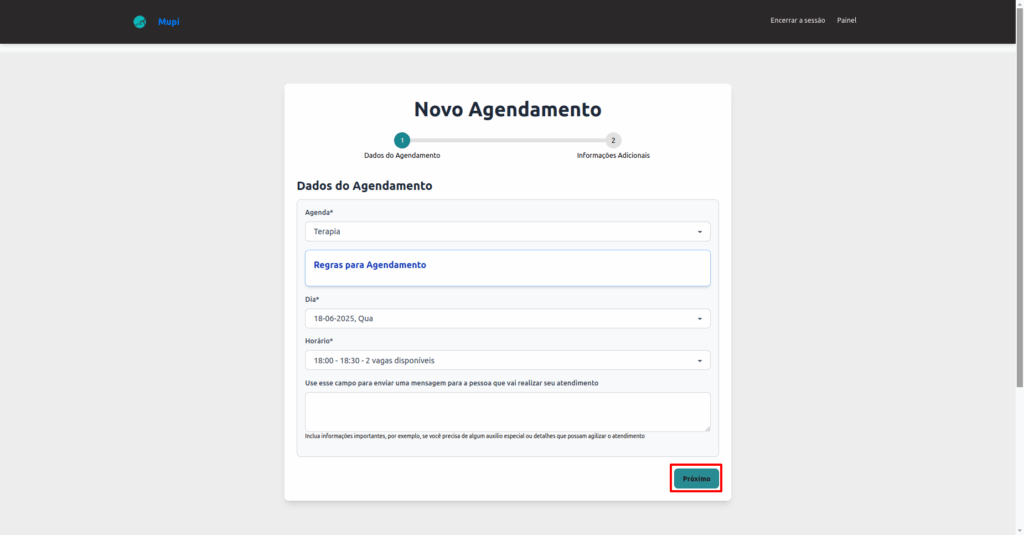
On the scheduling screen, the client needs to follow a few simple steps to complete the booking:
- Select the desired Schedule – if the provided link is general and includes multiple schedules, the client must choose the one that corresponds to the desired service or professional.
- Choose the Service – if different types of services are available, the client must select the one they wish to book.
- Select the Date and Time – the client chooses the day and time that best fit their availability, checking the actually free time slots.
- Confirm the choice – after selecting schedule, service, date, and time, the client must click “Next” to proceed with finalizing the appointment.
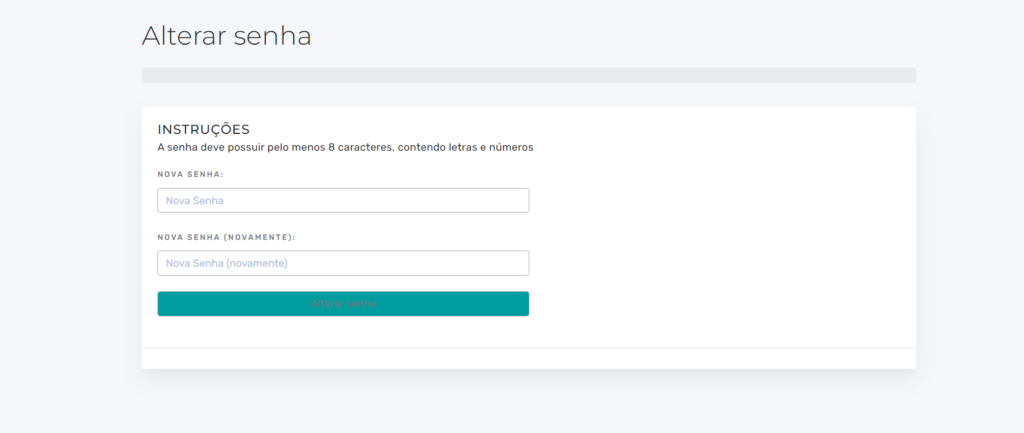
2. Register your password using the link provided in the email.
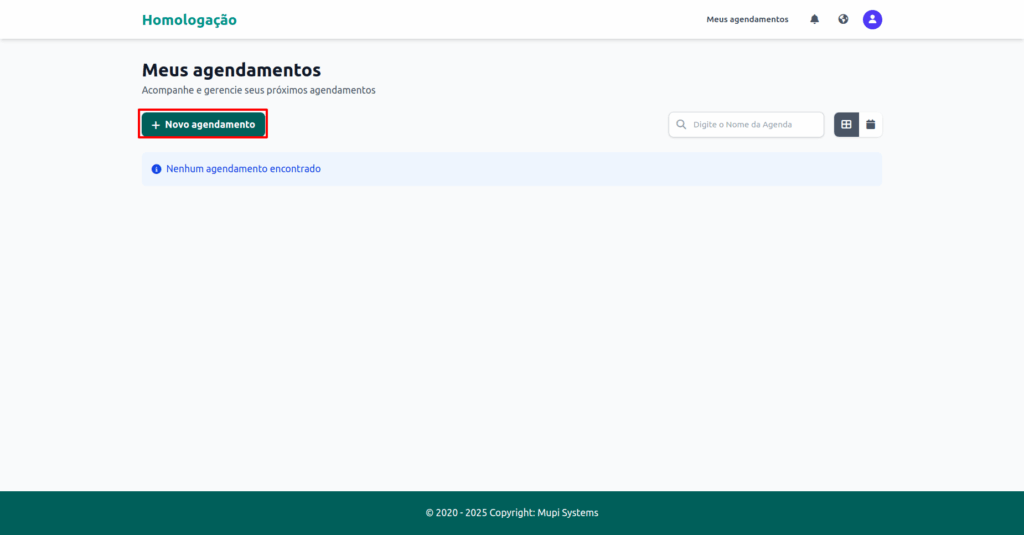
3. The page will be redirected to “My Appointments”. Click on New Appointment.
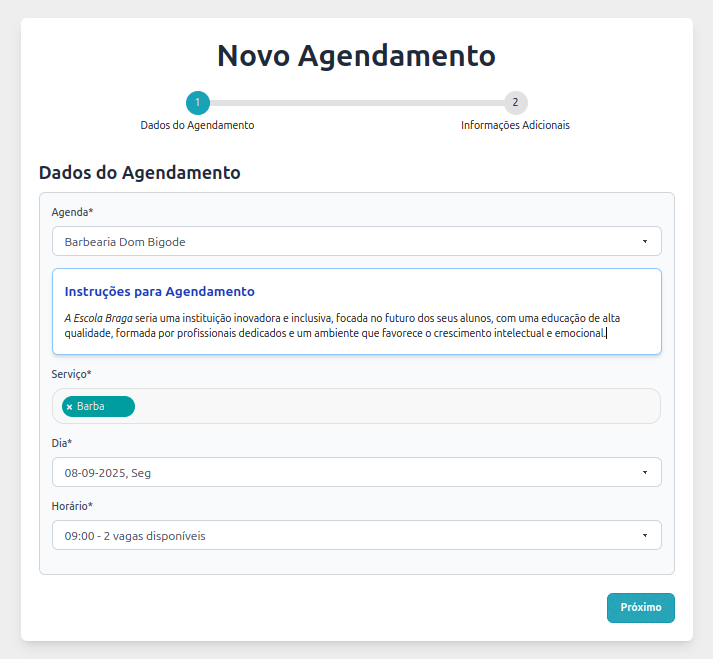
5. The page will be redirected to New Appointment with available times and days. Select the desired schedule. Click on the time slot on your preferred day. Review the details and click Next.
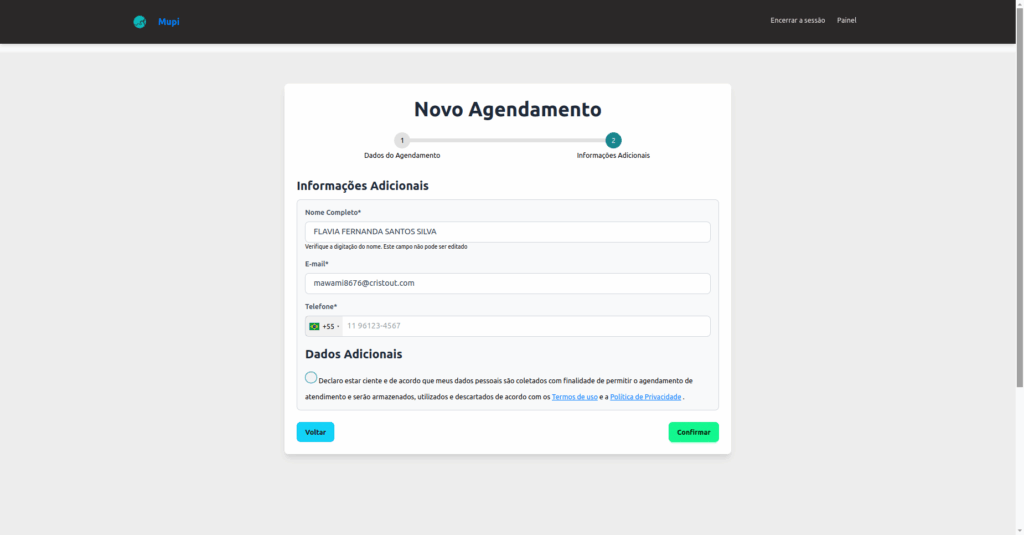
Fill in your personal information correctly.
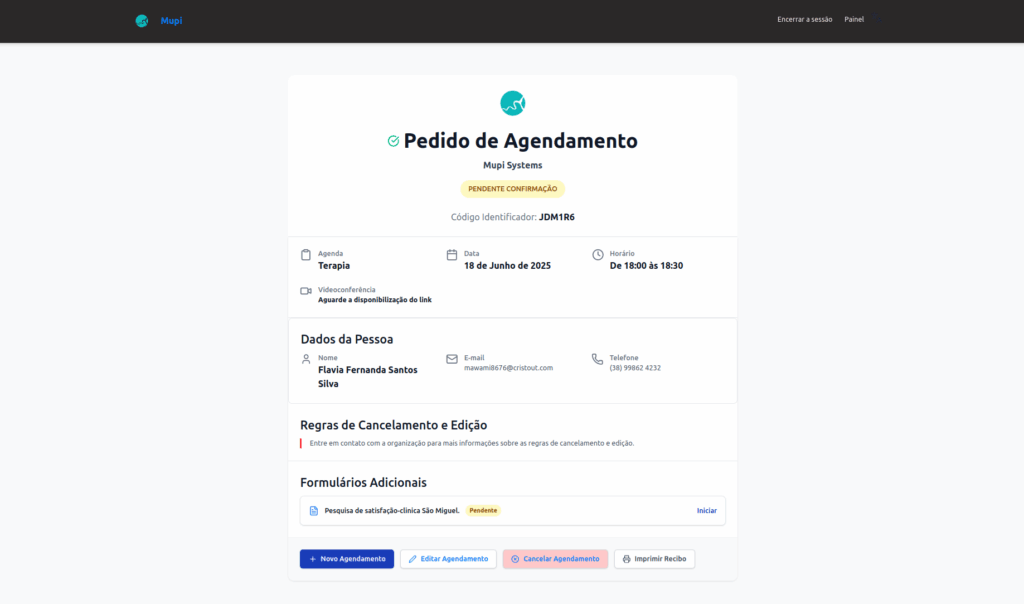
6. The Appointment Confirmation will be displayed.
Useful Information
- On the New Appointment screen, there is a field to send a message to the person who will be handling your appointment;

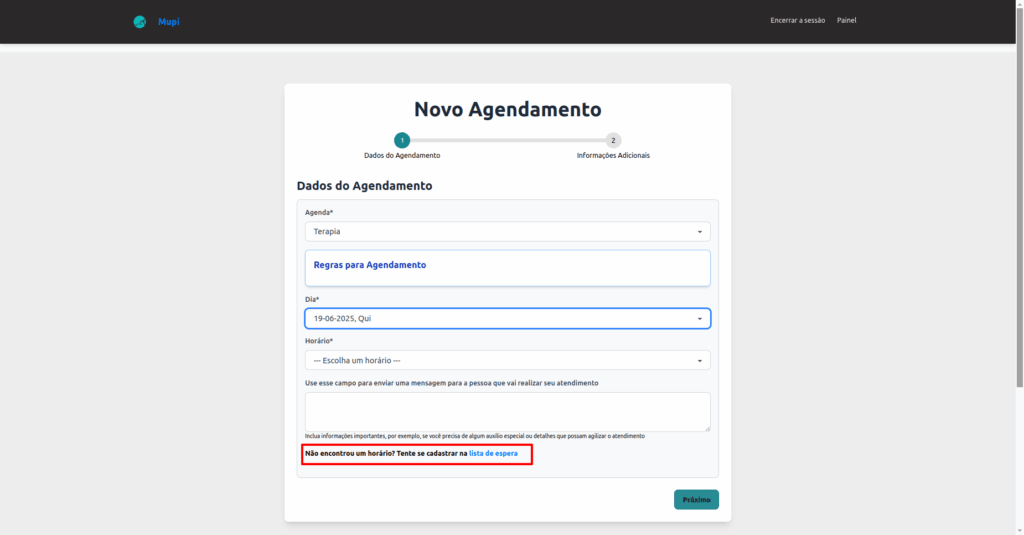
- If you have not found a suitable time slot, you can sign up for the waiting list. The link is available on the Schedule screen and on the New Appointment screen.
Take advantage and visit our Blog to answer your questions.
Get in Touch or Learn More We are here to help! Access our official channels:
WhatsApp : Click here to send us a message
eAgenda Platform : Discover eAgenda
Our Company : Mupi Systems – Innovative Solutions
Email : contato@mupisystems.com.br
Tutorials and Documentation : Access our guides and tutorials