How to Enable and Configure the Waitlist
On the eAgenda and Minha Agenda Virtual platforms, you can enable waitlists on your calendars. This feature is especially useful when a customer wants to book a time slot that is already taken. In such cases, they can sign up for the waitlist and wait for the desired time slot to potentially become available.
Additionally, the calendar administrator has full control over the waitlists and can:
- View who is waiting for service easily.
- Convert a “waiting” status into an actual appointment, quickly and conveniently, whenever availability arises.
In this post, we will explain in detail how to activate and use this feature, so you can make the most of the resources offered by our platforms.
Step by Step: How to Configure the Waitlist
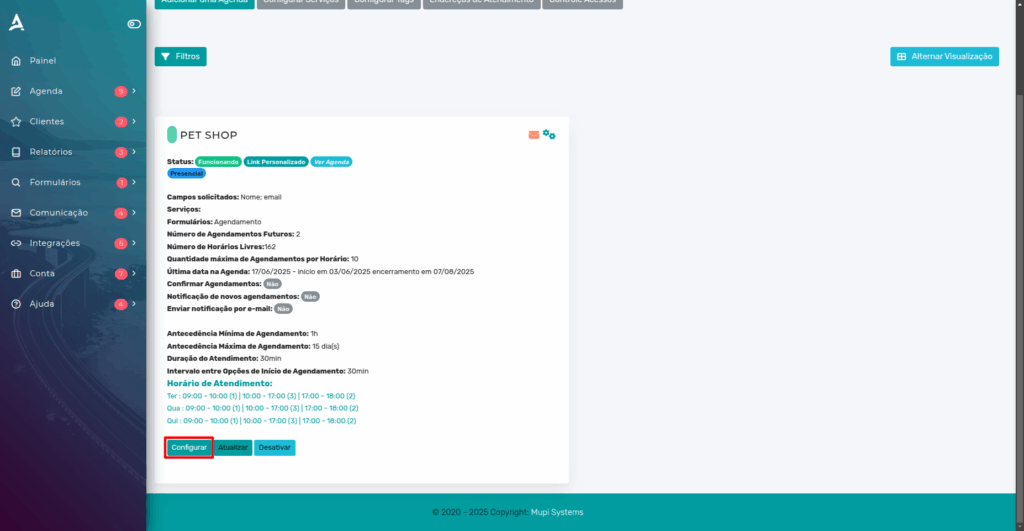
To activate the waitlist, access the menu: Calendar → Settings.

Then, access the settings of the desired calendar to continue the process.
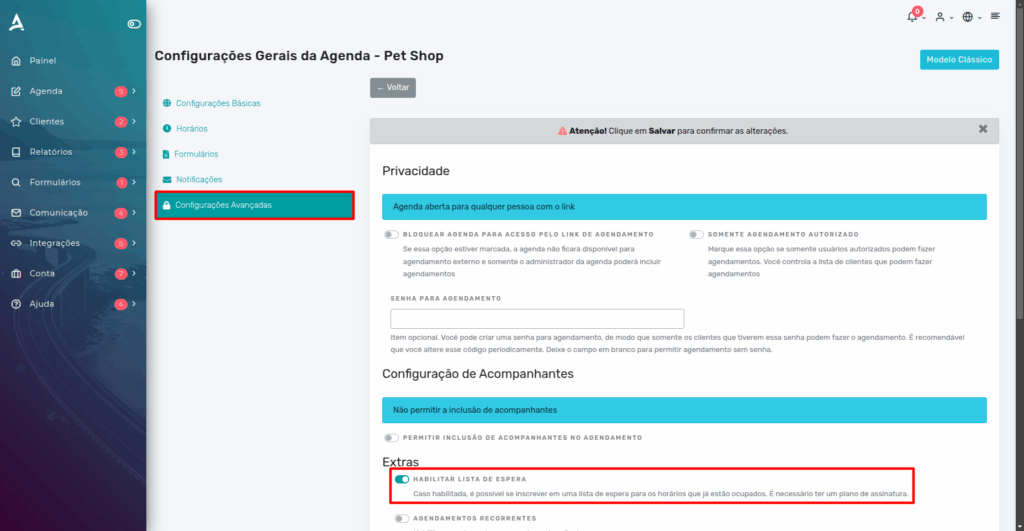
After the previous step, locate and access the Advanced Settings tab and, in the Extras section, enable the Enable Waitlist option.
How to Manage the Waitlist
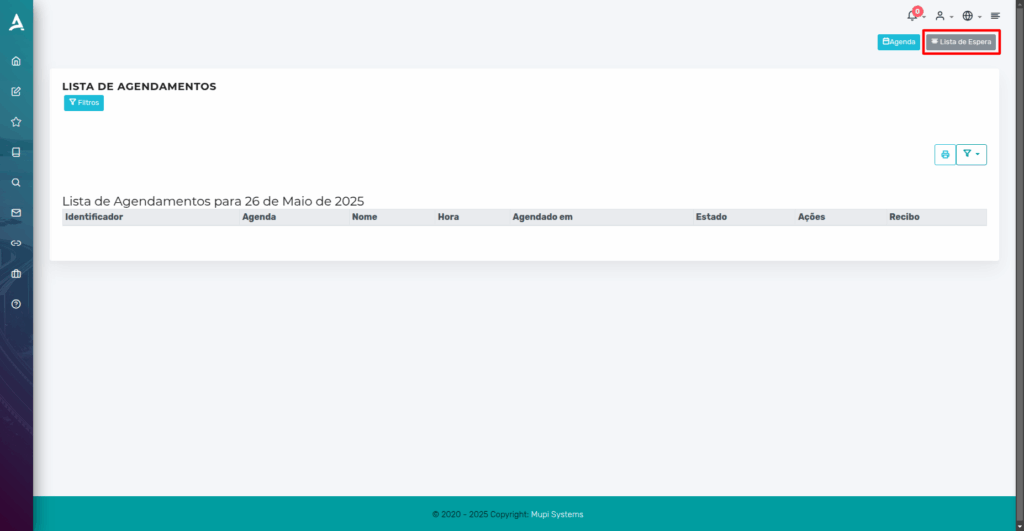
In the side menu, go to Calendar and then List Appointments.

You will be redirected to the Appointment List screen, where you can view all scheduled appointments.
In the upper right corner of the page, you will find the Waitlist option. Click this button to access the list of customers waiting for availability.
This feature is especially useful for managing and organizing customers who want service but were unable to book an immediate time slot, allowing you to optimize the flow of appointments as spots become available.
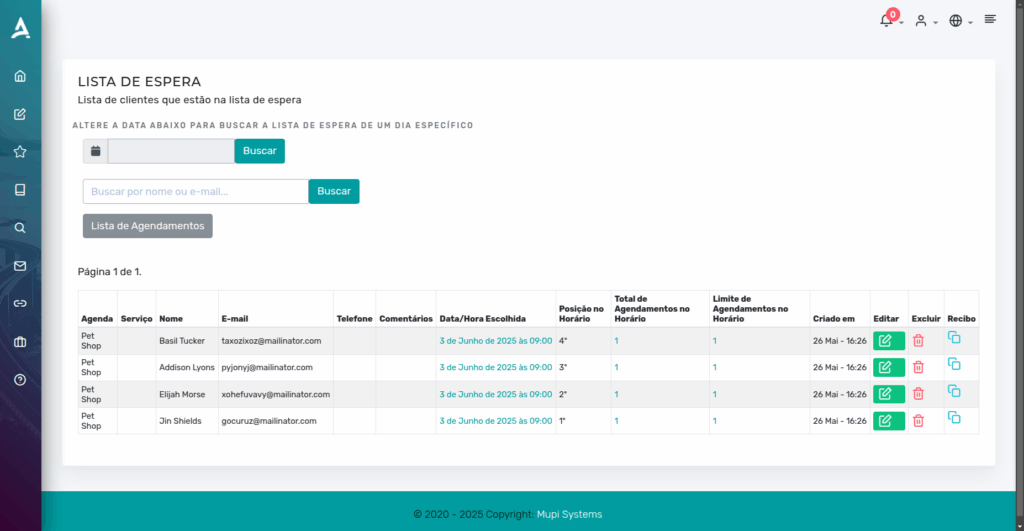
Then, you will have access to the Waitlist, where you can view all customers who are waiting for an available time slot.
Additionally, you will be able to track the priority order of each customer in the queue, making it easier to manage appointments as spots open up in the calendar.
This detailed view allows you to organize and serve customers fairly and efficiently, ensuring that no one is forgotten and that the service flow is optimized as much as possible.
You will also be able to quickly identify which customers have been waiting the longest, enabling faster and more satisfactory service for everyone.
Customer Experience: How It Works
When accessing the scheduling link, if the customer does not find any available time slots on the calendar, they will have the option to sign up for the waitlist.
At that point, the customer can select their desired time slot, registering their interest even when the calendar is full.
This way, if a cancellation or rescheduling occurs for the selected time slot, the system will automatically fit the customer in, ensuring they are served without having to manually monitor slot availability.
Additionally, the customer will receive automatic notifications, keeping them informed in real time and avoiding frustration from lack of response.
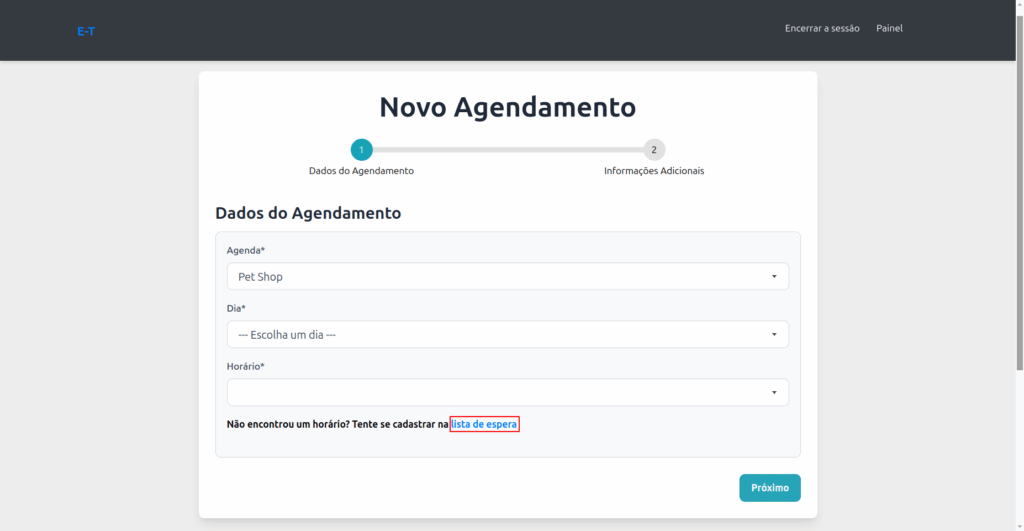
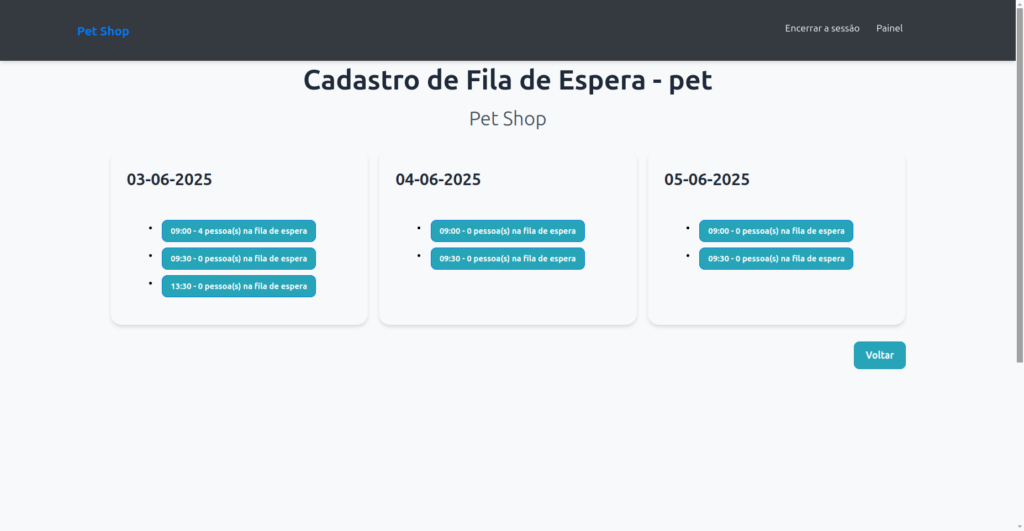
Then, after clicking Waitlist, the customer can select the desired time and date from available options.
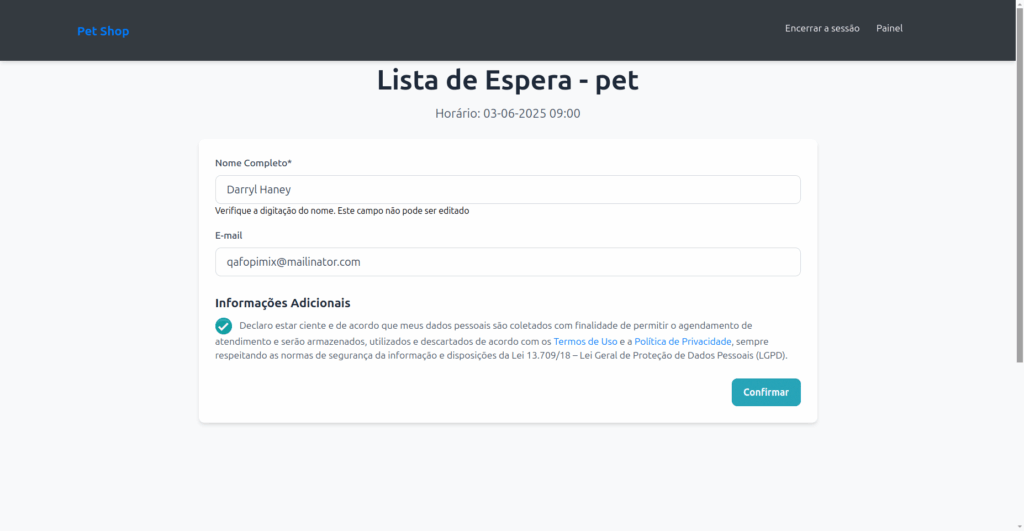
After clicking on a desired time slot, the customer will need to fill in the form fields.
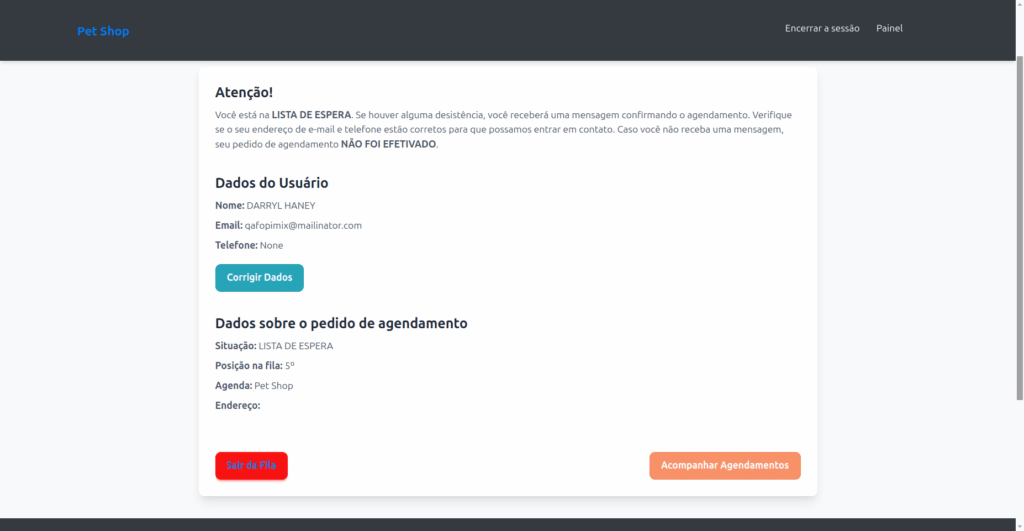
Then, the customer will see the Waitlist confirmation receipt.
Conclusion
In this content, you learned how to enable and manage waitlists on the eAgenda and Minha Agenda Virtual platforms. This feature allows customers to sign up for the waitlist when they cannot find available time slots, ensuring greater chances of being served. We saw that the administrator can view who is waiting and quickly convert a registration into an actual appointment whenever availability arises. As demonstrated, the setup is simple and practical, providing more organization and flexibility for your business. For more tutorials, visit our Blog or our YouTube channel.
Mupi Systems offers various technology solutions for all types of businesses. Explore our platforms that bring innovation to the market.