How to Create and Manage Access Lists on eAgenda
On eAgenda, the access lists feature allows you to control which users can book appointments on specific schedules, with specific restriction rules. This control is especially useful in contexts such as schools, where it is necessary to limit student bookings with certain teachers.
For example, student John may have permission to book up to 5 times with teachers X, Y, and Z. For this, the system generates an exclusive login and password for John, and when accessing the platform, he will only see the schedules authorized for him. It is not possible to make bookings on schedules outside the list, ensuring security and organization in access control.
Check below how to create and configure access lists in the system.
Setting the schedule as an internal schedule (Optional)
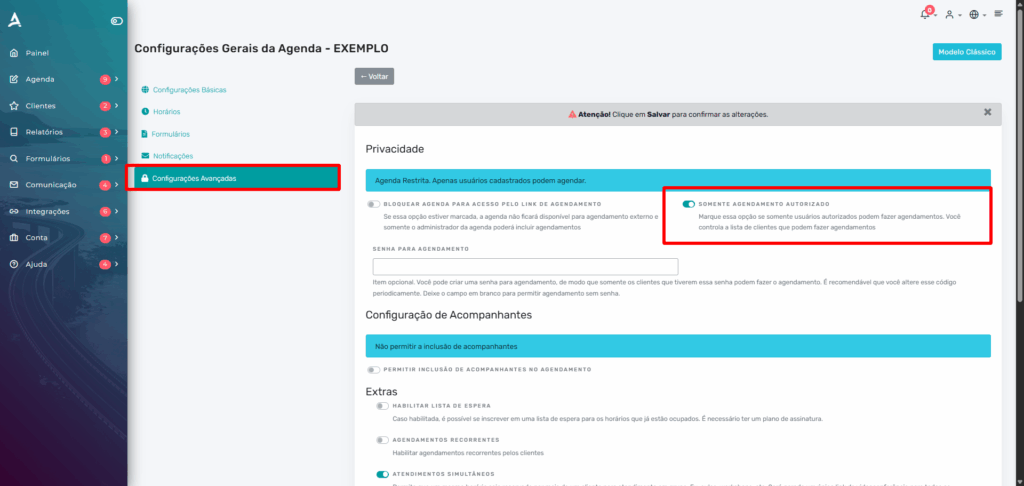
The first step to using access lists is to configure the schedule as internal, meaning it is available only to authorized clients. To do this, you need to restrict the schedule’s access.
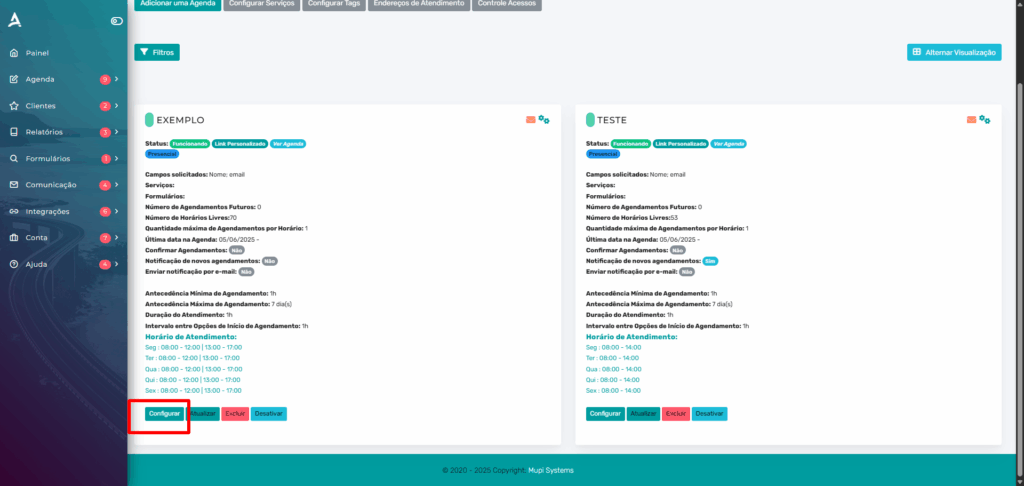
From the home panel, access the side menu and click on Agenda > Settings.

Next, locate the desired schedule in the list and click Configure.
Access the schedule’s advanced settings and enable the option: Authorized booking only. After enabling it, click Save to apply the changes.
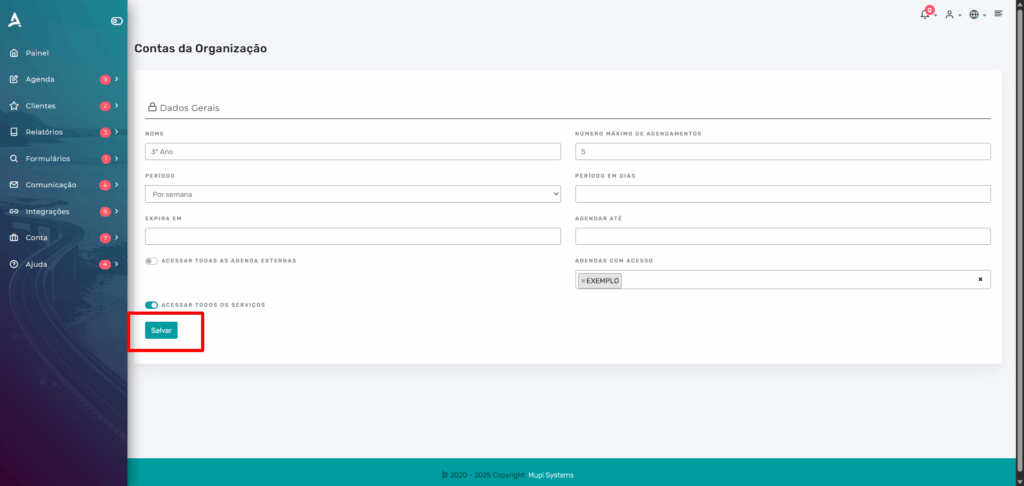
Creating the access list
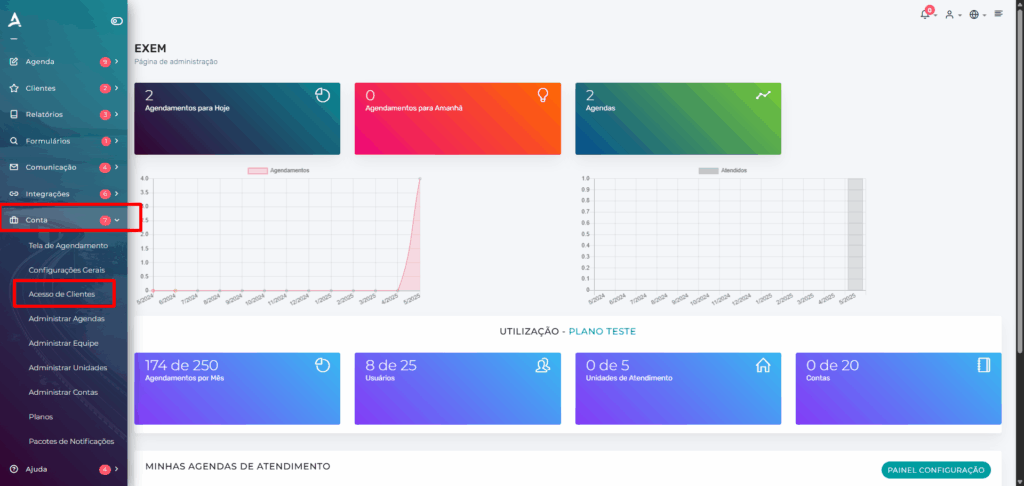
In the side menu, click on Account > Client Access.
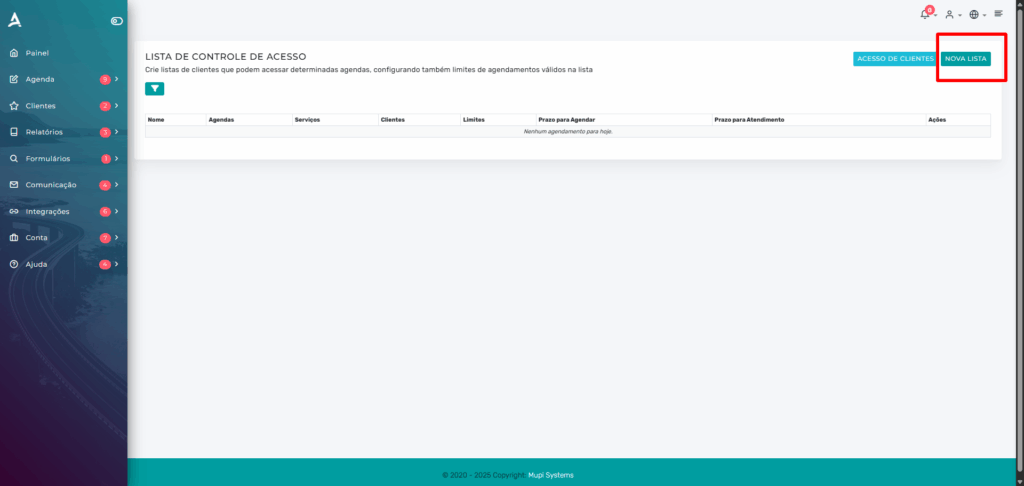
On the next screen, click New List.
On the next screen, you can define a name for the access list and configure the booking restrictions, such as:
- Maximum number of bookings per user
- Allowed booking period in days
- List expiration date
- Booking deadline (book by a certain date)
Additionally, you can select the schedules that will be available for users in this list. After completing the configuration, click “Save” to finish.
Adding clients to the list
After clicking Save on the previous screen, you will be redirected to your access list view. To add a new user, click the people icon located above the desired list.
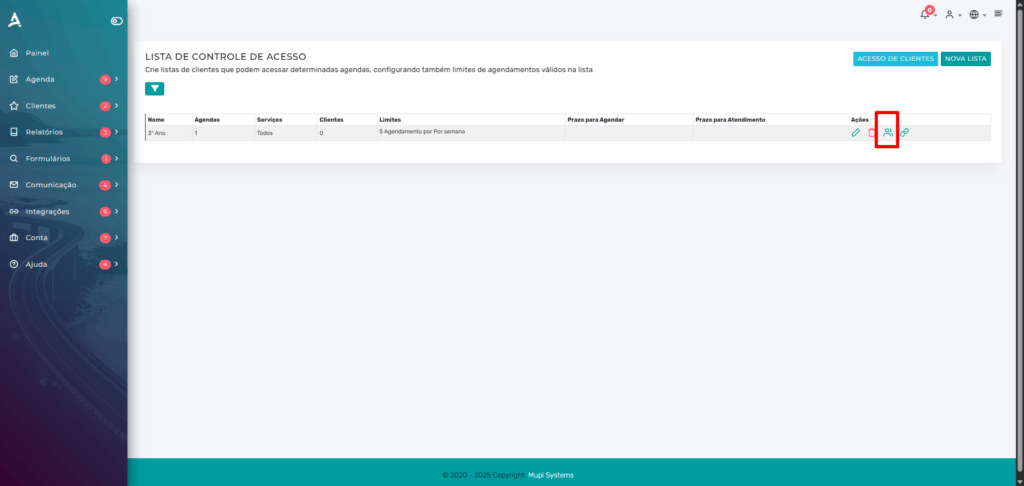
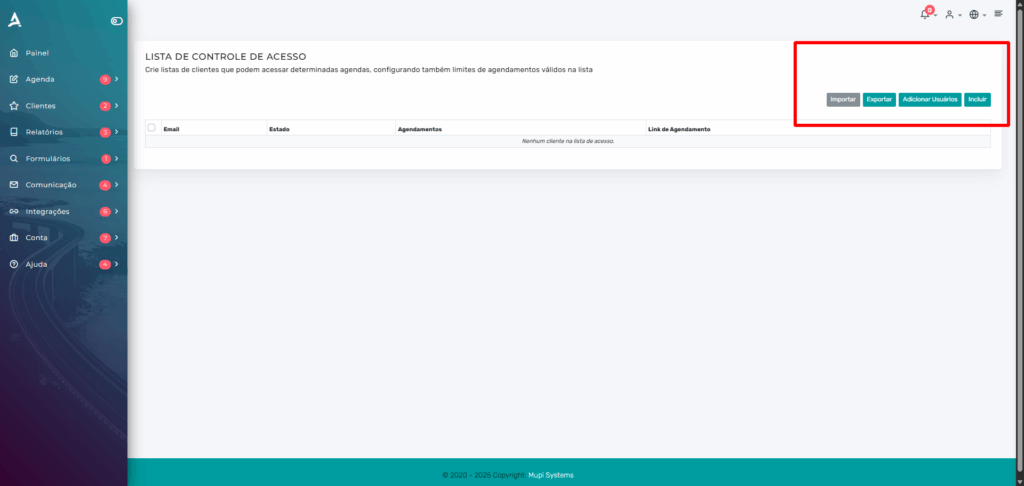
On the following screen, you will find four options to manage the list’s users:
- Import: allows adding multiple users in bulk through an
.xlsspreadsheet. - Export: generates a spreadsheet with the current client list, plus the template for correct data entry.
- Add: enables manual registration by entering the user’s name, email, and password.
- Add User: a simplified option where you only enter the email; the user will receive a link to set their password directly on the platform.
In this example, we will use the Add option, filling in the data manually.
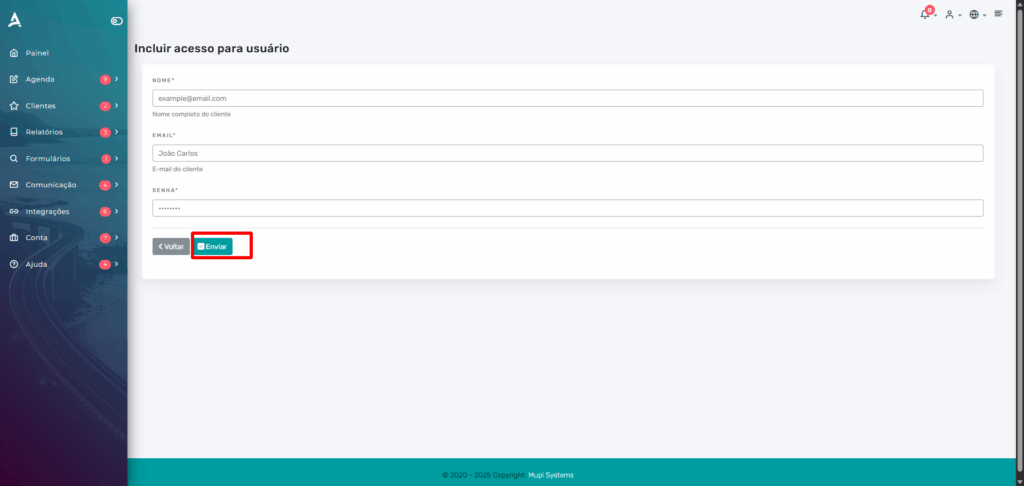
On the next screen, fill in the name, email, and password that the client will use to access the platform. After filling in all fields, click “Submit” to complete the registration.
After saving, the client will be added to the access list. You can share the same platform login link that you use with them, so they can access it with their email and password and make the allowed bookings.
On the access list listing screen, you can copy the specific link for each list and send it directly to the client, making access and the login process easier.
Client’s view when included in the list
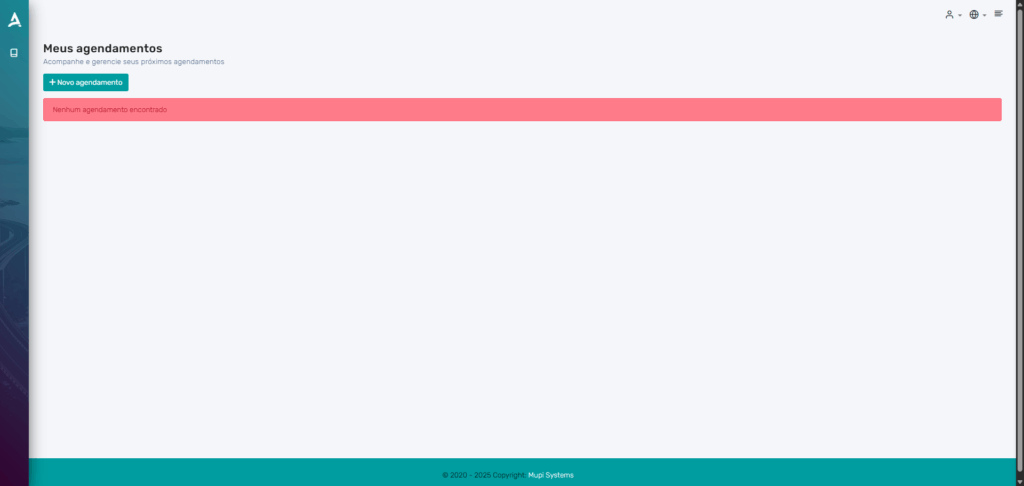
Upon logging in, your client will have access to a simple screen on the platform that lists all bookings already made and offers the option to make a new booking.
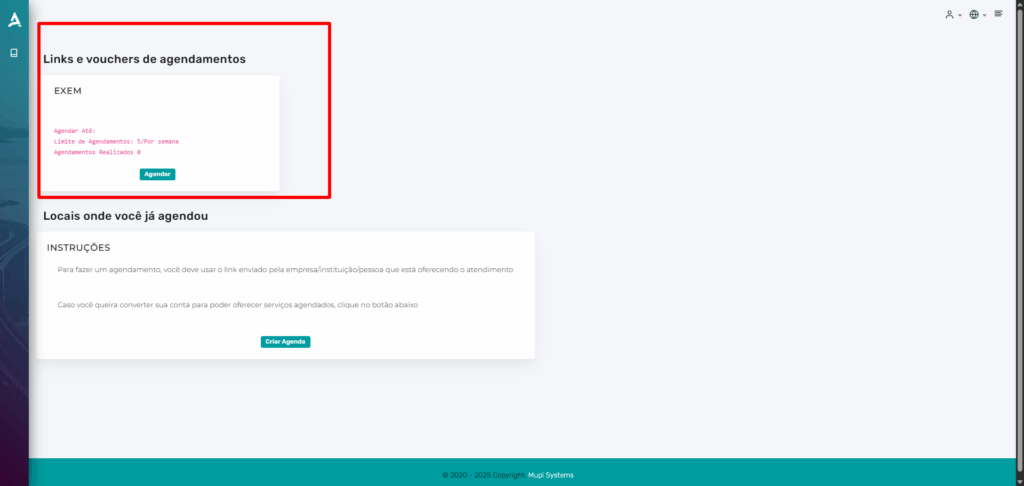
On the screen, the client can see how many bookings they can still make, as well as track all bookings already completed.
Conclusion
In summary, in this tutorial we showed how to create and manage access lists in the system, allowing you to securely and efficiently control who can book on each internal schedule. You learned how to configure restricted schedules, create user lists with specific booking rules, and add clients manually or via import. With this feature, your business gains more organization, security, and convenience in booking control, ensuring a personalized experience for each user.
Get in Touch or Learn More
We are happy to help! Access our official channels:
📞 WhatsApp : Click here to send us a message 🌐 eAgenda Platform : Discover eAgenda 🏢 Our Company : Mupi Systems – Innovative Solutions 📧 Email : contato@mupisystems.com.br 📚 Tutorials and Documentation : Access our guides and tutorials