How to Customize Scheduling Emails
In eAgenda, you can fully customize the automatic emails sent to customers for Confirmed, Declined, and Canceled appointments.
This feature allows you to adapt the email content according to the language, visual identity, and communication tone of your business. You can include useful links, contact information, specific instructions, or any other details that enhance the customer experience.
Additionally, by customizing these emails, your company demonstrates professionalism, increases credibility, and strengthens the relationship with the customer, ensuring they are always well informed about the status of their appointments.
This customization also contributes to reducing questions and rework, since customers receive clear, objective messages aligned with each stage of the service. It means more efficiency for your operation and more confidence for those who use your services.
Step by Step: How to Customize Emails
Attention:
Before setting up email templates for automatic notifications, it is essential to ensure that the email field is requested in the scheduling form. This feature will only work correctly if the customer provides a valid email address during the process.
Therefore, make sure the email field is marked as required. This ensures that confirmation, cancellation, or decline messages are sent correctly, providing clear, professional, and effective communication with your customers.
Setting Up the Email Form
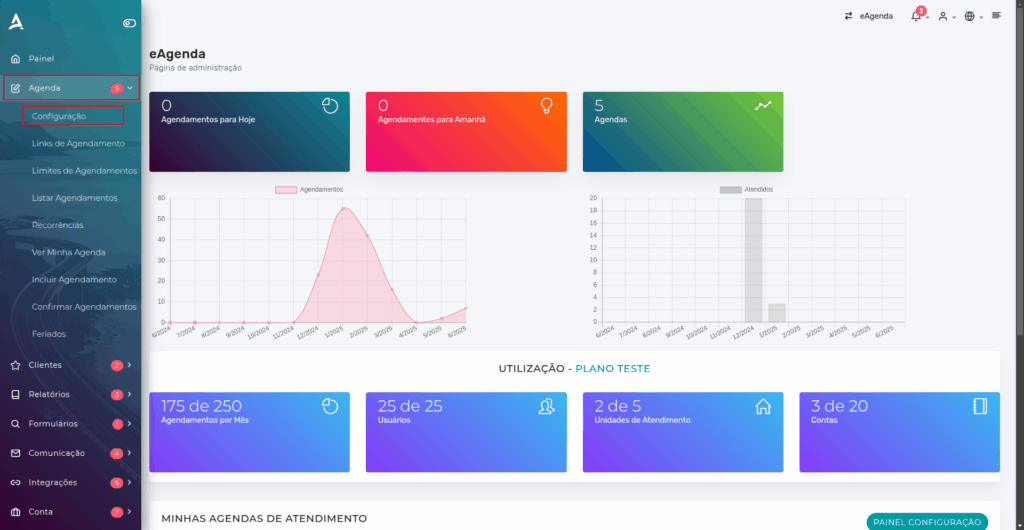
In the side menu, click on Calendar → Settings.
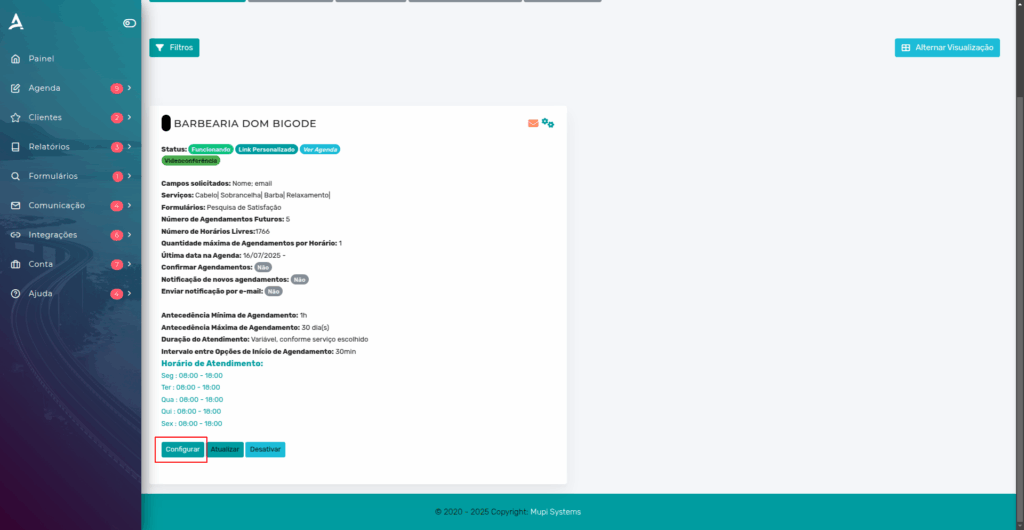
Then, click Configure on the desired calendar.
To ensure that the email field is filled in by your customers during scheduling, follow the steps below:
- Locate the Email field and enable the corresponding option.
- Access your calendar settings.
- Go to the Forms tab.
Important:
It is recommended to enable the Required Email option when configuring the scheduling. This measure is essential to ensure the user provides a valid email address, preventing the appointment from being completed without this information.
By making email a required field, you ensure that confirmations, notifications, and updates about the appointment are correctly sent to the customer, promoting more effective, transparent, and professional communication.
Additionally, this practice reduces the risk of no-shows or misunderstandings, since the customer will always be informed about the status of their appointments.

Setting Up the Email Template
In the side menu, locate and click on Calendar → Settings.

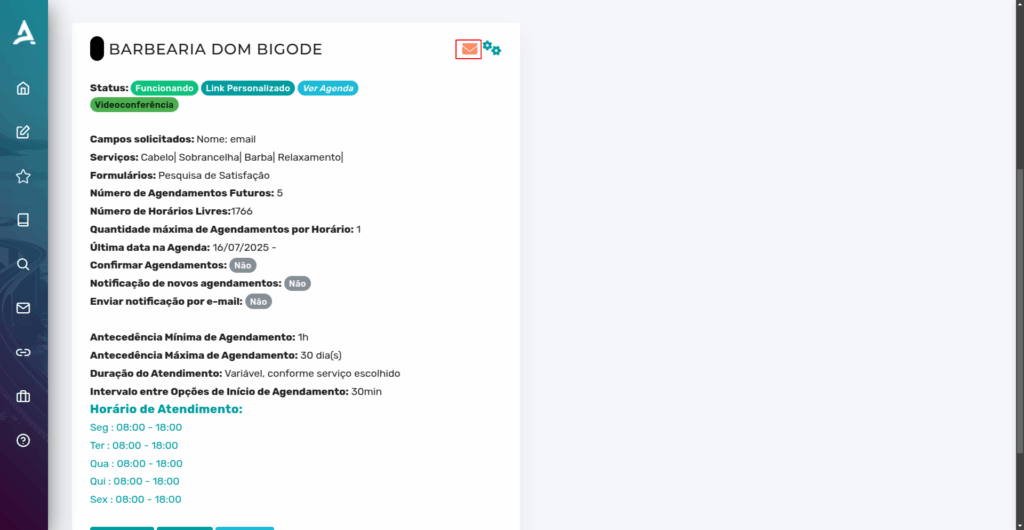
After completing the previous step, you will be redirected to the Calendar Settings screen. On this screen, locate the calendar you want to configure and click the “envelope” icon located in the upper right corner of the corresponding calendar. This icon allows you to access the customization area for automatic email templates, such as appointment confirmation, cancellation, or decline.
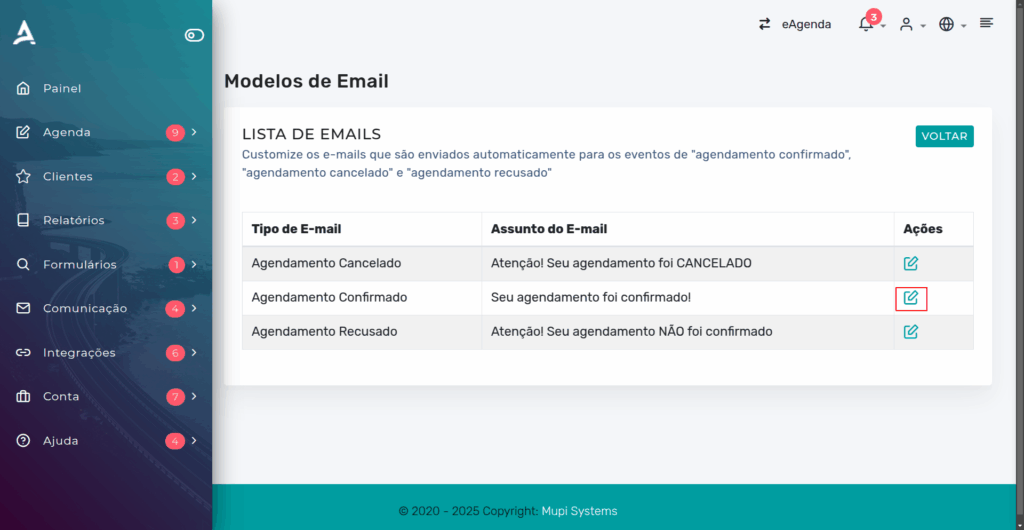
Then, you will be redirected to the Email Templates screen. On this screen, click the Edit icon in the Actions column.
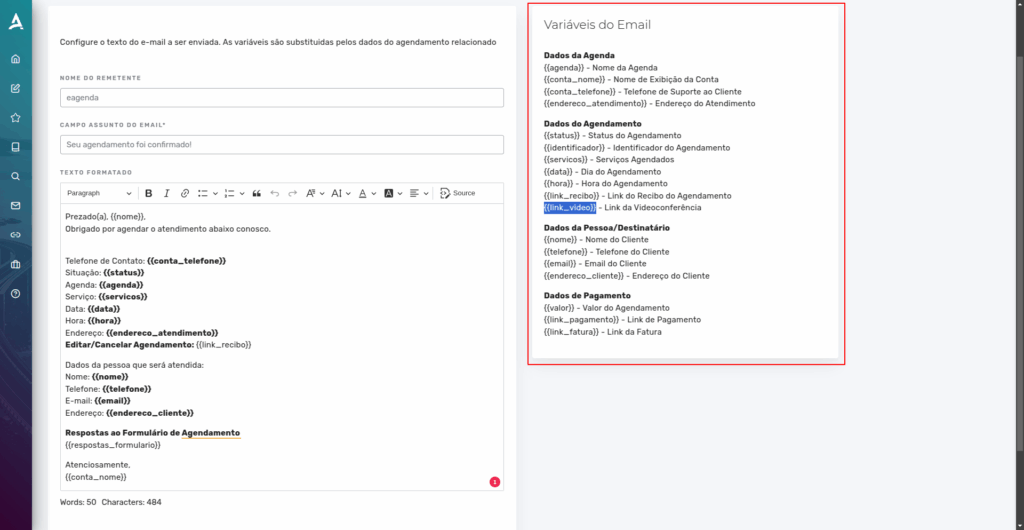
After completing the previous step, you will be directed to the email template editing area. In this step, you can customize the email content according to your company’s identity and the information you want to convey to your customers. You can edit the subject, body text, and insert automatic variables such as customer name, date, time, and service name, making the communication more personalized and efficient.

Note that on the right side of the page, the email variables are available. These variables allow you to automate information such as customer name, date, time, service name, and more. They make your email template more dynamic and adapted to your business needs. To use them, simply copy the desired variable and paste it into the body of your template — the system will automatically fill in the correct data at the time of sending.
Conclusion
In summary, in this tutorial you learned how to customize the automatic emails sent to customers for confirmed, canceled, or declined appointments in eAgenda and Minha Agenda Virtual. We covered how to enable the email field as required in the scheduling form and how to edit email templates with automatic variables and personalized information. This configuration ensures clearer, more professional communication aligned with your company’s identity.
Mupi Systems offers various technology solutions for all types of businesses. Explore our platforms that bring innovation to the market.
Contact Us or Learn More
WhatsApp: [Click here to send us a message] eAgenda Platform: [Explore the tool] Our Company: [Mupi Systems – Innovative Solutions] Email: [contato@mupisystems.com.br] Tutorials and Documentation: [Access our guides and tutorials]