How to Integrate with Google Calendar and Google Meet
The eAgenda and Minha Agenda Virtual platforms offer integration with Google Calendar and Google Meet. With this feature, you receive automatic notifications in Google Calendar whenever a new appointment is scheduled, giving you greater control over your commitments.
Additionally, for video conference appointments, a Google Meet link is generated automatically, providing more convenience and efficiency in organizing and communicating with your clients.
Step by Step: Google Calendar Integration
Configuring the Schedule for Video Conferencing
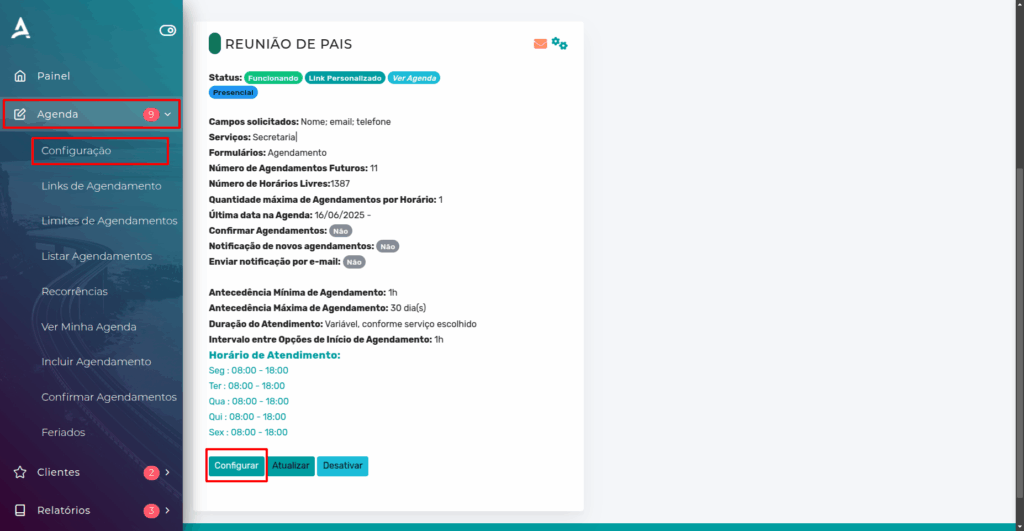
In the side menu, click Schedule → Settings, and then click Configure on the desired schedule.
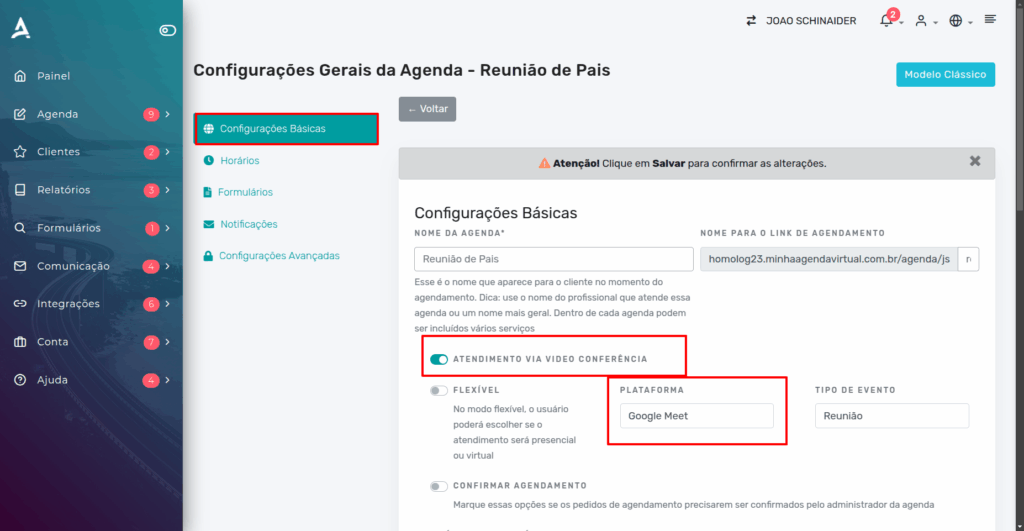
In the Basic Settings tab, enable the Video Conference Appointments option. Then, select Google Meet as the default platform for online appointments.
Done! Your schedule is configured for video conference appointments. Now, the next step is to integrate with your Google account so that Google Meet links are generated automatically and events appear in Google Calendar.
How to Authorize Google Calendar in eAgenda
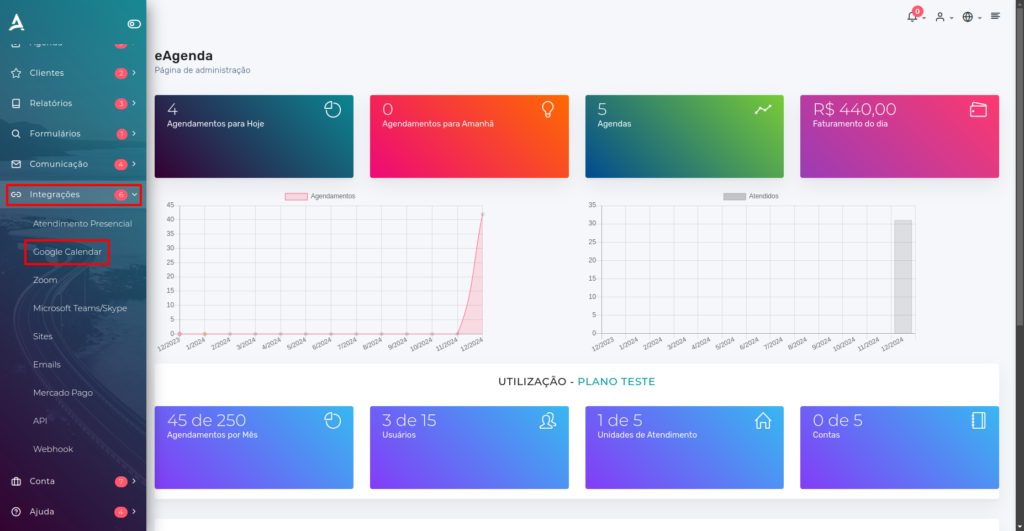
Go to the side menu and click Integrations → Google Calendar.
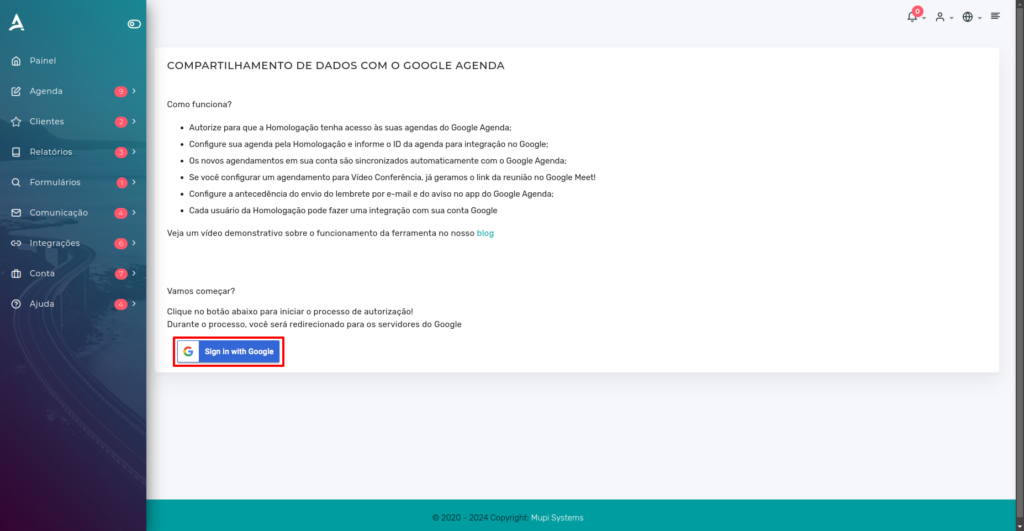
You will then be redirected to the Data Sharing with Google Calendar screen. At this step, simply click the Sign in with Google button to start the integration process with your Google account.
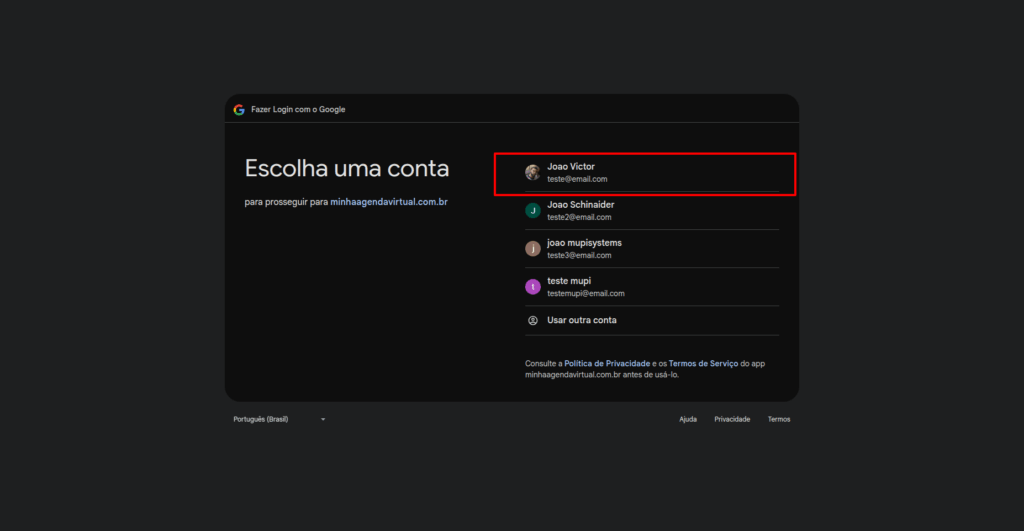
You will then be redirected to a Google page where you must select the account you wish to use for the integration. Choose the desired account from the list or, if you prefer, click Create account to add a new one. After making your selection, the system will automatically continue with the linking process.
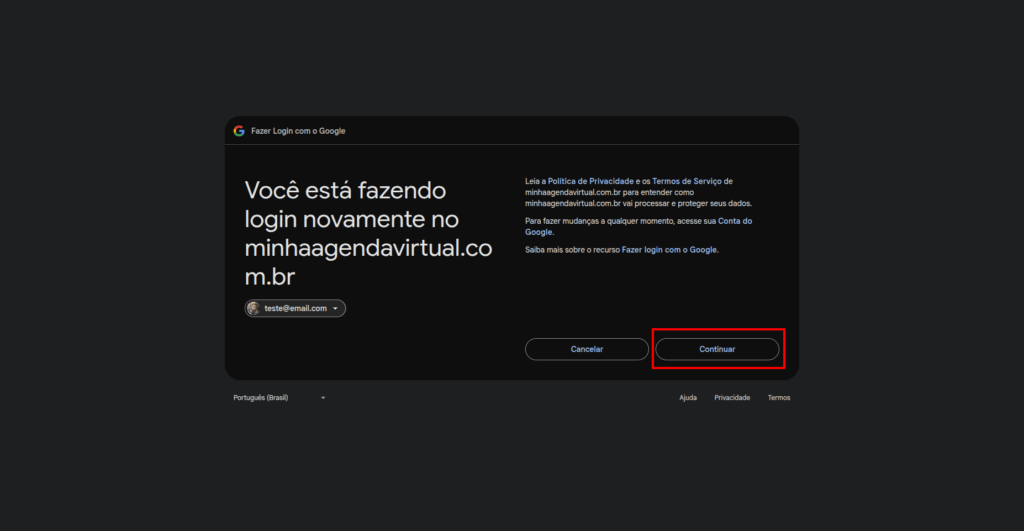
In the next step, an access permissions request will be displayed. To proceed with the integration, click Continue, as highlighted in red in the image below.
This authorization is required for the platform to create events in your Google Calendar and generate Google Meet links automatically.
Done! After granting the permissions, the Google integration will be completed successfully. From this point on, your schedule will be synced with Google Calendar and Google Meet links will be generated automatically for video conference appointments.
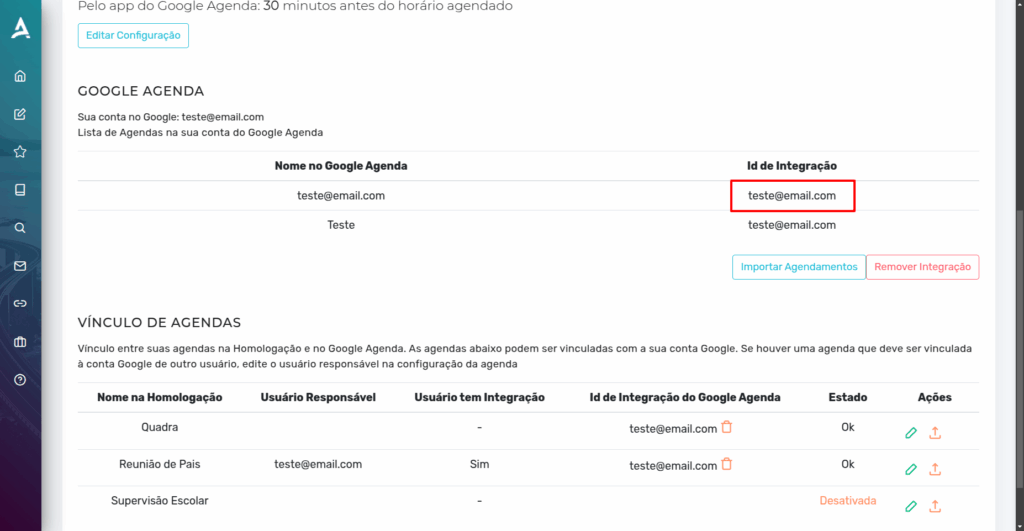
Entering Your Integration ID
After authorizing data sharing with Google, you will be redirected to a page displaying your Integration ID (highlighted in red in the image below).
This ID must be linked to the schedules you want to integrate with Google. To do this, copy the Integration ID.
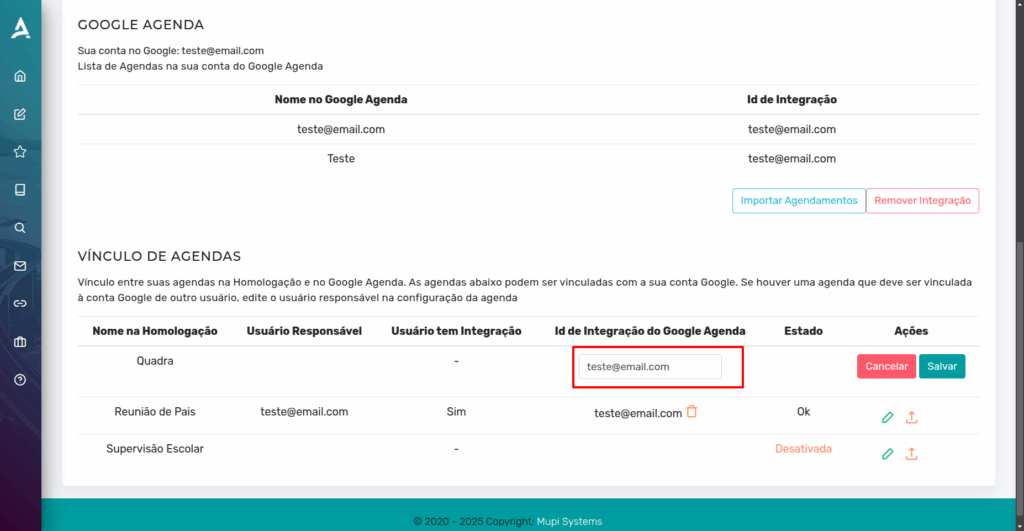
Next, after copying the Integration ID, click the Edit icon (highlighted in red) to access the settings of the schedule you wish to link to the integration.
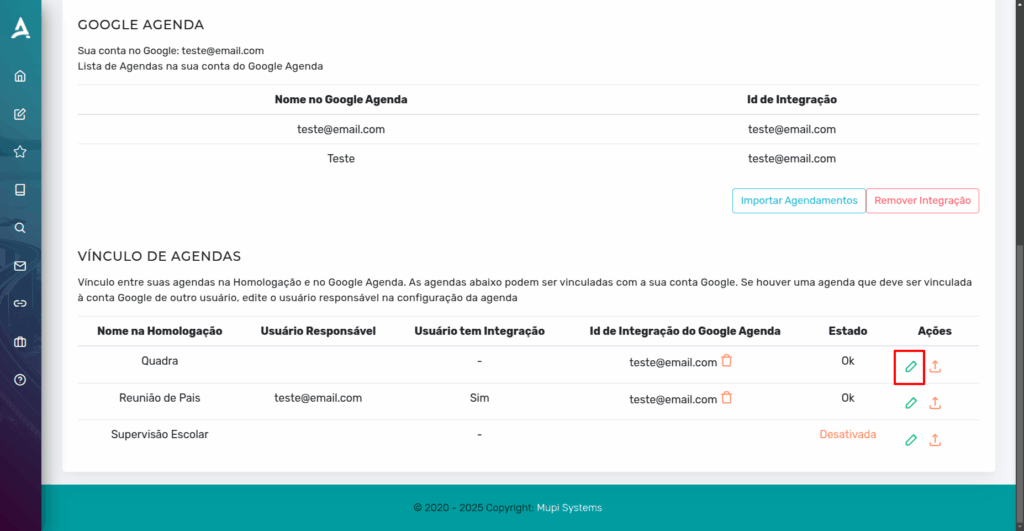
Then, paste the Google Calendar Integration ID into the indicated field, as highlighted in red. After entering the ID, click Save to complete the linking and finalize the integration process.
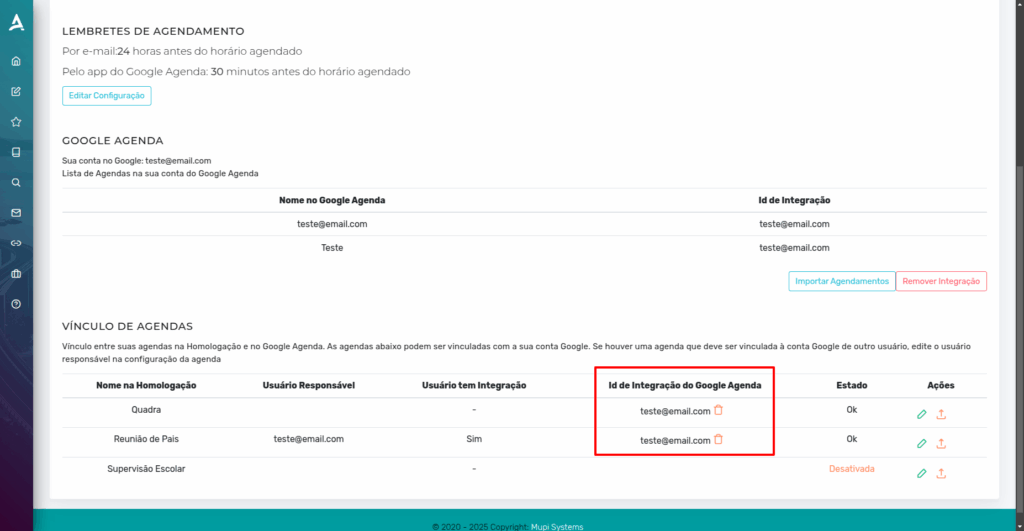
Done! The Google Calendar/Google Meet integration has been successfully enabled. Now, when you return to the Google Calendar integration page on our platform, you will see that the Integration ID is linked to the respective schedule, confirming that the process was completed successfully.
With this, all scheduled appointments will also appear in your Google Calendar account. Additionally, for online video conference appointments, a Google Meet link will be automatically generated to access the meeting.
We hope this post was helpful and we are available to answer any questions!
Conclusion
In summary, in this tutorial you learned how to integrate with Google Calendar. Feel free to explore our blog to find answers to other questions or visit our YouTube channel.
Mupi Systems offers a wide range of technology solutions for all types of businesses. Discover our platforms that bring innovation and efficiency to the market.