How to Configure Email Sending with Your Own Domain in eAgenda
Configuring email sending with your own domain in eAgenda is an effective way to strengthen your company’s visual identity and ensure that your clients receive automated communications directly from your corporate email address. This not only increases your brand’s credibility but also improves email open rates.
In this guide, we will show you how to configure SMTP in eAgenda step by step.
Why Use Your Own Domain?
By using a custom domain (for example, contact@yourcompany.com), you:
- Reduce the chances of your emails being marked as spam;
- Strengthen your brand’s visual identity;
- Provide a more professional experience for your clients.
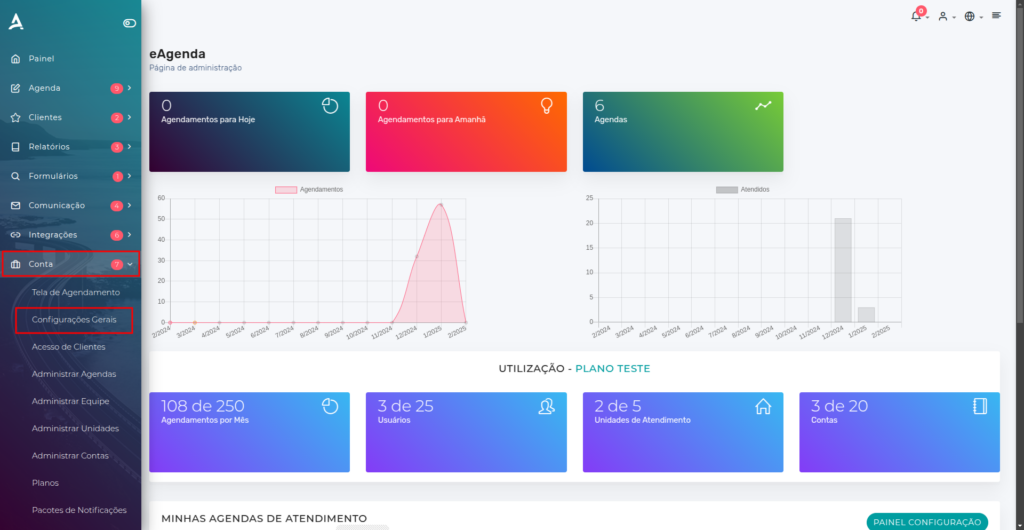
Accessing General Settings
- In the eAgenda side menu, click Account → General Settings.
2. You will be redirected to the Organization General Settings screen.
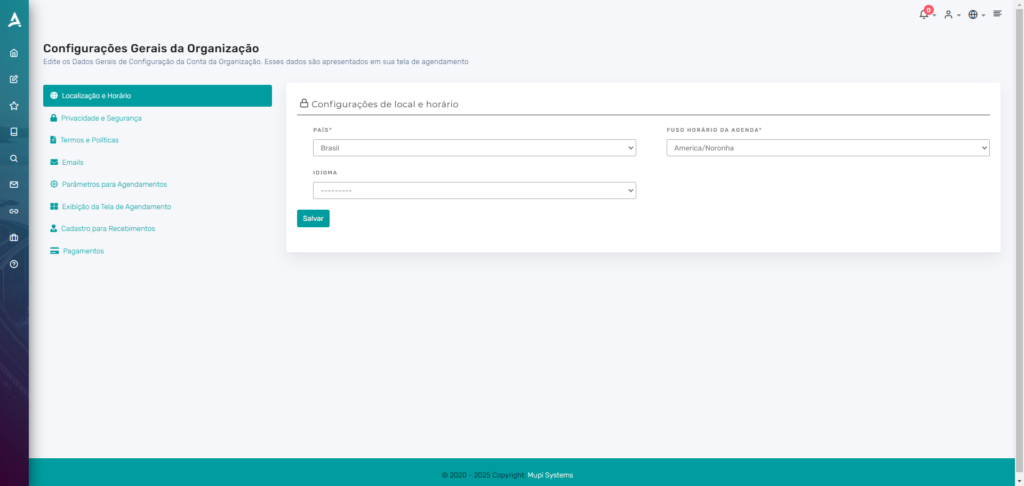
Then click Emails to configure the SMTP settings.
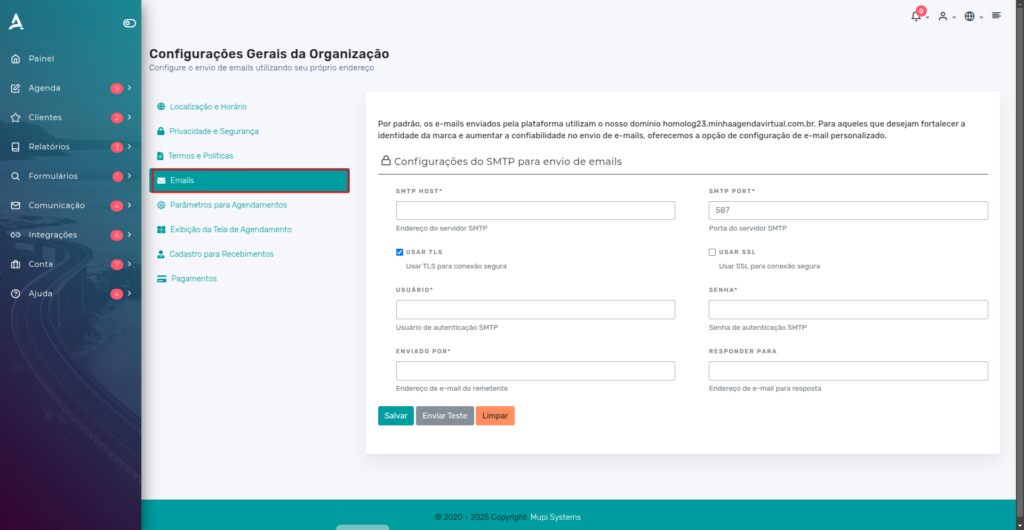
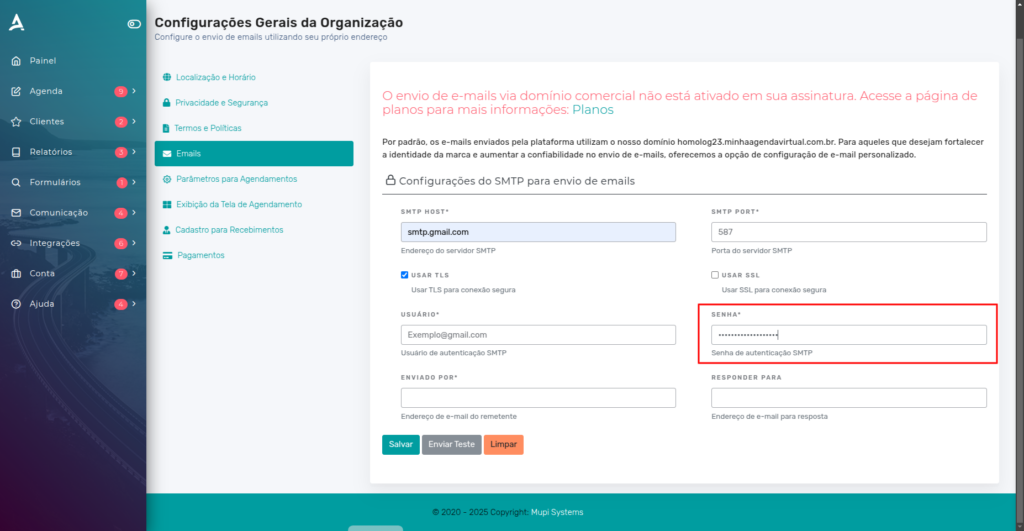
Configuring Email Parameters
In the Emails tab, fill in the following fields:
- SMTP HOST: For Gmail, use
smtp.gmail.com. - SMTP PORT: Choose the appropriate port:
587for TLS465for SSL
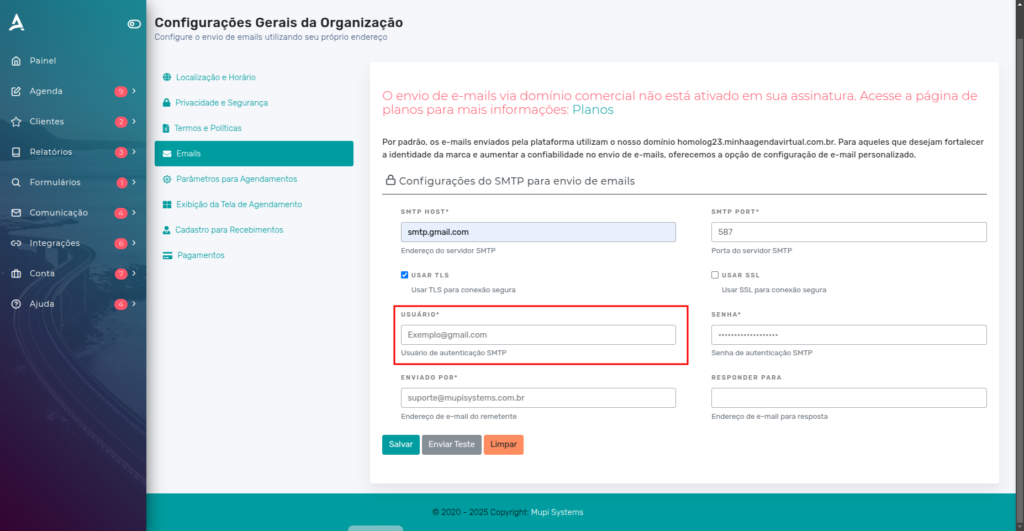
- Username and Password: Enter the username (usually the sender’s email address) and the password of the account that will be used to send messages.
Practical Example: Configuring SMTP with Google
If you use Gmail, follow these additional instructions:
Obtain an App Password
Open a new browser tab and go to Manage your Google Account.
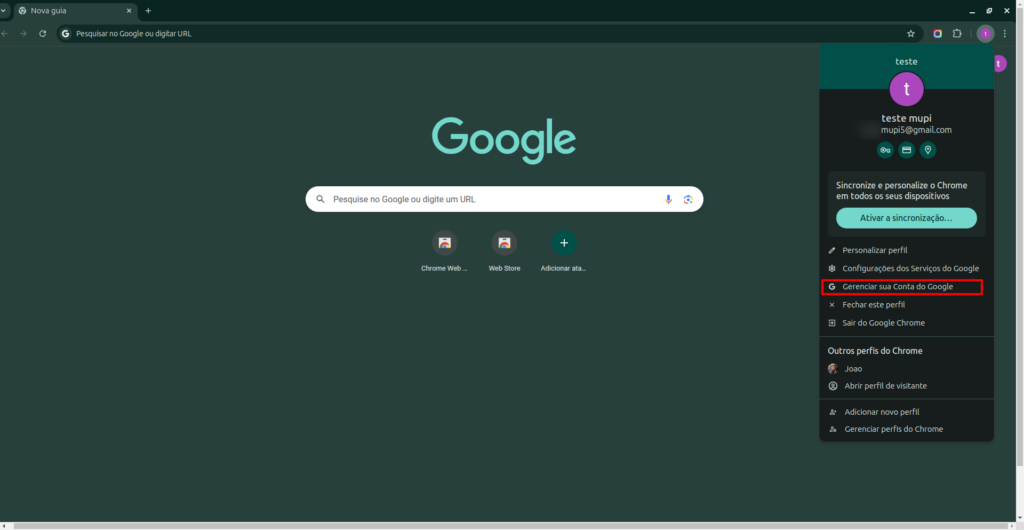
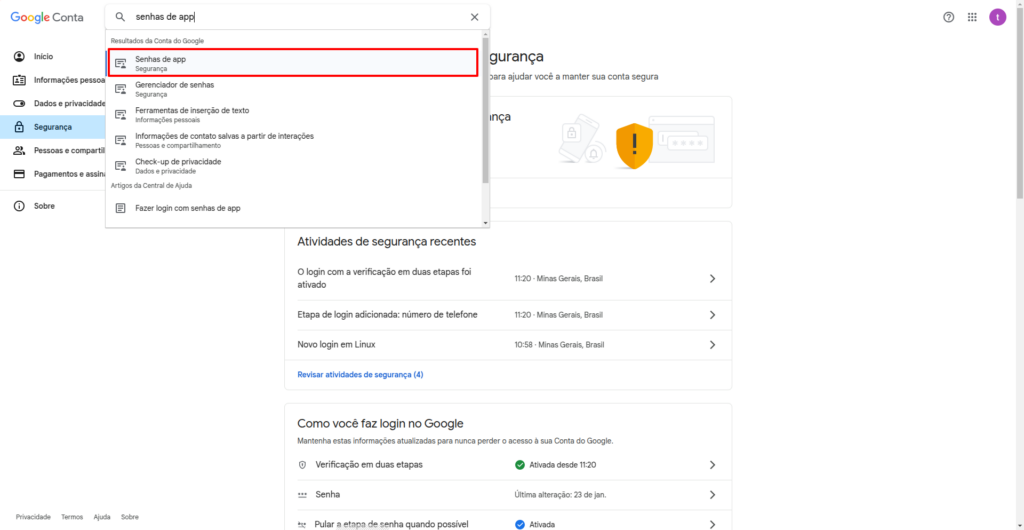
After completing the previous step, you will be redirected to your Google account settings. Click the Security tab and then use the search bar to find App Passwords.
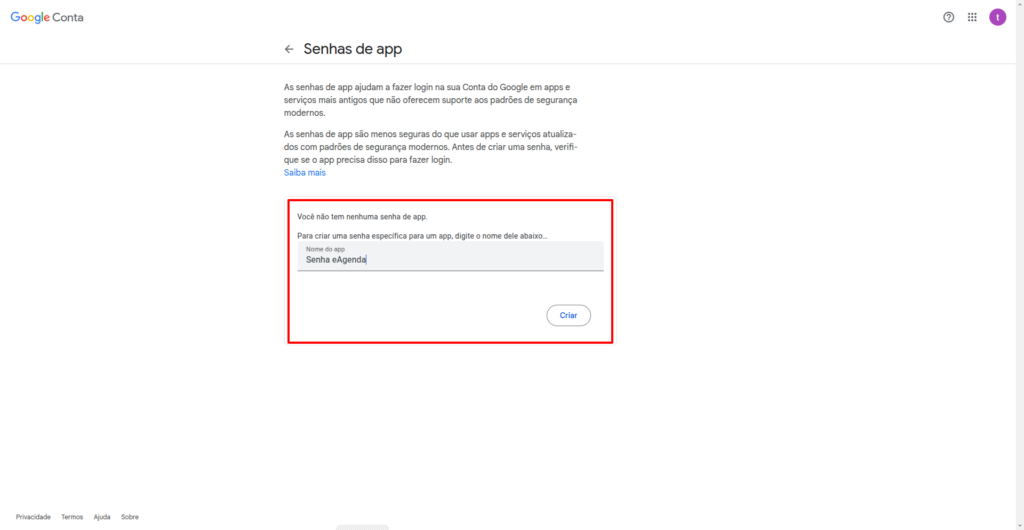
Give the password a name (e.g., eAgenda) and click Create.
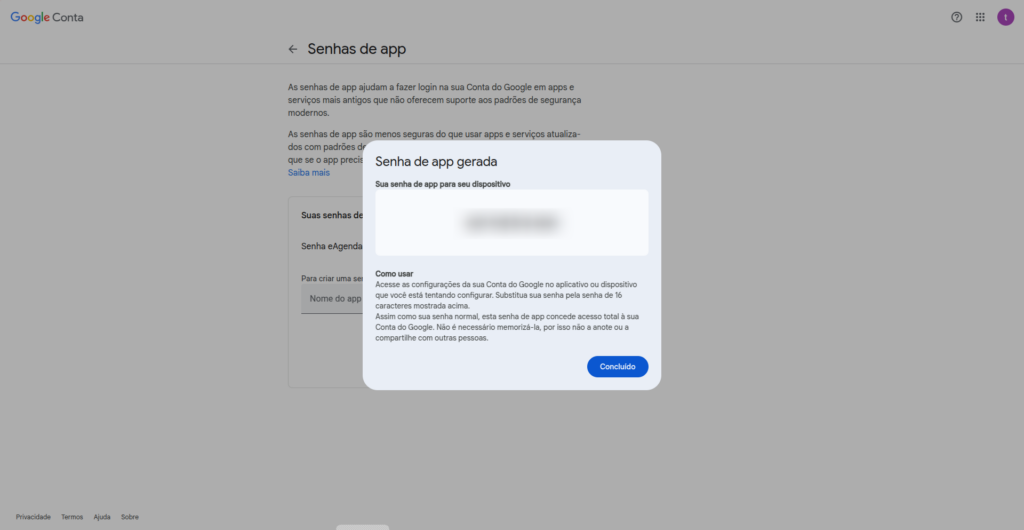
Next, copy the generated password, return to eAgenda, and paste it into the Password field.
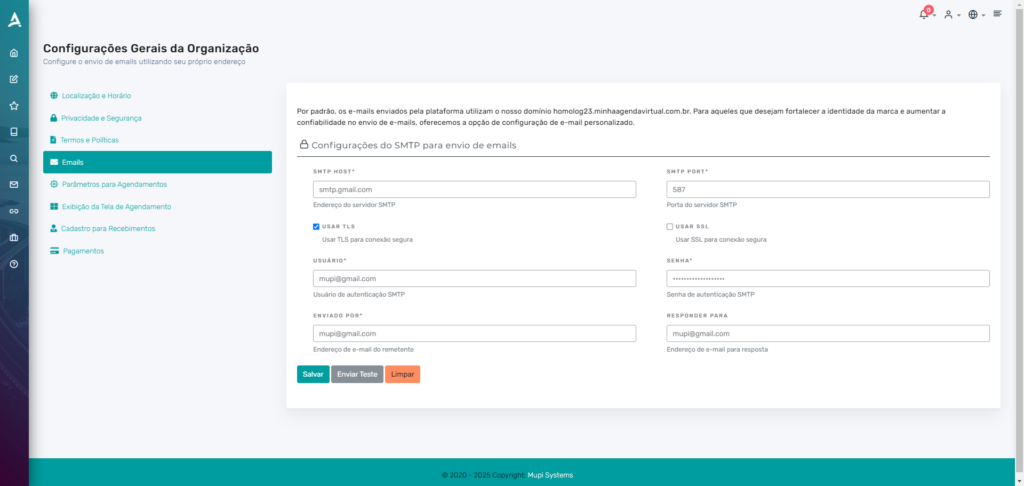
Enter the Password in eAgenda
Final Result
Done! Now simply set the email domain that will be the sender in the Sent By field. The Reply To field is optional.
Important Notes
1. Feature Availability
Sending emails with your own domain in eAgenda is available only on specific plans. To check whether your account includes this feature:
- Go to Account → Plans in the side menu.
- Confirm that your current subscription includes custom domain email sending.
- If necessary, upgrade your plan directly on the platform.
If you have questions about plans or need support for upgrading, please contact our team.
2. Configuring Sending Rules
In addition to SMTP, you can customize sending rules to optimize email delivery:
- Go to the side menu Communication → Notification Rules.
- Set rules such as sending times, message content for appointments and post-appointments, satisfaction surveys, reminders, and other types of notifications.
These settings help improve sending efficiency and client communication. Click here to see our tutorial on notification rules.
3. Monitoring Sent Emails
After configuring your custom domain email, you can track the history of sent emails directly in the outbox of the configured email account. Additionally, replies received will be directed to the configured email, allowing full tracking of interactions with recipients.
4. Technical Support
If you need help with the setup or encounter any difficulties, support is available:
- In the side menu, go to Help → Support.
- Or send an email to contato@mupisystems.com.br.
Conclusion
With these settings in place, you will be ready to send automated emails from eAgenda using your own domain. This simple yet powerful practice will help consolidate your company’s image and improve your clients’ experience.
Pro Tip: Explore other eAgenda features on our Blog or watch tutorials on our YouTube Channel.
Want More Innovative Solutions?
Mupi Systems offers a wide range of technology solutions to drive your business growth. Discover our platforms and find out how we can help your company reach new heights!