Configuring WhatsApp Communication
eAgenda offers new and powerful communication features that elevate your customer service.
You can configure personalized messages to be sent automatically via WhatsApp, ensuring fast, efficient contact that is fully aligned with your business identity. You can define sending rules, schedule automatic confirmation, reminder, or follow-up messages, and adapt the content to each type of service or customer profile.
Additionally, eAgenda has a built-in chat on the platform, enabling real-time interactions with your customers without needing to switch between different apps. Everything happens within a single environment, simplifying communication and optimizing your team’s time.
With the complete conversation history centralized, you can track each interaction in an organized way, ensuring more transparency and continuity in the customer relationship.
These new features make customer service more agile, personalized, and efficient, strengthening the bond with your customers and providing a modern, integrated communication experience.
1. Creating a Custom Sending Template
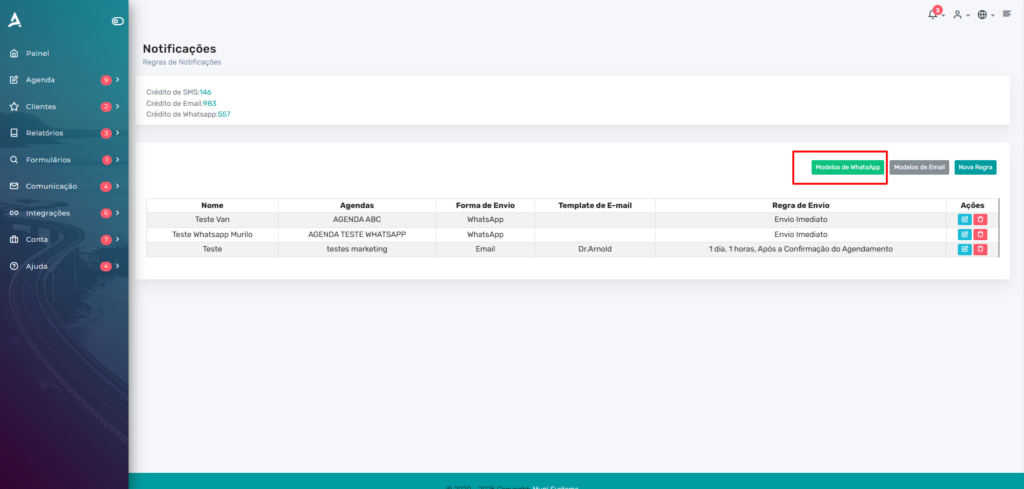
On the main dashboard, access the side menu and click on Communication → Notification Rules.

On the next page, in addition to creating your custom notification rule, you can view all previously created rules, check the available message sending balance, and register new templates for use in automated communications.
To create a custom WhatsApp sending template, click on WhatsApp Template in the upper right corner of the screen.
On the next screen, you can see your templates and create new ones. To create a new template, click New Template.
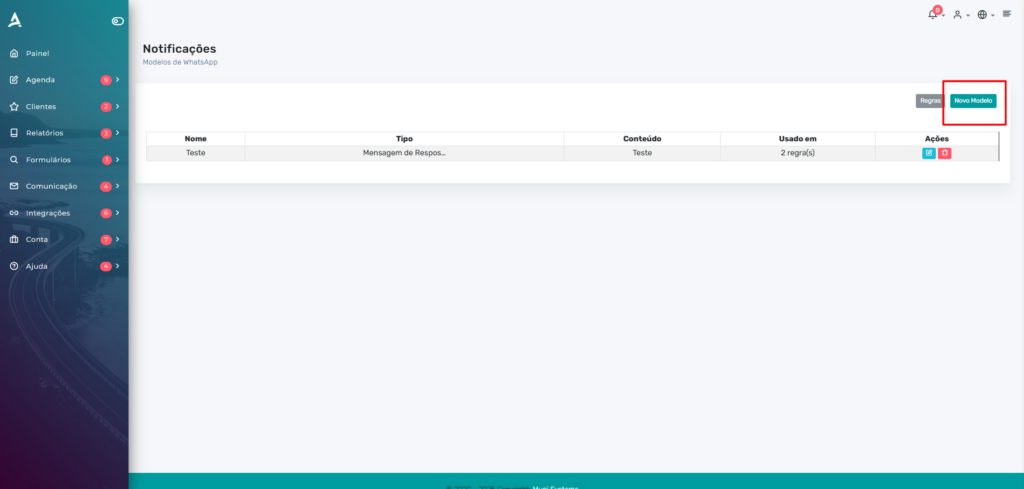
Here you can create the custom text that will be sent to the customer via WhatsApp. Remember: when a scheduling is made, the customer will receive a default platform message — which you can view below. When interacting with this message, they will then receive the custom communication you configured in this template.

Finally, click Save to create your custom template.
1. Creating a Sending Rule
Now, let’s create a sending rule to use the custom template you created in the previous step.
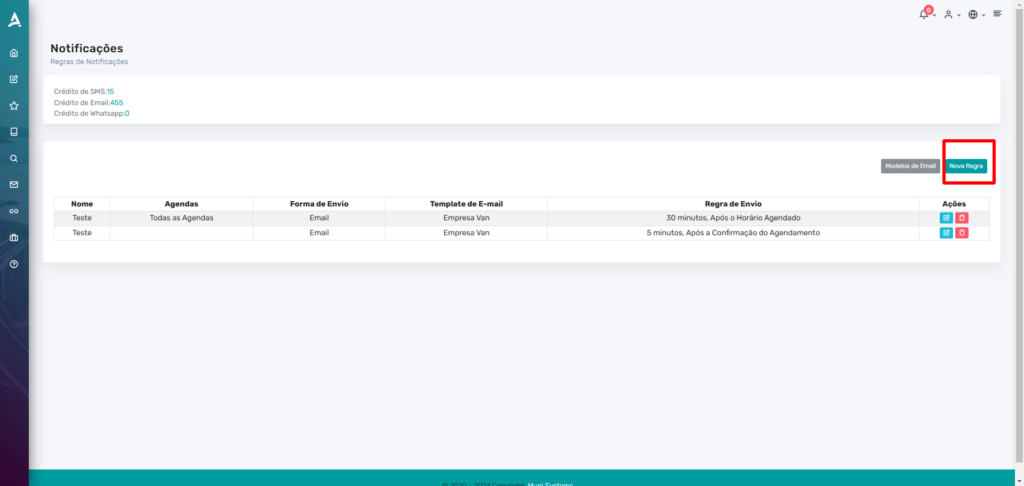
On the main dashboard, access the side menu and click on Communication → Notification Rules.
To create a new rule, click New Rule.
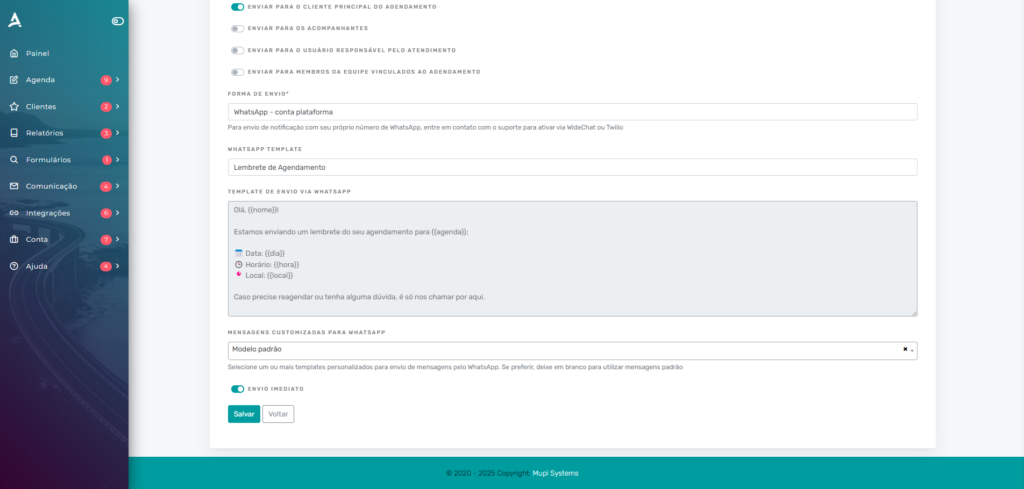
Fill in the fields below to configure your sending rule:
-
Rule Name: Set a descriptive name to identify the rule.
-
Linked Calendars: Select the calendars the rule will be associated with.
-
Recipients: Choose who will receive the message (customer, calendar manager, etc.). Each recipient will consume 1 sending credit.
-
Sending Method: Choose WhatsApp as the sending method.
-
WhatsApp sending template: Select one of our default templates that will be the first message sent to the customer.
-
Custom WhatsApp messages: Select the template created in step 1, which is sent right after the customer interacts with the first default message.
-
Sending Parameters:
-
Scheduled time: Configure the sending as a reminder in advance (e.g., 1 day before).
-
Immediate Sending: Send messages as appointment confirmation
-
After filling in all the fields, click Save to finish creating the rule.
3. Real-World Example
After completing both steps above, when an appointment is made in your calendar, the system will automatically send the default message to the customer according to the configured time. In the case of immediate sending, they receive it right away. See the example below:
4. Accessing the Customer Chat
The WhatsApp Chat in eAgenda allows you to view all conversations with your customers and check the status of sent messages. Follow the steps below:
Accessing the Chat
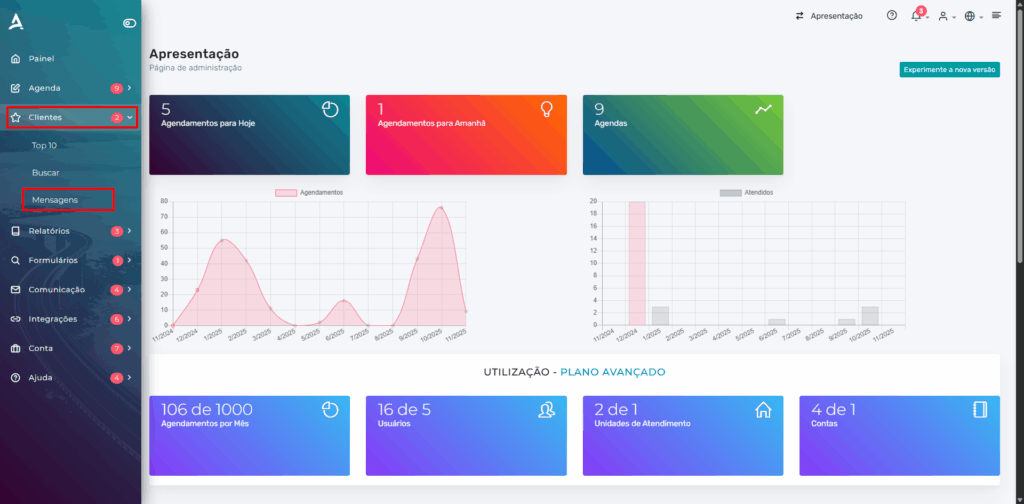
- On the main dashboard, click on Customers → Messages.
Conclusion
In summary, in this tutorial you learned how to configure automatic and personalized messages via WhatsApp in eAgenda, as well as use the built-in chat to interact in real time with your customers. We demonstrated how to create custom message templates, define automated sending rules, and link these rules to your calendars, ensuring that each customer receives appropriate communications at the right time. We also showed how to access the platform’s chat to track the complete conversation history and monitor the status of sent messages. These features make customer service more agile, efficient, and personalized, strengthening the relationship with your customers and centralizing all communication in a single place.
Take advantage of these tools to optimize your communication and strengthen relationships with your customers. Learn more about our solutions on our Blog or watch our videos on YouTube.
Contact Us or Learn More
We are available to help! Access our official channels:
WhatsApp: Click here to send us a message eAgenda Platform: Explore eAgenda Our Company: Mupi Systems – Innovative Solutions Email: contato@mupisystems.com.br Tutorials and Documentation: Access our guides and tutorials